Supporting materials
Download
Download this article as a PDF


Still standing: have you ever wondered how buildings stand? Or why they sometimes fall? Let’s explore this through bridges, from construction to collapse.

The students will learn about the concept of balance and how to find the centre of gravity of flat figures. They will also learn how to design a bridge to create a robust structure.
The activity starts as an individual experience of balance, and it grows into a group project to create an actual bridge.[1]
This project is for students aged from 11 to 14, although the second part could be used as a project for older students too.
Firstly, the students, in the school gym or classroom, take a photo of themselves while in a particular balanced position. Using sticks, cardboard, or other easily accessible materials, they have to try to recreate their pose from the photo.
After this first experience, the students try to find, empirically, the centre of gravity (G) of different flat figures, starting with a cardboard rectangle, upon which, after identifying G, the students will glue pieces of cardboard to one of the vertices, modifying the mass of the figure.
Finally, the teachers will propose irregular flat figures with which the students can recreate the experiment.
This activity takes 2–3 hours.
Use rounded-tip scissors, and perform the first balance activity away from obstacles.


Was it harder to find balance with your body or with the figurine? What changes the position of G in the cardboard model?
The activity lets the student understand the concept of the centre of gravity and mass variation, without using physics formulas, which aren’t yet in the curriculum for younger students.
Step by step, the students become more and more aware of what they are learning, and they can test themselves with more complex models over time.
In this activity, if the students find the wrong G, they can try again and again until they get the right centre of gravity, in both the figurine and the cardboard model.
With the design, construction, and breaking test of a bridge, the class experiences the loss of equilibrium of a complex structure. To do this, in the first lesson, the teacher introduces the force diagram in an elementary way using simple geometric models. Then the teacher illustrates the different types of bridges with particular reference to reticular and suspended ones. At the end of this first lesson, the challenge is launched and the teacher organizes the class into work groups. During the following lessons, the students design and build their bridges by autonomously choosing the shape and materials. The activity concludes with load testing of the structures and with a final reflection on how the bridges break.
This activity should take 2 hours of lessons (introduction and testing at the end) and up to 8 hours of workshop time (designing and building the bridges).


By the end of the activity, the students will have had the opportunity to get involved in the project, with first-hand experience of choosing materials, building the bridge, and evaluating the breaking load.
The drawing of the bridge on paper allows the students to reflect on the importance of the concept of scale in technical drawings.
Finally, the team challenge develops soft skills, such as group work, creativity, and critical thinking.
During the course of the activity, the teacher is free to go into more detail about different parts of the structure, by dedicating some brief collective moments to reflection, starting from the models the students are building.
[1] Salvadori Mario (2000) Perché gli edifici stanno in piedi. Bompiani, Milan 2000.
This is an excellent introduction to utilising physics by completing an engineering problem. It considers the problem and breaks it down into manageable steps that are easy to follow. There are plenty of opportunities to develop some of the softer skills where students can improve their presentation skills and improve their science literacy.
The project is ideally suited as an end of year or STEM club activity and introduces a level of competition between designs. This would improve students’ evaluation skills as well as allowing students to learn from their mistakes and those of the students around them. It is a great project to develop teamwork.
Mike Sands, Science consultant, UK
Download this article as a PDF
Sketch graphs from ‘story’ videos of everyday events to help students understand the basic features of graphs and how to interpret…


Engaging with biomimetic design encourages students to explore the principles of form and function in relation to evolutionary…
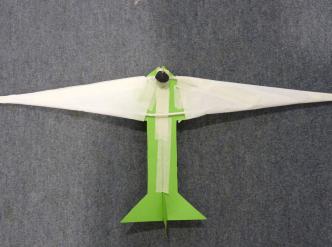
Designing a glider wing helps students understand forces and what it means to be an…
