High flyers: thinking like an engineer Teach article
Author(s): Bridget Holligan
Designing a glider wing helps students understand forces and what it means to be an engineer.
Mary and Michael have good ideas but struggle to implement them: they need the help of your class to fly a glider in a straight line between their two bedroom windows.
For approximately three and a half hours, small groups of pupils (aged 9–12) will work together to explore the forces that allow heavy machines such as gliders to fly, to investigate appropriate materials, and then to design and test their own gliders.
Tightly rolled paper – either normal writing paper or newspaper
Tracing paper
Newspaper
Thin plastic bags
Thin cloth
Supporting information, images and instructions can be downloaded from the additional material section.
Procedure
Before the lesson, the teacher should:
Build one or more launchers (see online instructionsw1) to test the gliders.
Prepare as many fuselages as necessary for the whole class (see online instructionsw1).
Set up a couple of test areas on the floor, using masking tape to mark a launch line and a 3 m perpendicular line.
Email from Mary
From: michaelandmary@monotreme.co.uk
To: Pegasusyr5
Subject: Please help us!
Attached: Picture of our street.jpg
__________________________________
Dear Year 5,
Please help us!
Your head teacher suggested that you would be the best people to help us with a problem that we need to solve.
My name is Mary and my bedroom window is opposite my best friend Michael’s window. We think it would be fun to build a model glider that can be flown from my window to Michael’s window (and for him to be able to send it back to me). That way we can send each other messages and, if we can build the glider well enough, perhaps small gifts.
Can you help us by finding out about gliders and sending us some information on how to build a glider that works? I’ve attached a picture showing you our houses, which might help.
Thanks for all your help,
Mary
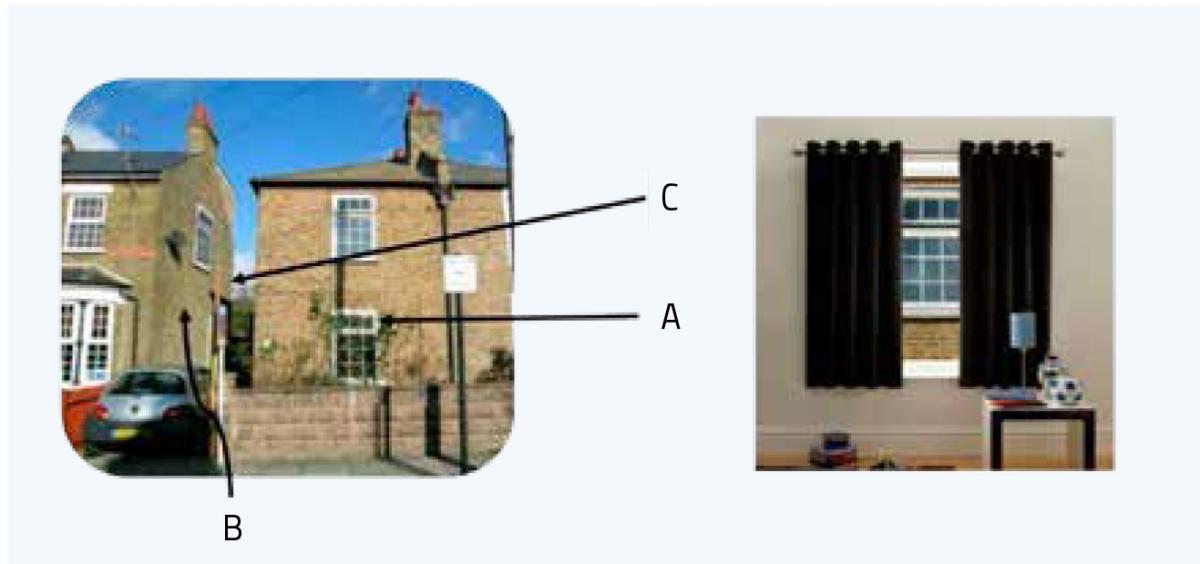
Pictures showing my house and Michael’s house (left): A – my house, B – Michael’s house, C – The distance between our houses is 3m. Michael’s window is exactly opposite mine and is the same size (1 m x 1 m)
Image courtesy of Science Oxford
Set the context of the challenge by giving Mary’s email to the pupils, together with the photo of the friends’ houses (see box). Their bedroom windows (1 m x 1 m) face each other, 3 m apart. This automatically sets up the design specifications for the problem: the pupils need to build a glider that will fly a distance of at least 3 m, between two points at the same height.
Discuss the key specifications of the challenge. For five minutes, small groups of pupils should list what their glider has to do to meet the challenge set by Mary and Michael (i.e. distance of flight, path line, and weight to carry). They should also realise that the glider must be made of everyday materials so that Michael and Mary can reproduce it.
Discuss the specifics of gliders. Show your pupils images of planes and glidersw1 and ask them to discuss for five minutes what the differences between gliders and planes are, and how they think gliders take off. Show them a Youtube videow2 of a glider launch.
Lead a five-minute discussion on the different parts of a glider (e.g. cockpit, fuselage, wings and tail) and the role played by each partw1.
Explore the forces involved in flight with the following activities (about 20 minutes each):
Use the rope to stage a mock tug-of-war to illustrate the equilibrium of forces needed to keep the rope static. Pupils should understand that the rope moves in the direction of the greatest force, and that forces of equal magnitude acting in opposite directions to each other balance each other out.
Using a paper plane, discuss the influence of gravity (what happens when you release the plane without throwing it?) and of lift and weight forces (what do we call the upward force that helps a glider to fly? What do I need to do to make the glider fly through the air?).
Explore the material properties of wings. After studying pictures of old planes, discuss the most important characteristics of wings: the frame needs to be both light and rigid, while the cover should be as light as possible.
Explore how you can modify the rigidity of materials, such as paper: take five sheets of paper, leave the first one intact and fold the others to make a triangle, a tube, a W shape, and a shape of your liking. Then, carry out two brief experimentsw1:
Place the folded paper shapes on a table and slowly push them towards the edge so that more than half of each shape sticks over the edge (you may need to hold the other end to stop it falling). Pupils will observe that some shapes will not bend because they are stiffer, although they are made with the same material.
Move the folded paper shapes onto the table. Do they stand up on their own? What happens if you press down on them gently?
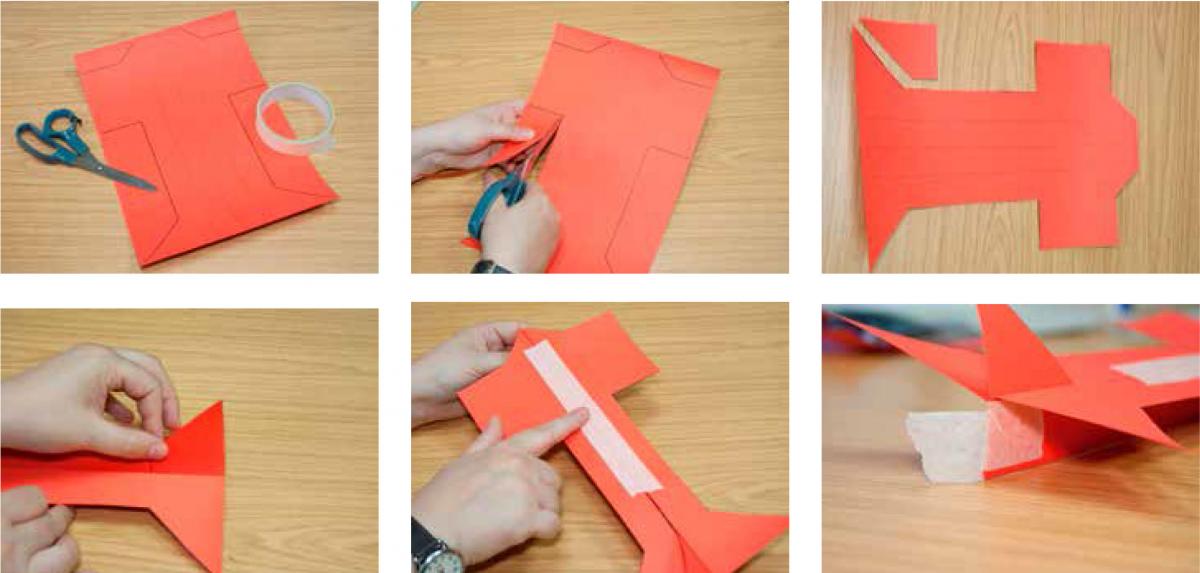
The online instructions will give you all the details to build the glider’s fuselage.
Image courtesy of Science Oxford
Select the best materials: on the basis of the previous steps, ask your pupils to determine which materials would be good for building the wing’s frame, covering it, and for fastening things together. Remind pupils that some materials can be made stronger just by changing their shape, so, for example, paper may be suitable for the wing frame as well as the wing covering.
Start building! This takes around 30 minutes.
Give each group of pupils a fuselage.
Using the materials they selected, the pupils should draw a labelled plan of their wings.
Pupils should then build their wings and attach them to the card fuselage.
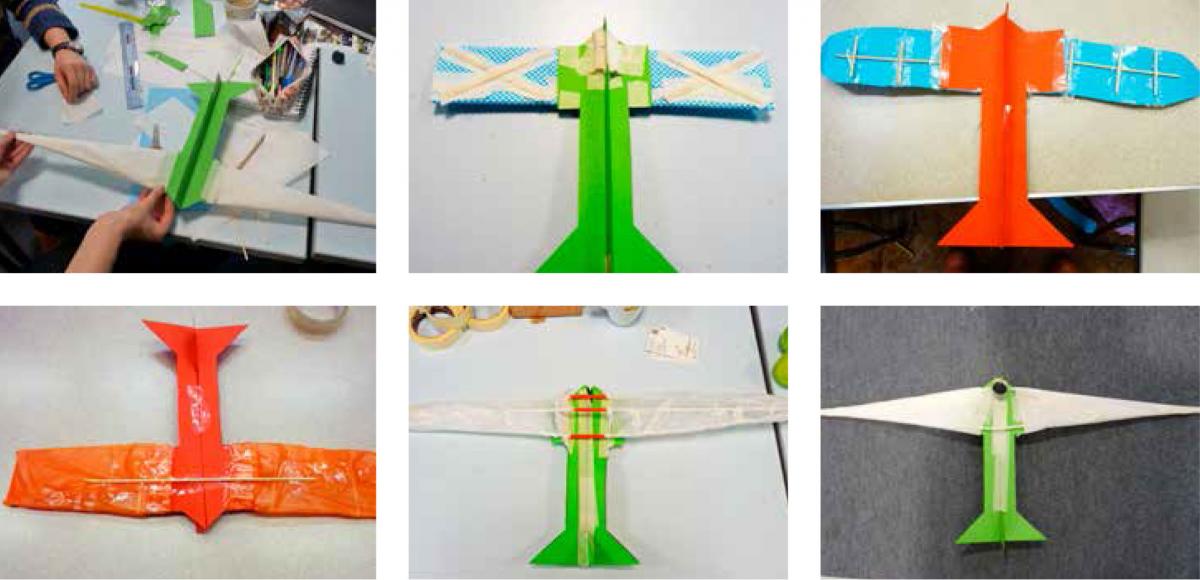
Pupils can be very creative when building glider wings and come up with different models.
Image courtesy of Science Oxford
Test and improve the glider; this should take approximately 60 minutes.
Bring the launchers to the test areas you have prepared in advance, and demonstrate the launching process to your pupils.
Pupils should test whether their design meets the specifications defined in step 2. It does not need to be perfect: very few ideas work perfectly the first time, and working out what to improve is how engineers learn.
Pupils should observe the flaws in their initial model, and reflect on the causes and on how to correct them. After modifying their wings, they should re-test them. Common issues (e.g. the glider not balancing properly or being too heavy) and their solutions are addressed onlinew1.
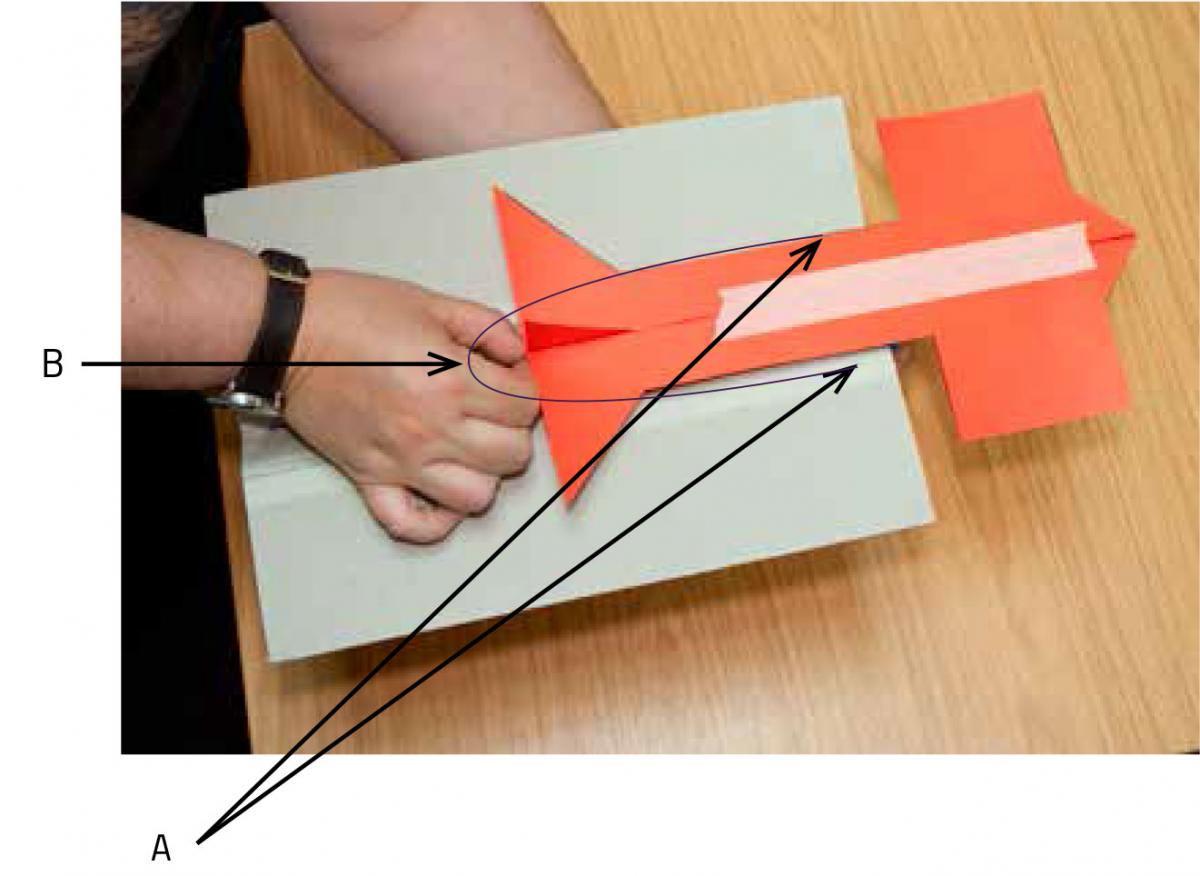
Demonstration of how to use the launcher: A – Attach the elastic here, B – Elastic stretched round back of fuselage.
Image courtesy of Science Oxford
The forces in glider flight
Scientists and engineers refer to the downward force that is produced by gravity as weight, w. How much weight force there is on an object depends on the acceleration due to gravity, g, and mass, m. Mass is how much ‘stuff’ there is in an object and it is measured in grams (or kilograms, kg). In English, we often use the word ‘weight’ when we are really talking about ‘mass’. If you want to make something fly, like a glider, you want to make it as light as possible so that the downward weight force can be kept as small as possible. Weight, mass and gravity are linked together by the following equation:
w = m x g
This is an important principle for an aeronautic engineer.
Scientists and engineers call any force that works upwards ‘lift’. Wings only help to lift a glider into the air if the glider is moving forward fast enough, because it is the movement of air over and under an aircraft’s wings that is essential to creating lift. If you want a glider to fly in a straight line, you need the forces of weight and lift to be carefully balanced, just like in the tug-of-war demonstration.
Web References
w1 – The ‘high flyers’ lesson plan was developed by Science Oxford within the EU ‘Engineer’ project, which developed ten design challenges set in a wide range of pupil-friendly engineering contexts that also link with school curricula for science, design and technology. It can be downloaded from additional material section and the Science Oxford website.
The lesson plan contains additional information for the glider activity:
The worksheet on page 49 includes a standard fuselage template.
Appendix 5 describes how to build the launcher.
Appendix 3 contains images of aeroplanes and gliders.
The worksheet on page 44 describes the different parts of a glider and their roles.
The worksheet on page 46 describes two experiments to investigate the rigidity of materials.
Pages 26–27 cover common problems when building your glider and offer some solutions.
w2 – Watch a video showing how gliders can be launched.
Resources
Aeroplanes are different from gliders because they have an engine, but their general shape and structure are similar. This NASA resource explains how planes fly.
Bridget Holligan has worked in the informal science learning and public engagement sector for more than 20 years, following a BSc in Chemistry and an MSc in Science Communication. After three years at the Exploratory Science Centre in Bristol, UK, she moved to Science Oxford where she is now Director of Education and Engagement. From 2011 to 2014, Science Oxford was the UK partner for the EU-funded ENGINEER project, which aimed to improve primary-school pupils’ understanding of the engineering design process by providing practical resources and teacher training.
Review
Engineering challenges provide a wide variety of learning opportunities. This activity allows students to act as engineers by working as a team to solve problems in addition to applying their knowledge of forces and material science. Students often fear making mistakes but the nature of the challenge demonstrates how trial and improvement is a crucial part of the science and engineering process. The challenge would be particularly suitable for science or engineering days.
The activity could also lead to wider discussions on topics such as “What do you think are the similarities and differences between this challenge and engineering projects in industry?” and “What are the advantages of gliders over powered aircraft?”.