Supporting materials
Download
Download this article as a PDF

This activity was presented at the Science on Stage Festival 2022 ![]()
Seeing science in a new light: build your own stroboscope and use it to create beautiful optical illusions with water!
Many human inventions are intertwined with our need to ‘see’ beyond one’s senses. The need to see beyond the limits of one’s vision led to the invention of the microscope and the telescope. Once machines were constructed that moved much faster than the human eye could follow, the stroboscope was invented.[1] Although most students are familiar with microscopes and telescopes, few have heard of the stroboscopic effect. Nowadays, the stroboscopic effect has a variety of applications, such as in photography, medicine, or industry. There are also many papers on the use low-cost digital stroboscopes to measure the speed of motors.[2]
In the present work, the basic principle of stroboscopy is applied in a different context: free-falling water droplets that create very impressive optical illusions.
Through a science, technology, engineering, and mathematics (STEM) approach, students can see how we can ‘trick’ our senses and ‘see’ beyond them. This impressive experiment sparks students’ enthusiasm and curiosity to learn more about the phenomenon. Thus, it is an impactful way to engage your students with the basic principles of stroboscopy and extend this knowledge to the plethora of real-world applications mentioned above. It is suitable for students
aged 14–18.
The setup consists of three basic components (figure 1): 1) the water outflow tank, 2) the observation chamber, and 3) the water collection basin.
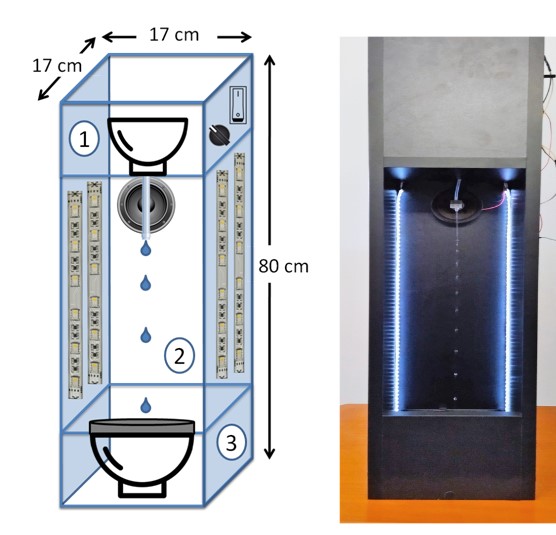
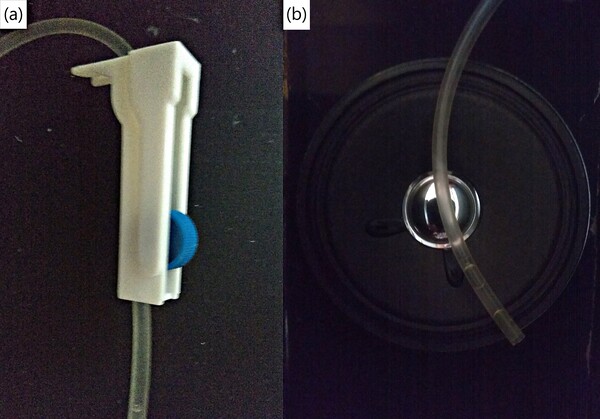
The water tank is placed in the upper part of the construction, from there the water flow moves downwards through a thin plastic pipe. The water supply to the pipe is determined by a water-flow controller (figure 2a). The plastic pipe ends in front of a speaker, which makes the pipe vibrate at a specific frequency (figure 2b).
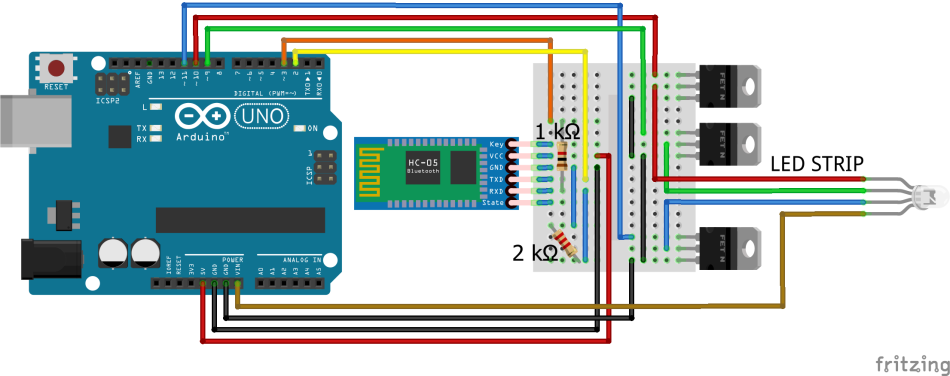
The observation chamber, which is lit by light-emitting diode (LED) strips, is in the middle of the construction. LED lighting allows the observer to watch the phenomenon at different frequencies.
Finally, the water-collection basin, which returns water to the upper part if the chamber, is in the lower part of the construction; in this way, water is recycled through the system.
This arrangement consists of three interconnected systems, which can be used to produce the ‘stationary-drop’ effect. Though the arrangement might look complicated, the only thing you have to do is assemble these three systems, as presented in detail in the following three activities. The materials used are low cost and easily available.
This system is responsible for the production of short, repetitive flashes of light. For this purpose, four LED strips of high brightness (1000 lumens m−1) can be used. High brightness is chosen to allow the phenomenon to be visible under any lighting conditions. The flash frequency is determined by an Arduino UNO microcontroller regulated by a smartphone app. The length of time that the LEDs are on (duty cycle) is about 5% of the period of repeated flashes. In this way, shorter LED flashes and a better visual effect are obtained. This activity should take about 50 minutes.
Appropriate precautions should be taken into account for students with photosensitive epilepsy.
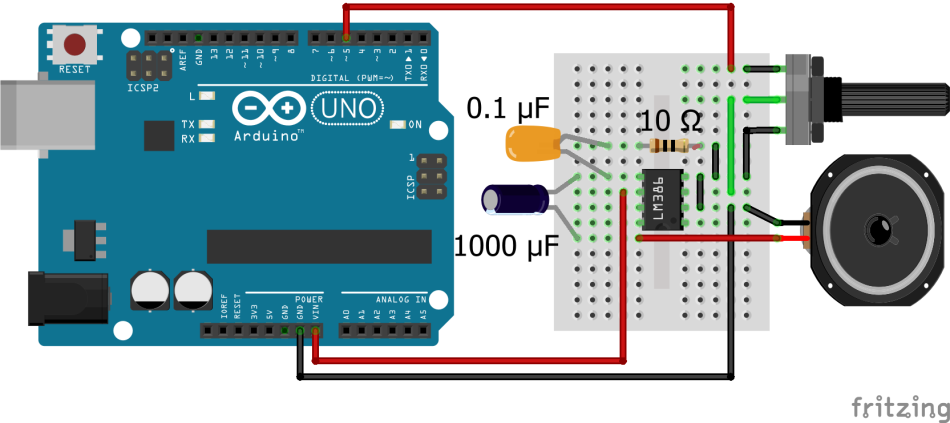
This system is responsible for the controlled vibration of a water pipe, and thus, for the controlled fall of water droplets. For this reason, a speaker is attached at the end of the water pipe. The device uses a 1 W speaker, an electrical circuit acting as an amplifier, and an Arduino UNO microcontroller (figure 4). This activity should take about 50 minutes.
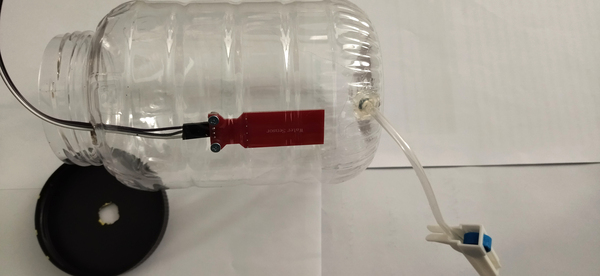
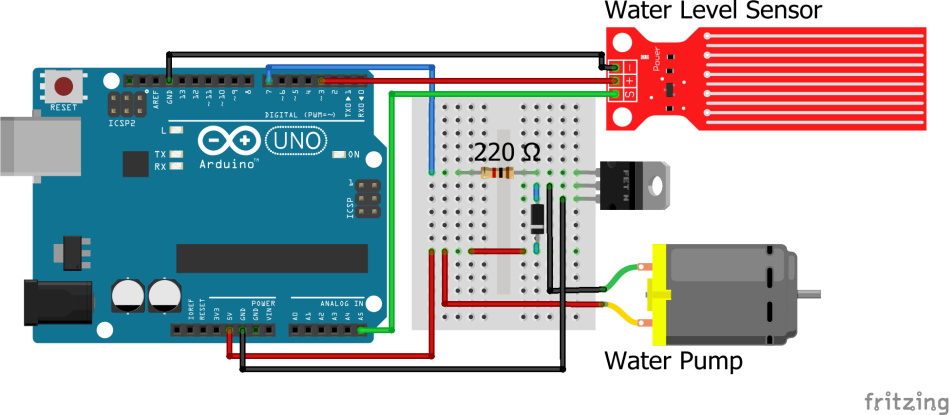
This system is responsible for the flow of water in the chamber, and it is composed of two containers with a capacity of 1 litre each, a plastic pipe with an inner diameter of 3 mm, and the water-flow controller. A water pump and a water-level sensor enable the constant flow of water from one container to the other. This activity should take about 50 minutes.
At first, we set the frequency of sound to 50 Hz. Then, we turn on the water supply while varying the flash frequency of the LEDs. When the frequency of the LEDs is equal to the frequency of sound
(fLED = fsound = 50 Hz), every time a drop comes out of the tube, the LEDs light up. So, every time the LEDs light up, we take the same snapshot and the drops will appear motionless. When the flash frequency of the LEDs is slightly lower than the frequency of sound, the drops appear to be moving downwards, whereas, when the flash frequency of the LEDs is slightly higher than the frequency of sound, the drops seem to be moving upwards.
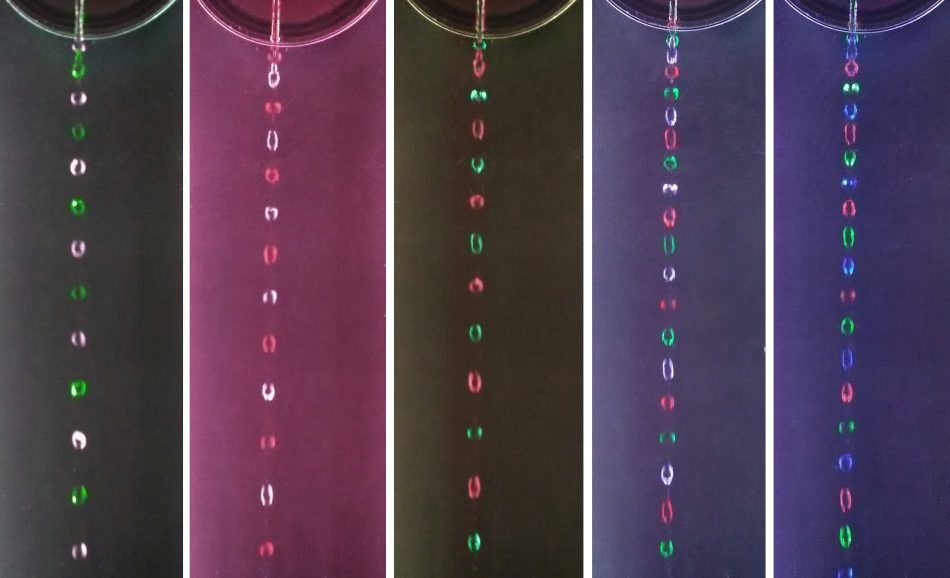
By changing the colours of the LEDs in the app, we can see droplets with specific colours (figure 7).
This work is a unique opportunity for students to become familiar with the stroboscopic phenomenon by applying the basic principles of physics. They also study this phenomenon in a different context from that commonly used. Students construct their own strobe using low-cost, everyday materials. By using the Arduino UNO microcontroller boards, students can change the frequency of the flashing LEDs to ‘defy’ gravity either by immobilizing the drops or by making them move upwards.
This setup can be also used to measure the acceleration of gravity as follows:
[1] Van Veen F (1977). Handbook of Stroboscopy. GenRad, Concord, MA.
[2] Islam M and Bhuiyen M (2011). Low cost digital stroboscope designed to measure speed of motor optically. 2011 International Conference on Electronic Devices, Systems and Applications pp. 187–190. IEEE, New York. ISBN: 978-1-61284-388-9
This article describes how an Arduino can be used to control LEDs to make a simple stroboscope. This is linked to the apparatus making water droplets to give an interesting illusion. The basic components might also be adapted to illuminate the parabolic trajectory of water droplets projected horizontally.
Stuart Farmer, Education Manager, Institute of Physics Scotland, UK (Scotland)
Download this article as a PDF