Supporting materials
Download
Download this article as a PDF

Build a linear accelerator to demonstrate spallation – the source of high-energy neutrons used by the new European Spallation Source being built in Sweden.
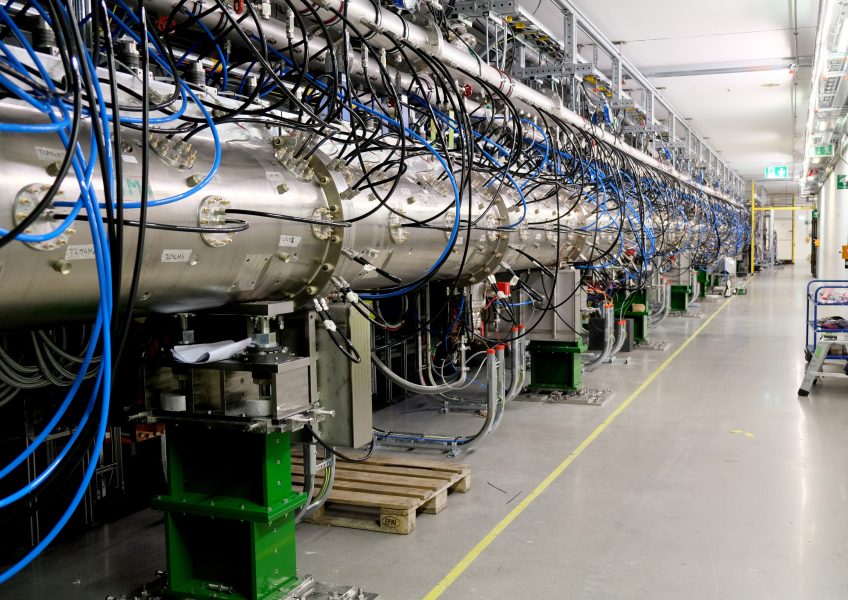
© Ulla Hammarlund/ESS
We are currently building the European Spallation Source (ESS) in Lund, Sweden.[1] ESS is a next-generation spallation source – a source of neutrons that will be used by researchers from academia and industry to study the structure and behaviour of matter from the atomic to the macroscopic scale in many different fields, including biology and medicine, chemistry, materials, physics and engineering, magnetism, and archaeology. Spallation is the production of neutrons by hitting a heavy-metal target with high-energy protons, which have been accelerated using a particle accelerator.
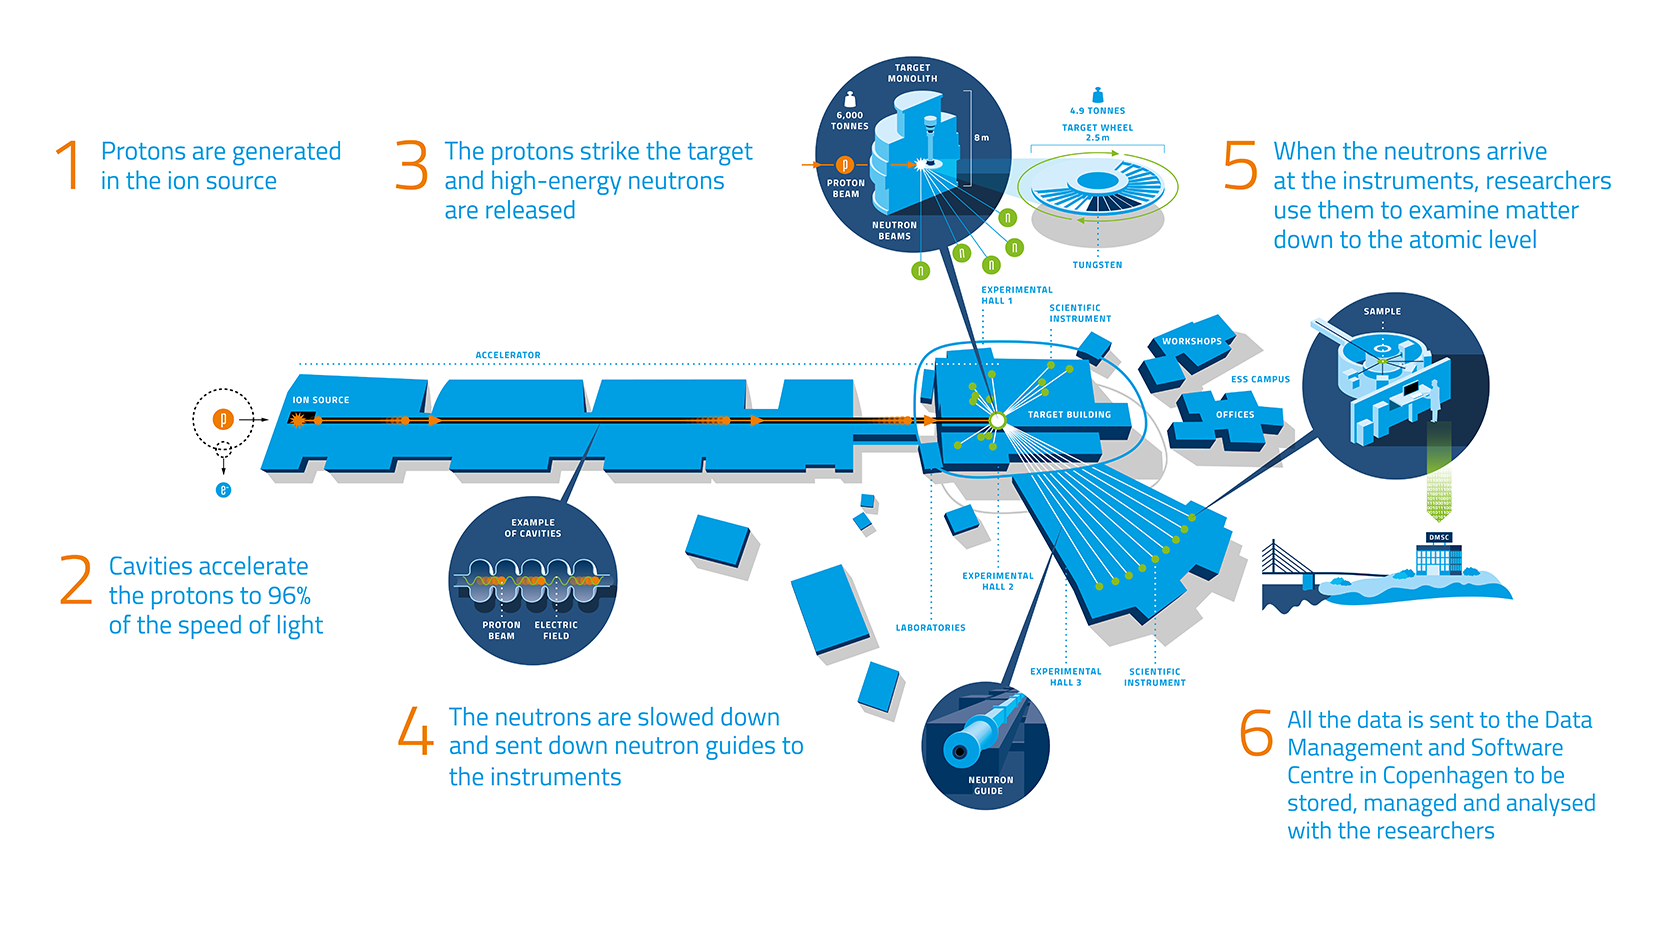
A scheme of ESS, showing the different steps of the process
© ESS
An important part of ESS is a linear particle accelerator, where protons will be accelerated to around 96% of the speed of light. Acceleration is achieved using strong electromagnetic waves, which propel the protons from one section to the next at ever-increasing speeds.
In this activity, we build a model of a linear accelerator (linac) called a Gauss cannon. It uses magnetic attraction and momentum transfer to accelerate a series of steel balls, representing protons. At the end of the track, one ‘proton’ will collide with a bunch of balls or marbles, which represent the neutron-rich nucleus of a tungsten atom. If the initial ‘protons’ have sufficient energy, they will be able to release the ‘neutrons’, thereby modelling the spallation process.
The activities demonstrate electromagnetism, conservation of energy, kinetic energy, (magnetic) potential energy, momentum and collisions, and accelerated motion.
It is best suited to students aged 16 and older, but also works as a demonstration for younger students.
In a Gauss cannon, a series of strong magnets are distributed evenly along a track. At one end of each magnet, two or more steel balls are placed. When another steel ball is rolled along the track towards the first set of magnets, magnetic attraction, coupled with a transfer of momentum, causes the leaving balls to accelerate, each to a higher speed than the previous one. Acceleration thus occurs stepwise, just as in a linear particle accelerator, although the exact mechanism differs.
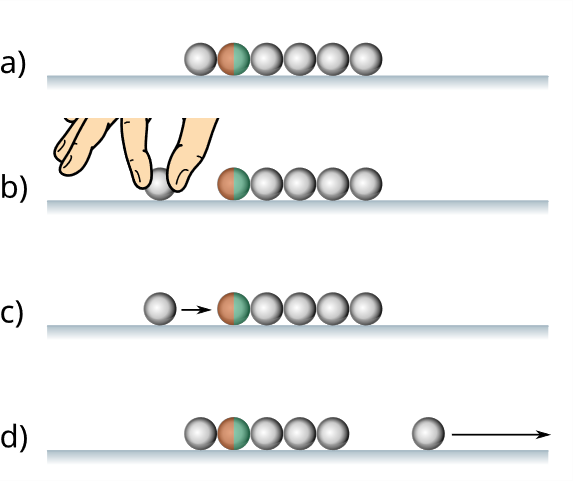
A scheme showing the function of a Gauss cannon. The coloured sphere is the neodymium magnet.
Image: MikeRun/Wikimedia, CC BY-SA 4.0
This can be done as a demonstration from the front, but provides more critical-thinking skills if the school can provide enough equipment for each group of students to have a complete set of the list below.
As a demonstration, this activity requires 10 minutes for preparation and 20 minutes for the demonstration and discussion. As a student workshop, this activity requires 20 minutes for preparation and 40–60 minutes for the activity and discussion.
For each model, you will need:
The setup can also be bought relatively cheaply as a whole track with the appropriate balls, sometimes called a magnetic rifle or a Gauss gun, from an education supplier (see resources section).
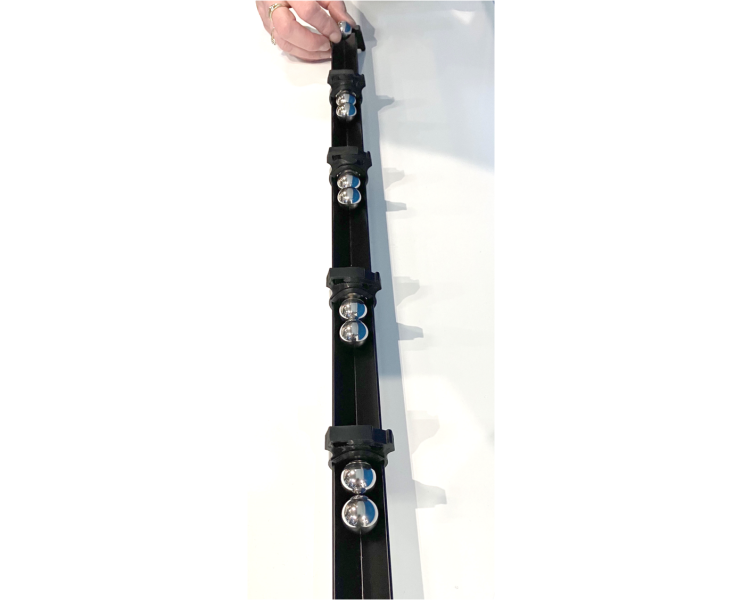
A pre-prepared track contains stronger magnets and uses larger steel balls, making it easier to see if used as a demonstration.
© ESS
Image courtesy of Lukasz Michalak
If you have access to a smartphone or tablet with a slow-motion function in the camera app:
In a Gauss Cannon, we first give some energy to the initiating ball, either by pushing it or raising the track to a slope. This initial energy causes it to roll towards the first magnet, but as it approaches, magnetic attraction causes the ball to accelerate. On impact with the magnet, this increased energy is transferred to the next balls in the system, causing the last ball to leave with the same momentum, rather like in a Newton’s cradle. This ball then rolls further along the track towards the next magnet with an energy that is higher than the initiating ball. The same magnetic attraction occurs with the next magnet, accelerating this second ball still further, and this further increased energy is transferred again on impact. Thus, with each repeating step, the energy of the released balls increases, and stepwise acceleration is observed.
The details of energy transfer might not be obvious to students, and the teacher should provide a guided discussion if necessary. Some useful resources for this are provided in the resources section.
Place a bunch of small balls or marbles at the end of the Gauss cannon track. When the final accelerated proton collides with the bunch of marbles – or neutrons – they will be scattered in many directions. This is similar to the real spallation process, where high-energy neutrons are released when the protons hit the neutron-rich target.
This activity takes 10 minutes.
The Gauss cannon is an analogy for what actually happens in an accelerator. In a functioning particle accelerator, electric fields are used to accelerate electrically charged particles. In the Gauss cannon, magnetic fields are used to accelerate the ferromagnetic balls.
In a linac, acceleration occurs along a straight line, in a series of repeated steps, each one providing an extra kick to each of the protons (steel balls in a Gauss cannon), enabling them to get faster and faster as they proceed.
In a linac, the magnets serve to focus the beam, to limit losses from the protons, which would otherwise repel one another. In a circular accelerator, there are also focusing magnets, but, in addition, dipole magnets are used to bend and steer the beam around a near-circular track.
At ESS, there is a target wheel, containing tungsten bricks. When the accelerated protons hit the target, they knock neutrons out of the tungsten atoms (which each release around 30 neutrons) in a process called spallation.
These neutrons are then sent down neutron guides towards different instruments, where researchers place the samples they wish to study. The more neutrons that arrive at the instrument, the more data can be collected, which can lead to more detailed and higher-resolution experimental results. The number of neutrons produced is called the flux. ESS will have a very high flux of neutrons.
The ESS scheme can be used to discuss linacs and the analogy with the Gauss cannon.
When recreating spallation in this way, the main aim is to generate as many fast-moving ‘neutrons’ as possible. Ask students how they could increase the flux of ‘neutrons’ in their model. They could for example change the element in the target to one with more neutrons, or increase the energy of the protons in the accelerator (with a higher starting energy, or more powerful magnets) so more neutrons are released on impact.
This activity provides a hands-on way to teach the physics concepts demonstrated by particle accelerators, such as magnetism, energy, momentum, and accelerated motion. It also provides background information about ESS, Europe’s flagship big-science project, to provide context for students about how physicists and engineers today are using these concepts in their jobs to build and run cutting-edge research facilities.
Teachers can access this and many more teaching resources around particle accelerators at the legacy version of the massive open online course Accelerate Your Teaching.[2] You will need to set up a free login at Scientix and enrol to access the materials.

The work presented on this document has received funding from the European Union project Accelerating Teaching (Agreement number 2022-1-SE01-KA220-SCH-0000889631). The content of the document is the sole responsibility of the organizer, and it does not represent the opinion of the European Union, nor is the European Union responsible for any use that may be made of the information contained.
[1] The European Spallation Source website: https://europeanspallationsource.se/explore
[2] The Accelerate Your Teaching website: https://www.europeanschoolnetacademy.eu/courses/course-v1:AT+AcceleratingTeaching+2023/about
Download this article as a PDF
Create a particle accelerator using a Van de Graaff generator, a ping-pong ball and a salad bowl to understand how it is used to study matter at the…
Silly or serious? Rube Goldberg machines are not only a lot of fun but can help students to understand the principles of conservation and transfer of…

Science fiction can be an engaging starting point for scientific discussions. Learn how one research group is using Star Wars to introduce students…