How do materials science engineers choose fabrics for parachutes? Teach article

Fabrics are not just for fashion: explore the processes materials science engineers use when selecting fabrics by designing a parachute.

Have you ever wondered who designs an astronaut’s space suit, a diver’s wetsuit, or even a parachute? The creators of this essential equipment are materials science engineers. Using next-generation science standards to frame materials science lessons allows students to make connections between content and what scientists do to investigate the world around us.[1] Introducing materials science in middle schools is a great way to provide career awareness in this field and to engage students in chemistry when going deeper into the physical properties of a particular material, such as ceramics, glass, metal, or even fabrics.[2,3]

What are fabrics?

By definition, fabric material is a piece of cloth. However, to a materials science engineer, fabric material is composed of synthetic or natural strands of fibre weaved together tightly or loosely in a pattern to form a piece of cloth. Fabrics are not commonly thought of as products materials science engineers would use, because they are materials mostly used by regular consumers to design clothes, cover furniture, or to decorate homes. Students will find interesting the level of detail materials science engineers use to select a fabric when designing an effective parachute as they begin a series of tests.
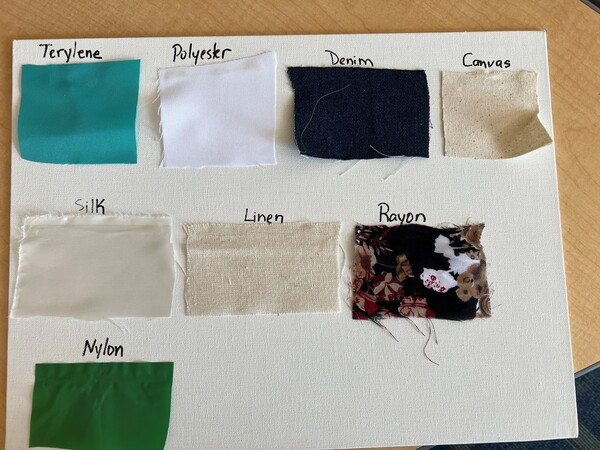
A display of the different fabrics tested in this activity: Terylene, polyester, denim, canvas, silk, linen, rayon and nylon.
Various types of fabric materials
Image courtesy of Ivonne Miranda

Students explore the properties of different fabrics. In these tests, each fabric is tested for durability and resistance. Comparing and contrasting the quality of materials will determine if the fabric material selection meets the requirements for the parachute design. Both activities in this lesson can be completed within a 60-minute time frame, including discussion time. This lesson is appropriate for 11- and 12-year-old students studying chemistry. Students should work in groups of four or five.

Activity 1: Fabric comparison

Students will examine different types of fibres and determine which would make the best parachute. Opportunities to explore multiple fabric materials will lead to an understanding of how fabrics are chosen for parachute designs given to students. This activity will help students to think about selecting materials according to their properties, purpose, and resistance to allow them to make a final selection.

The fabrics given are just suggestions; teachers can include or substitute different fabrics, like wool. Additional tests can also be added if the students discuss them, for example, weighing a fabric piece of a particular size.

Safety notes

Safety glasses should be worn when using a heat gun, and the heat gun should be at least 2 cm from the fabric to prevent the heat gun from overheating. Caution should be taken when using the heat gun. Caution should also be taken when using coarse sandpaper, as it can scrape fingers.

Materials

Each group will need:

  • Infosheet
  • Worksheet 1
  • Fabric squares (five of each): canvas, polyester, silk, rayon, nylon, terylene, cotton, denim, linen
  • Magnifying glass
  • Pipette
  • Water
  • Extra-coarse sandpaper
  • Heat gun
  • Tennis ball to cover with fabric
  • Pencil
  • Timer
  • Scissors

Procedure

  1. Briefly discuss the purpose of a parachute. What type of material is needed for a parachute, considering that life depends on its functionality? Discuss the various types of fabrics, their uses, and which fabric would be the best choice for a parachute. The infosheet can be used as a basis for the discussion.
  1. Each student group is provided with a set of fabrics to examine and Worksheet 1. Worksheet 1 contains instructions and tables for recording findings on observations, strength, wear and tear, durability, and absorbency each fabric is tested.
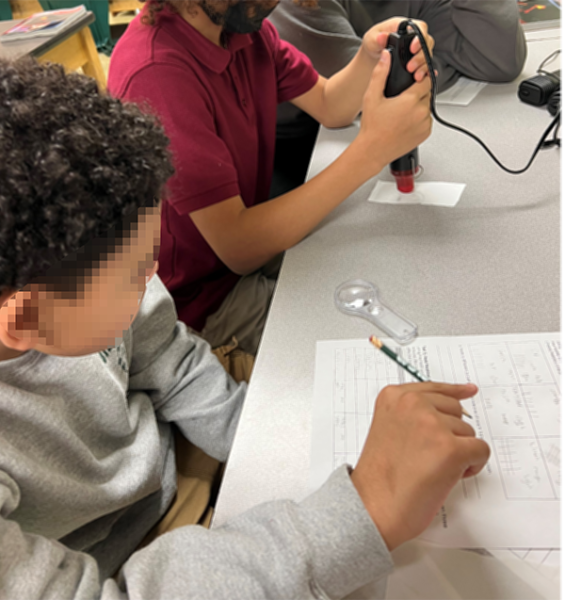
  2. The first test is based on observation. Closely look at each fabric using a magnifying glass and determine its characteristics. Draw a small diagram of the weave of each fabric type.
  3. The second test is a heat test. Using a heat gun, apply heat to each piece of fabric for one minute, then two minutes, and then three minutes. Observe how heat affects each fabric type’s weave pattern and if any changes to the fabric have an effect on the other tests.
Students checking a fabric’s resistance to heat
Image courtesy of Ivonne Miranda
  1. The third test is the strength test. One student must be selected to perform this test on all fabrics. Each type of fabric has a small cut, so the same student tries to rip each fabric into two pieces. Using the same student to rip the fabric adds validity to the test. A more systematic way to test this would be to use weights.
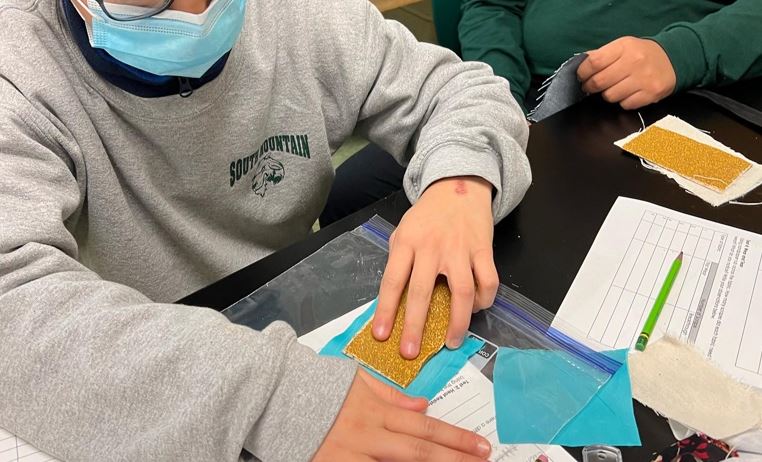
  2. The fourth test is wear and tear. Using a tennis ball, wrap a piece of fabric material around the ball and drag it over a coarse piece of sandpaper. To add validity to this test, rub the fabric ball over the sandpaper five times.
Students checking the durability of the fabric material. Here, sand paper is applied to the fabric, but wrapping the fabric around a ball and rubbing it against the sandpaper works better.
Image courtesy of Ivonne Miranda
  1. The fifth test is the absorbency test. Using a pipette and water, drop water onto each fabric material and observe if it can soak up or hold water. To maintain validity, each group places three drops of water on the fabric and times how long it takes for the water to be absorbed into the fabric.
  2. Compare and contrast the results of all types of fabrics. The following questions can be used to guide the discussion:
    1. Which fabric materials are strongest?
    2. Do synthetic and natural fabrics have different arrangements of weave patterns?
    3. How many scrapes with sandpaper did each fabric need to show signs of wear?
    4. Which fabric materials retain water better?

Results

This materials science lesson is a great way to get students to think and discuss like materials science engineers. The following questions can be used to guide the discussion:

  • What properties are essential for a parachute?
  • Using the characteristics observed from test 1 and the samples below, which fabric characteristic affects these properties?
    • Fabric characteristics: flexibility, rough, smooth, course, transmission, abrasive, durability, etc.
    • Fabric properties: thickness, colour, size, weight, weave type, width, etc.
  • Do some fabric characteristics affect the properties differently? For example, name fabrics that are very resistant to heat but sensitive to wear.

Based on the results of Activity 1, each group should choose a fabric to make a small parachute to test.

Activity 2: Parachute testing

In this activity, students test the parachute performance of the fabric they chose in Activity 1. Teachers can discuss how research and preliminary experiments are important for guiding a design, but the next step is to make a prototype and test it, and this stage may reveal additional important factors that were not considered before.

Materials

Each group will need:

  • Worksheet 2
  • Timer
  • Fabric pieces selected from Activity 1
  • Metal clips
  • String
  • Gram weights
  • Handheld fan

Procedure

  1. Using the fabrics selected from Activity 1, discuss what a parachute is within the student groups and sketch a design. Use Worksheet 2 to record findings and observations on the parachute test.
  2. Cut a hexagon from the chosen fabric. Each side of the hexagon is 20 cm long. Six pieces of strings should be cut to 50 cm lengths.
  3. Each piece of string is attached to a slit at each vertex of the hexagon of fabric. The strings are tied to a 20 g weight or any available weight. The idea is to be consistent with the same weight.
  4. Each group tests their parachute twice, with and without wind, by dropping it from a specific height. The handheld fan can be used to simulate wind from the side. Students can stand on a chair or stepping stool to gain extra height. If there is access to an upstairs window, then the parachutes can be dropped out the window (in this case, the fan can’t be used).
  5. Record the time the parachute takes to drop, whether the drop is abrupt or gentle, and if the fall is straight or shifted. To maintain the validity of the test, the same student should do all the drops, or a fixed height should be used, for example, by making a mark on a stick. Several drops (repeats) should be performed.
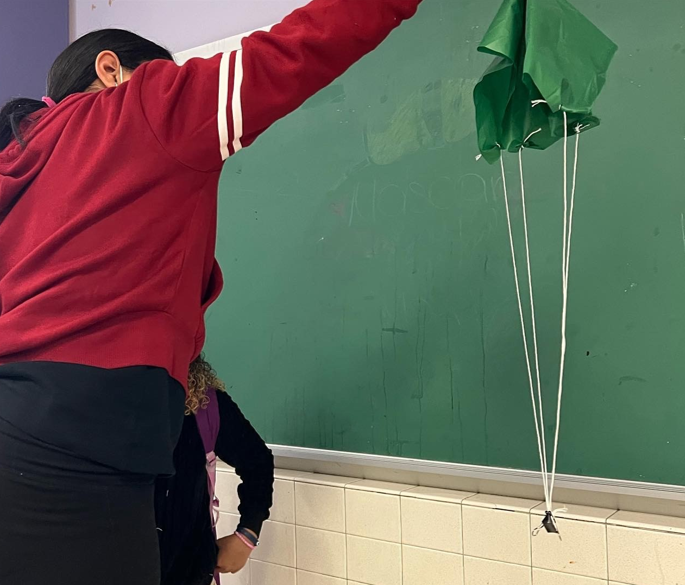
A student dropping a homemade parachute to test the air resistance.
Students testing air resistance
Image courtesy of Ivonne Miranda

Results

If two or more fabrics were selected, students compare and contrast their findings to decide which fabric material is the most suitable for the design of a parachute. If all students selected the same fabric, then a fabric piece that was not selected from Activity 1 should be tested to compare with the one selected. Some guiding questions are as follows:

    1. Which type of fabric worked best? Why?
    2. Which fabric material did not work well for a parachute? Why?
    3. Can you think of any fabric properties that you hadn’t considered before that might have influenced the outcome?
    4. What were the differences between adding wind or not?
    5. What would happen if a variable was changed? For example, a smaller hexagon design, a lighter weight, or a different height.

Discussion

This materials science lesson is a great way for students to think and discuss like materials science engineers. The discussion part is key. This lesson is not about getting the correct answers but learning how engineering (and science more generally) is done. It could be that properties not considered in Activity 1 (e.g. weight or stiffness) turn out to be very important for the wind performance. It should be made clear to students that it is not a failure if they do not pick the best-performing fabric. The experiment is considered a success when students are able to explain and support the subsequent step of development for their designs.


References

[1] Campbell T, Lee O (2021) Instructional materials designed for A Framework for K-12 Science Education and the next generation science standards: An introduction to the special issue. Journal of Science Teacher Education 32: 727–734. doi: 10.1080/1046560X.2021.1975359

[2] The standards used for the design of this lesson: https://www.nextgenscience.org/sites/default/files/MS.SPM 5.21.13with footer.pdf

[3] Nadelson LN, Moll AJ, Seifert AL (2011) Living in a materials world: Materials science engineering professional development for K-12 educators. 2011 ASEE Annual Conference & Exposition Vancouver, BC: 22.1019.1–22.1019.15. doi: 10.18260/1-2–18288

Resources

Author(s)

Ivonne Miranda has a PhD in education and a master’s in education from Walden University, specialising in curriculum, instruction, and assessment. Ivonne is an assistant professor of teacher education at Cedar Crest College in Allentown, Pennsylvania, consistently providing opportunities for teachers and students to be actively engaged in science through STEM workshops and STEM education.

License

CC-BY
Text released under the Creative Commons CC-BY license. Images and Supporting Material: please see individual descriptions.