Natural experiments: chemistry with mushrooms Teach article
How many ‘chemicals’ are there in a fresh mushroom? These simple experiments reveal the hidden chemistry within natural foods.
Everything around us and in our own bodies consists of chemical substances, which react with each other to keep us alive. However, many students do not see chemistry as part of their everyday lives; in fact, chemistry is often seen as the opposite of ‘nature’ – and even as something dangerous to be avoided. For example, many foods are advertised as ‘free of chemicals’, as if the substances they contain consist not of molecules and compounds, but of something else entirely.
This of course is an important misunderstanding, which is quite likely to lead to mistakes and unscientific decisions. In these ‘natural experiments’ articles (see also Höfer, 2017), we use chemical methods to analyse natural, raw foods. Whatever their results, carrying out these experiments confronts students with the indisputable fact that healthy, natural foods are also substances within the realm of chemistry.
Skeeze/pixabay.com
Mushroom chemistry
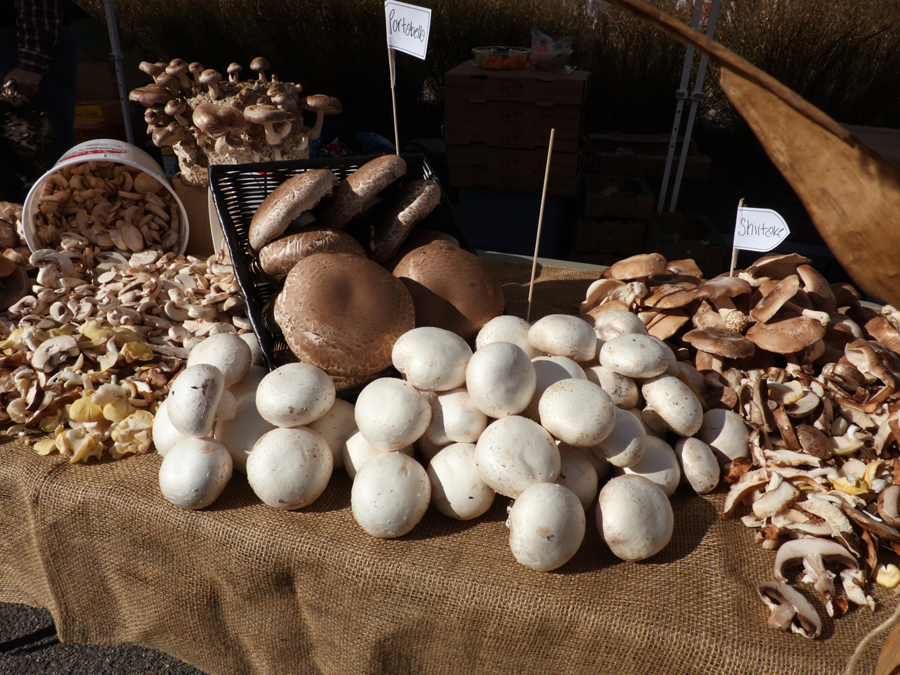
Food is a major part of our daily lives, so it makes sense to use foods as a way of connecting chemistry with everyday life. Mushrooms are an interesting example, because they contain a variety of substances that can be quite easily identified. This may surprise students, who are likely to begin the experiments with few expectations about the composition of mushrooms. These substances include carbohydrates, fats and proteins, as well as vitamins and minerals as more minor components, as students can discover for themselves.
In these experiments, we apply standard laboratory chemistry tests to edible mushrooms. The experiments are suitable for chemistry classes in secondary school. They can be carried out by the students themselves in around 1 hour including discussion. Some additional time is needed for teachers to prepare the materials needed in experiments 2 and 3.
a cultivated mushroom
U.S. Department of
Agriculture/Flickr
What are mushrooms?
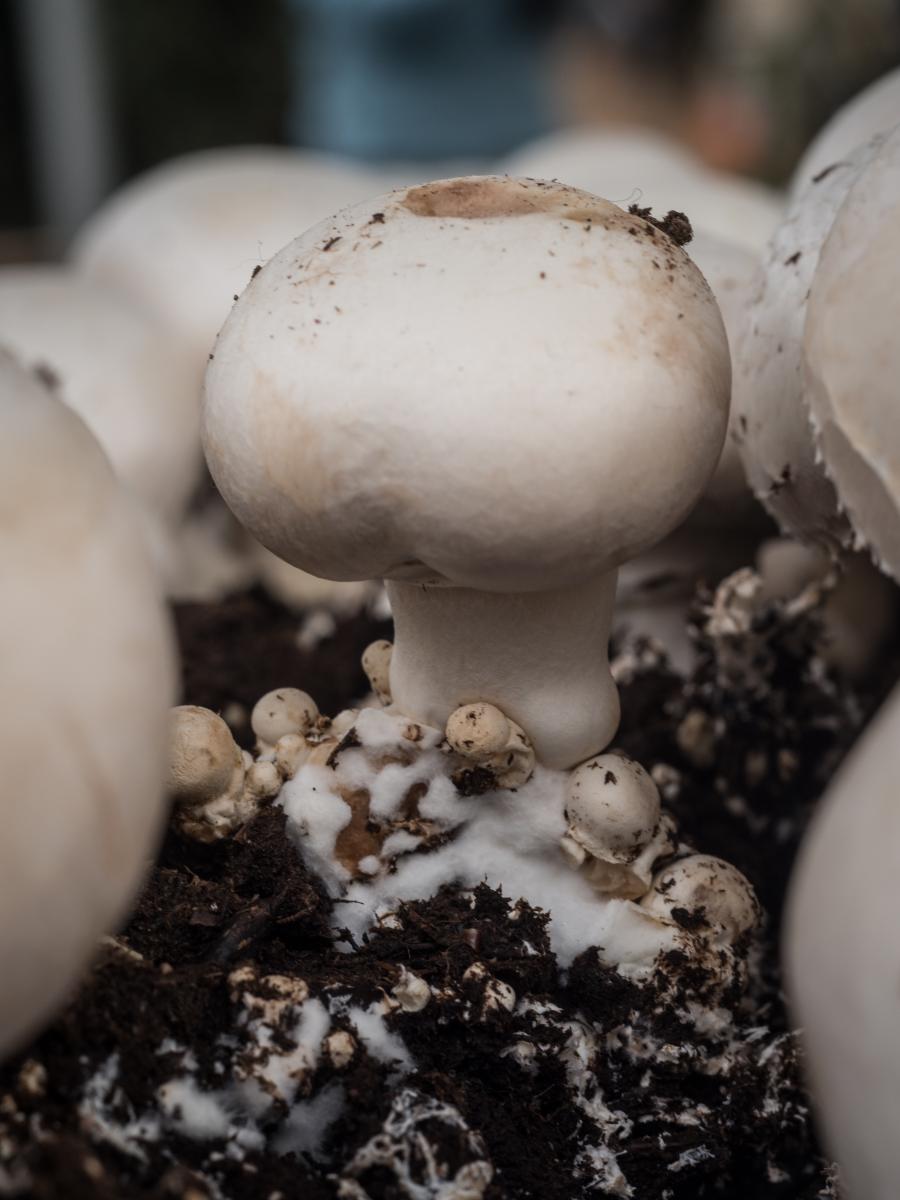
Mushrooms are fungi, which are not plants or animals, but form their own taxonomic kingdom. They are eukaryotic organisms, which distinguishes them from bacteria. Like plants, mushrooms absorb organic nutrients from surrounding substrates by osmosis, but their structure and way of reproducing is quite different from plants. And like animals, mushrooms are heterotrophic organisms: they need to take in food and cannot make it themselves. Fungal cells form a net of fibres called a mycelium, hidden in the soil. This is branched like a root system and is responsible for the nutrient uptake. Fungi also have a fruiting body, which grows above ground and is the (sometimes edible) part we call a mushroom (see figure 1).
Nutritionally, mushrooms are a valuable part of our diet. Among other nutrients, they contain sodium, chloride and potassium ions, which are needed to maintain water balance; plus phosphate ions for the stability of bones and teeth and the formation of red blood cells; and vitamin C, which acts as a protective agent for cells and helps the body to incorporate iron.
In the following experiments, we used mushrooms from commercially grown Agaricus bisporus fungi as the sample materials, in either fresh or dried form. In culinary terms, these are known as champignons, button mushrooms or (when mature and brown) portobello mushrooms.
Safety note
For all the experiments, students should wear safety glasses and follow the usual safety rules for chemistry classes, as some of the reagents are harmful or corrosive. Please also see the general safety note on the Science in School website.
Experiment 1: Testing for protein
Allow approximately 5 minutes for the Biuret test, and 10 minutes for the ninhydrin test (see procedure section below).
Materials
- Sodium hydroxide solution (1 mol/l)
- Copper(II) sulfate solution (1 mol/l)
- Ninhydrin solution (2% w/w)
- Fresh edible mushrooms (e.g. button mushrooms) – enough for one mushroom per student or group
- Bunsen burner
- Watch glass
- Knife (not too sharp)
- Small dropper pipettes
- Tongs
Procedure
Proteins can be detected using both the Biuret and the ninhydrin tests. These procedures are described here separately.
Biuret reaction
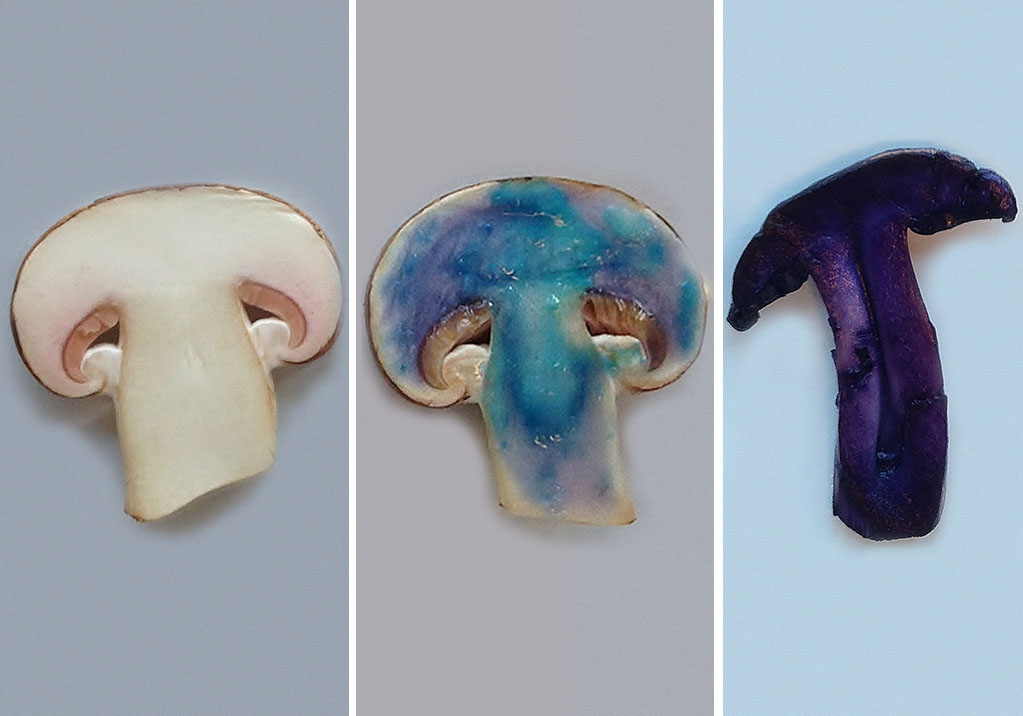
- Cut a mushroom in half (see figure 2, left).
- Using the pipette, coat the cut surface of the mushroom with a thin layer of the sodium hydroxide solution.
- Place a drop of a copper(II) sulfate solution on the surface of the mushroom.
If protein is present, the colour will change from light blue (the colour of copper(II) sulfate solution) to dark blue or violet (see figure 2, middle) This colour change is due to the formation of a copper-protein complex.
Ninhydrin reaction
- Place a slice of fresh mushroom onto a watch glass.
- Sprinkle a drop of ninhydrin solution onto the mushroom.
- Using tongs, hold the mushroom slice into the non-luminous part of a Bunsen burner flame (which should not be roaring).
- Take the mushroom slice out of the flame and look at the colour.
If protein is present, a deep violet compound will be formed (see figure 2, right) . The deep violet compound is called Ruhemann’s purple. It is produced when ninhydrin reacts with the amino acids found in proteins.
Farina Bunjes
Experiment 2: Testing for vitamin C
Duration: approximately 15 minutes. Teachers need to allow 45 minutes beforehand to prepare the iron(III) chloride filter paper. To do this, soak the filter paper in 1% w/w iron(III) chloride solution and then leave until well dried (about 30 minutes).
Materials
Each student (or group) will need:
- Potassium hexacyanoferrate(III) solution (1% w/w) in a vaporiser/sprayer
- One filter paper soaked in iron(III) chloride solution and dried
- One fresh mushroo
- Knife (not too sharp)
- Fume hood
Procedure
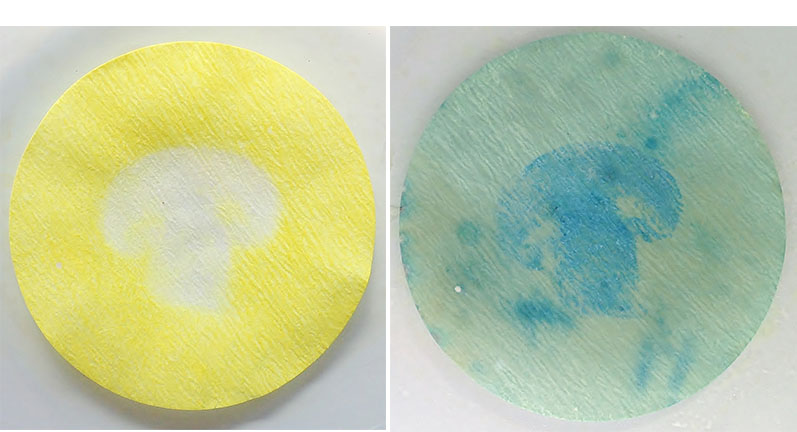
- Cut a mushroom in half, and press the freshly cut face of the mushroom onto the filter paper (see figure 3, left).
- Remove the mushroom. Working under a fume hood, spray the filter paper with the potassium hexacyanoferrate(III) solution. Take care to avoid breathing the vapour.
The potassium hexacyanoferrate(III) solution makes the paper turn light blue, as the soluble form of Prussian blue (or Turnbull’s blue) is produced. If vitamin C is present, the Fe(III) ions will be reduced to Fe(II) ions, forming a darker blue compound (see figure 3, right).
Farina Bunjes
Experiment 3: Testing for potassium and sodium
Duration: approximately 10 minutes. Prepare the dried mushrooms in advance by slicing the mushrooms and drying them overnight at 105 °C in a drying cabinet.
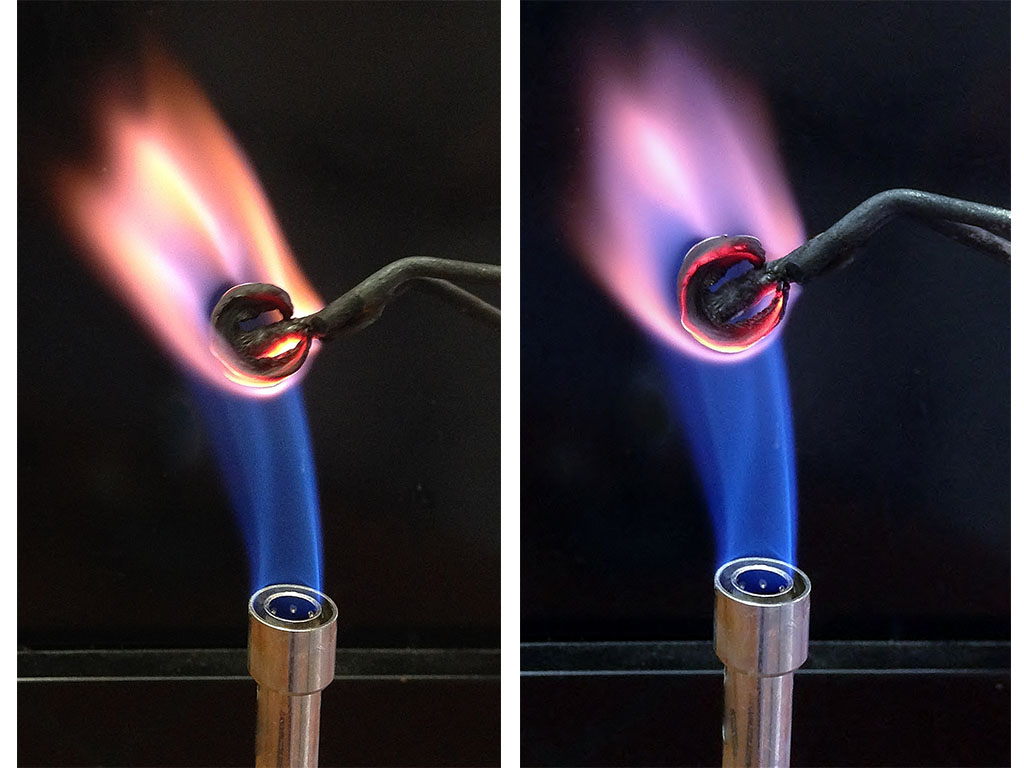
Potassium and sodium can be detected via their characteristic flame colours. Using cobalt glass to filter out the yellow sodium flame makes the pale lilac potassium flame more visible.
Materials
- Dried mushroom
- Bunsen burner
- Crucible tong
- Cobalt glass or other blue light filter
Procedure
- Hold a dried mushroom slice with the crucible tongs into a non-luminous flame of a Bunsen burner.
- Observe the flame colour. A yellow-orange colour indicates the presence of sodium, while a lilac colour indicates potassium.
- To see the lilac flame more easily, look at the flame through the blue filter, which filters out the yellow colour of the sodium flame.
Farina Bunjes
Experiment 4: Testing for phosphate ions
Duration: approximately 45 minutes (15 minutes for the experiment plus 30 minutes for the ash preparation). Teachers will also need 15 minutes to pre-prepare the ammonium heptamolybdate solution.
Materials
For the ammonium heptamolybdate ((NH4)6Mo7O24) solution:
- 10 g of ammonium molybdate tetrahydrate
- 20 g of ammonium nitrate
- 7 ml concentrated ammonia solution (30% w/w)
- Distilled water
- Volumetric flask (100 ml)
- Pipette
For the experiment, each student (or group) will need:
- Distilled water
- Dried mushrooms (a few slices)
- Dilute nitric acid (2 mol/l)
- Porcelain dish
- Pestle (for grinding)
- Bunsen burner
- Filter funnel and filter paper
- Test tubes and test tube rack
- Pipette
- pH indicator paper
burning dried mushrooms
Farina Bunjes
Procedure
Prior to the lesson, teachers should prepare a solution of ammonium heptamolybdate, ((NH4)6Mo7O24) solution: place 10 g of ammonium molybdate tetrahydrate and 20 g of ammonium nitrate into the volumetric flask. Add 7 ml of concentrated ammonia solution (using a pipette), and fill up the flask to 100 ml with distilled water, dissolving completely.
The rest of the procedure is suitable for students.
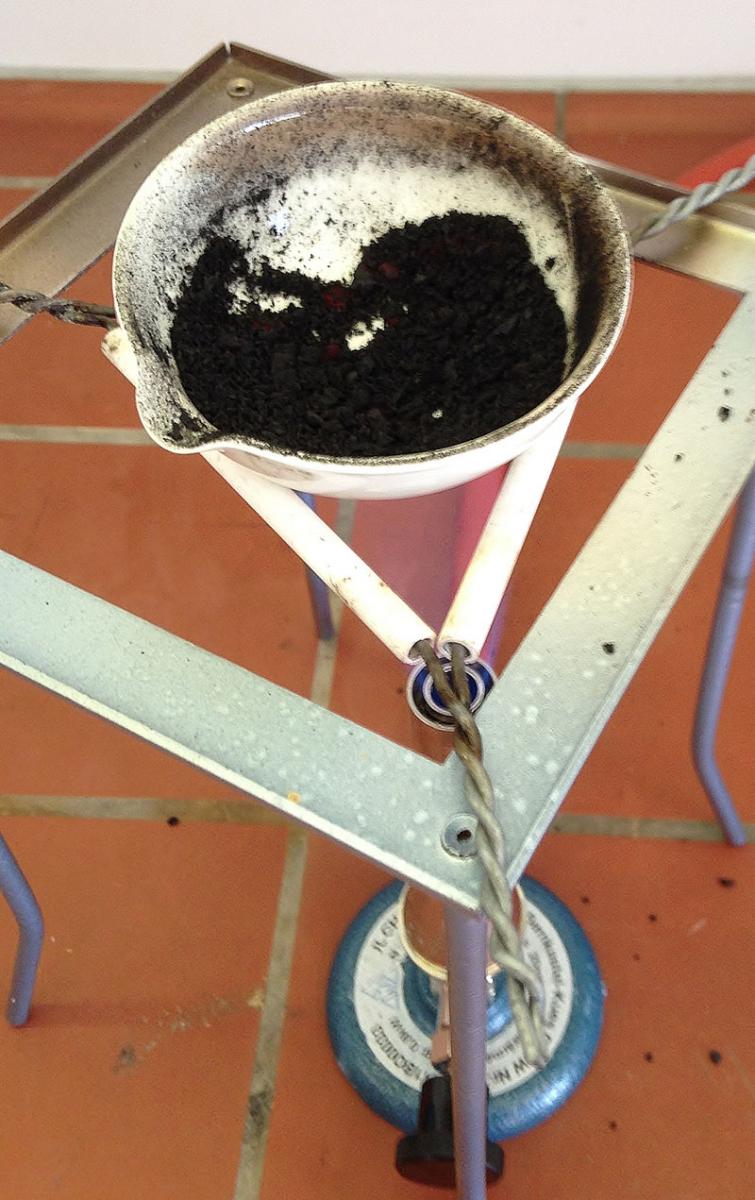
- Prepare the mushroom ash. First, place the dried mushrooms in a porcelain dish and grind them up, then burn the dried mushrooms with a non-luminous Bunsen burner flame until they turn to ash.
- Dissolve the mushroom ash in distilled water (not more than 10 ml), and then filter the solution to get rid of the insoluble parts, collecting the filtrate.
- Acidify the filtrate with dilute nitric acid so that the pH is below 6. Note: you will need the resulting acidified ash solution for the next experiment, as well as for this one.
- Use a pipette to put 5 ml of the acidified mushroom ash solution into a test tube, and then add approximately 10 drops of the ammonium heptamolybdate solution using another pipette.
- Heat the solution for two minutes with a Bunsen burner, then place the tube in a test tube rack to let it cool down.
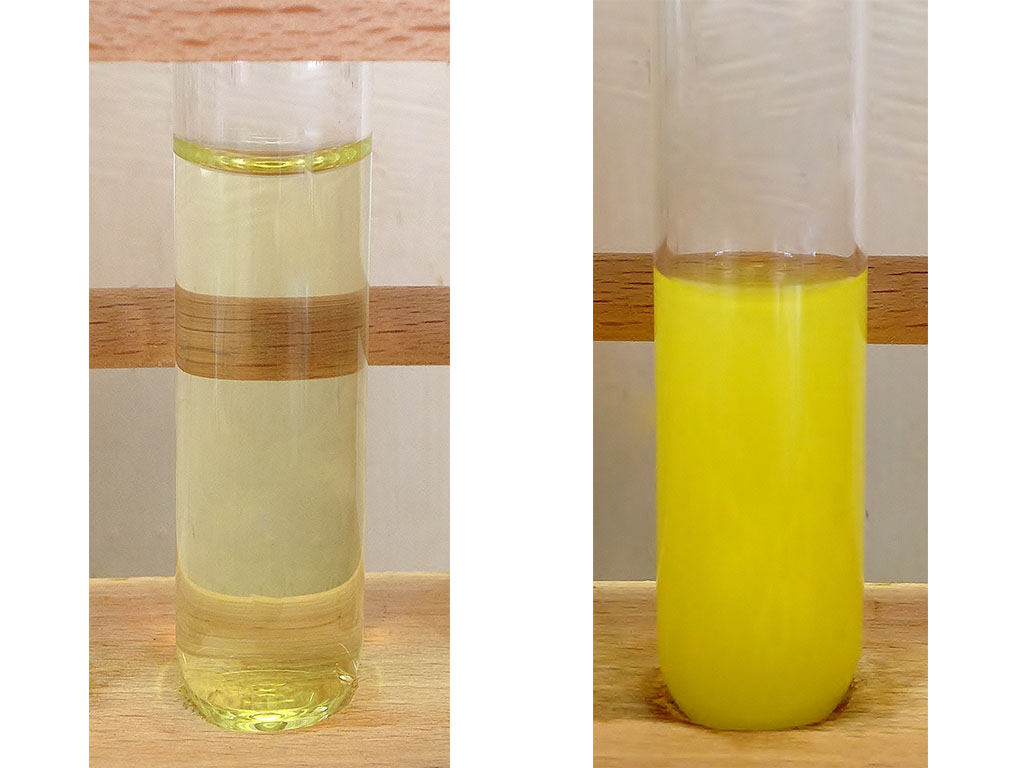
If phosphate ions are present, a lemon-yellow precipitate of ammonium phosphomolybdate ((NH4)3PMo12O40) will be formed (see figure 5).
Farina Bunjes
Experiment 5: Testing for chloride ions
Duration: approximately 5 minutes
Materials
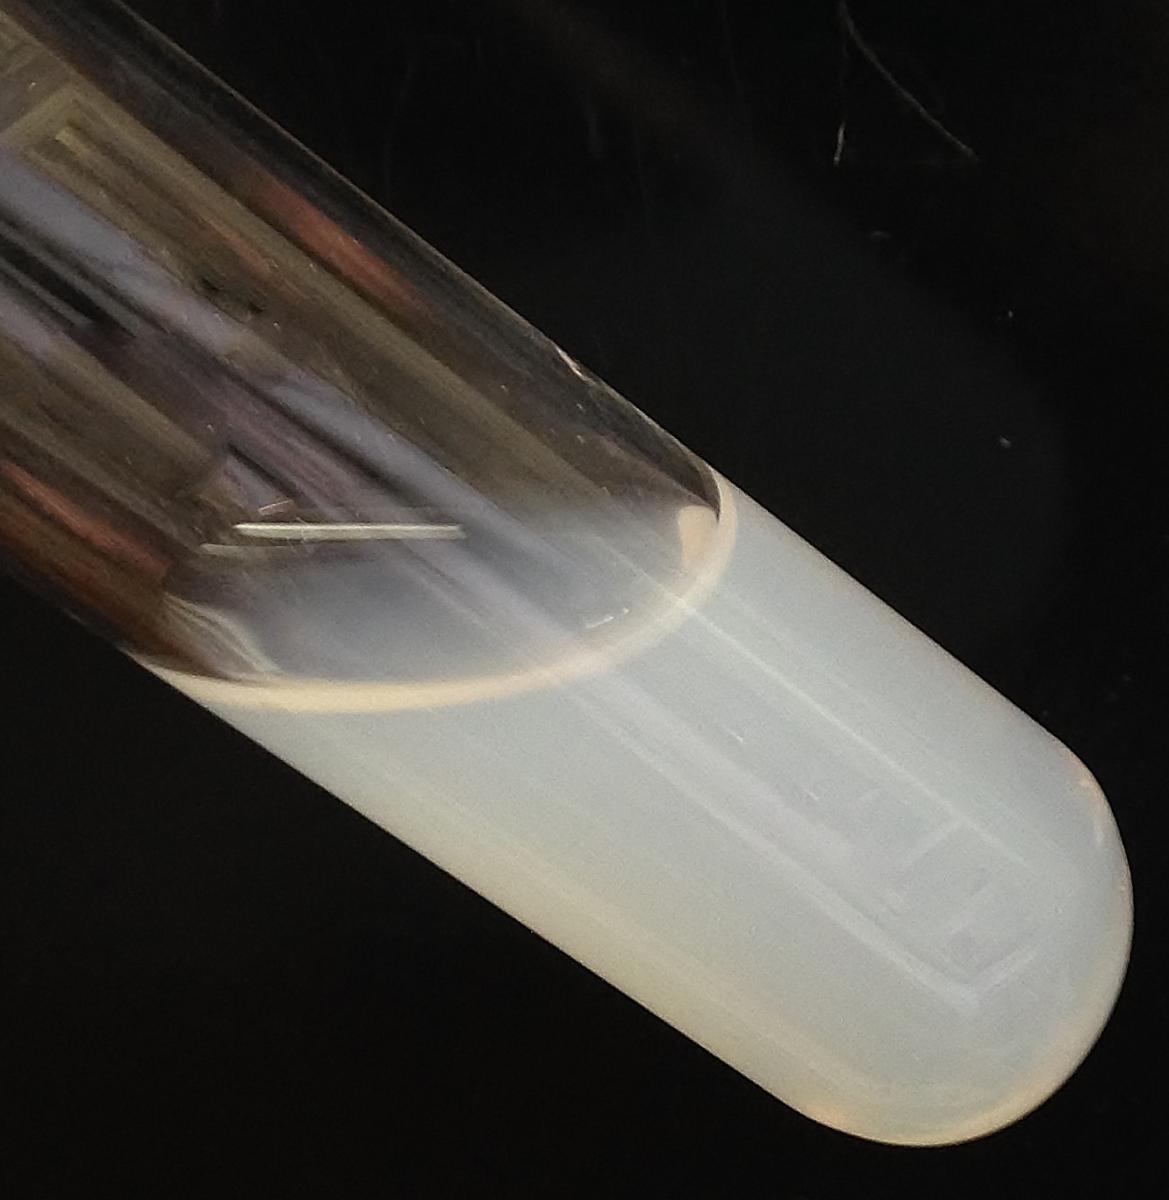
precipitate of silver chloride
in a solution of mushroom
ash, indicating the presence
of chloride ions
Farina Bunjes
- Acidified solution of mushroom ash (see Experiment 4)
- Silver nitrate solution (5% w/w)
- Test tube
- Pipette
Procedure
- Put 3–5 ml of acidified mushroom ash solution in a test tube.
- Add a few drops of silver nitrate solution to the test tube using a pipette.
A white precipitate indicates the presence of chloride ions (see figure 6). The silver chloride (AgCl) precipitate is finely dispersed, so the liquid has a cloudy white appearance.
Discussion
Using these experiments, students themselves can identify some important compounds in mushrooms – which are also nutrients. This can provide a basis for discussing aspects of chemistry that have an impact on daily life. For example:
- How would you respond if someone says, ‘I prefer food that is chemical-free’?
- How do mushrooms support a balanced diet?
- Can you think of an experiment that helps us to distinguish between plants and mushrooms? (Remember that mushrooms cannot carry out photosynthesis, but plants can.)
- In these experiments, we have not tested for starch and glucose. What do you think the results would be if you tested for these substances?
The composition of cultivated mushrooms
The following information may be useful for teachers to use in discussions following the experiments.
Carbohydrates
Starch is not present in cultivated mushrooms, and glucose is almost completely absent. Fungi contain mainly chitin and cellulose as structural components of the cell walls. They also contain trehalose (a sugar) and mannitol (a sugar alcohol).
Lipids (fat)
Lipids are found in very fine droplets within the cytoplasm of fungi, and in the fungal cell wall (as lipid bilayers). Mushrooms contain 0.3 g fat per 100 g of fresh mushrooms, which is a relatively low proportion.
Minerals
Mushrooms are rich in minerals – especially potassium, with a surprisingly high level of 390 mg per 100 g of fresh mushrooms. Phosphorus is also present (about 60 mg per 100 g), mostly as phosphate. The sodium content of around 5 mg per 100 g fresh mushrooms, however, is low, as are the calcium and iron contents. Fresh mushrooms contain about 93% water, although the water content depends on the age of the fruiting body, with young fruiting bodies generally containing less water.
Vitamins
Mushrooms contain significant amounts of vitamin C (about 2.1 mg per 100 g of fresh mushrooms), plus some B vitamins (including B1, B2, B6 and the amide of niacin, B3). Mushrooms are also rich in nicotinamide (5.2 mg per 100 g of mushrooms).
References
- Höfer J (2017) Natural experiments: taking the lab outdoors. Science in School 42: 42-48.
Resources
- Read a research article on school students’ attitudes to science and nature. See: Krischer D, Spitzer P & Gröger M (2016) ‘Chemistry is toxic, nature is idyllic’ – investigation of pupils’ attitudes. The Journal of Health, Environment, & Education 8: 7-13. doi: 10.18455/08002
- For more information about the chemistry involved in the various tests, see the following resources:
- Biuret test
- Ninhydrin test
- Vitamin C: Teepoo S (2012) A new simple and rapid colorimetric screening test for semi-qualitative analysis of vitamin C in fruit juices based on Prussian blue. Journal of Applied Sciences 12: 568-574. doi: 10.3923/ jas.2012.568.574
- Phosphate test
- Silver chloride
Review
The authors have identified a major challenge in science: students, and a significant portion of the wider public, do not appreciate that everything around them – and even their food – is made up of chemicals.
The experiments described in this article, which are suitable for senior students working in a laboratory, are a great way to show that food is chemical in nature, using mushrooms as the example studied. The exercise also links aspects of chemistry with biology, and may broaden students’ experience by providing practical work that is not usually covered in the science curriculum.
Tim Harrison, School Teacher Fellow, University of Bristol, UK


