Supporting materials
Download
Download this article as a PDF

Hold a double helix in your hands: the model that will reveal the secrets of the DNA molecule.
A bacterium, a fish, a tree, and a child: what do they have in common? DNA, of course! DNA is simple molecule capable of guiding all living beings and all the extraordinary functions of the human body.

DNA is not visible, and therefore, understanding its structure is difficult for students. What if they could build it with their own hands?
We propose a hands-on model that allows you to do just this; a few essential elements replicate the fundamental properties of DNA in a concrete and accurate way. Unlike other models, both the types of bond and their strength are realistic and can be touched. You and your students can use it countless times to synthesize a strand of DNA, duplicate it, and even wrap it into the famous double helix.
The main element of the model is made of wood: it is therefore resistant, versatile, and long-lasting. Its construction may seem a bit laborious, but it is an investment that lasts over time and can be a way of involving parents or colleagues who love DIY.
These activities are designed for children aged 11–14, who, according to the Italian curriculum, must know “the biological bases of the transmission of hereditary characteristics by acquiring the first elementary notions of genetics”. However, they can also be used with older students to explore the function of nucleic acids in more detail or to discuss scientific models.
How is DNA made? It is a very long polymer, that is, a chain made up of similar repeated elements, monomers. The monomers that make up DNA are called nucleotides and in turn are composed of various elements, each with a specific role:
– a nitrogenous nucleobase; there are four different ones in DNA: adenine (A), thymine (T), guanine (G), and cytosine (C);
– a ring-shaped sugar, deoxyribose; and
– a phosphate group, capable of easily binding to other molecules.
The three parts that make up each nucleotide, namely, a nitrogenous base, sugar, and phosphate, are present in the model. The nucleobase is represented by the wooden block, the sugar by the ring formed by the chenille wire on one side of the block, and the phosphate by the free ends of the chenille wire.

As in the real DNA molecule, the ends of the wire (phosphate) can bind to the ring (sugar) of another nucleotide, creating the repeated bonds that form the DNA strand. Another feature of the model is that the bases can only pair in a specific way, since A and T end with magnetic tape, and G and C with Velcro.
The basic element of the system is a wooden block (dimensions 1.8 cm × 1.8 cm × 4 cm) with a through hole at one end with a diameter of 6 mm.
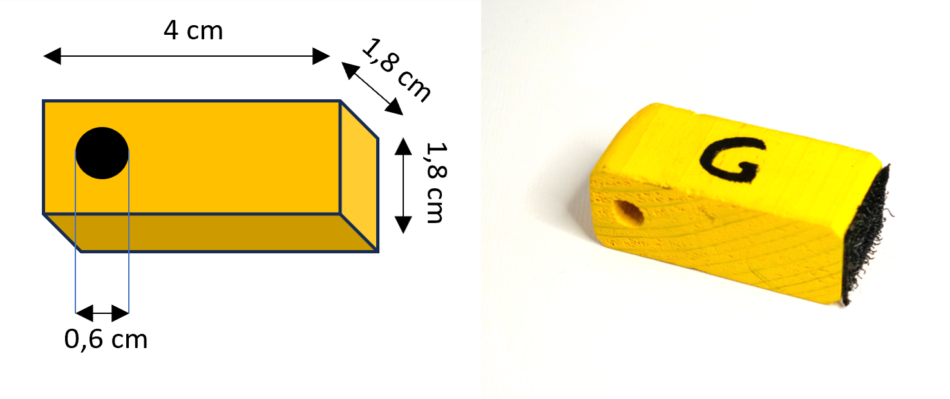
The block is completed with magnetic tape or adhesive Velcro on the side opposite to that of the hole and a 15 cm long chenille wire (pipe cleaner).
The complete building instructions for the constructing the blocks and a list of materials are provided in the supporting material.
The minimum quantity of blocks that allows you to carry out all the proposed activities are described as a set. A set is made up of 32 complete pieces (wooden block + chenille wire). The first 16 are necessary for the construction of the first DNA molecule, the rest for the duplication activity. In our experience, it is better not to increase the length of the strand beyond eight nucleotides in sequence, because the assembly becomes too fragile and difficult to manipulate.
The activities can be introduced with a single set; in this case, each student will prepare one or two nucleotides individually. The subsequent phases, that is, the assembly of the single and double strand and the duplicate, can be carried out by the teacher or by the children in turn, perhaps using a portable video camera (document camera) to show the operations to the whole class. If several complete sets have been prepared, the class can be divided into as many groups as there are available sets and the work of each group organized so that all components build at least one nucleotide and one bond.
The activity can be introduced with a brief group discussion, asking the students some questions: what do you know about DNA? What comes to mind when you hear the word DNA? How do you imagine DNA? What shape do you think it looks like? Is it big or small? To answer these questions, the activity proceeds with the construction of the DNA molecule.
The practical part will take 15–30 minutes, depending on the manual skills of the students; for the discussion, plan for at least 20 minutes. The discussion can be extended at the discretion of the teacher.

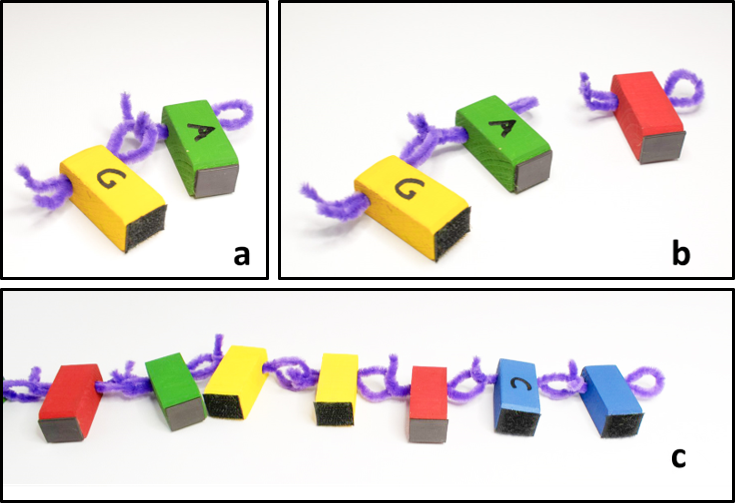
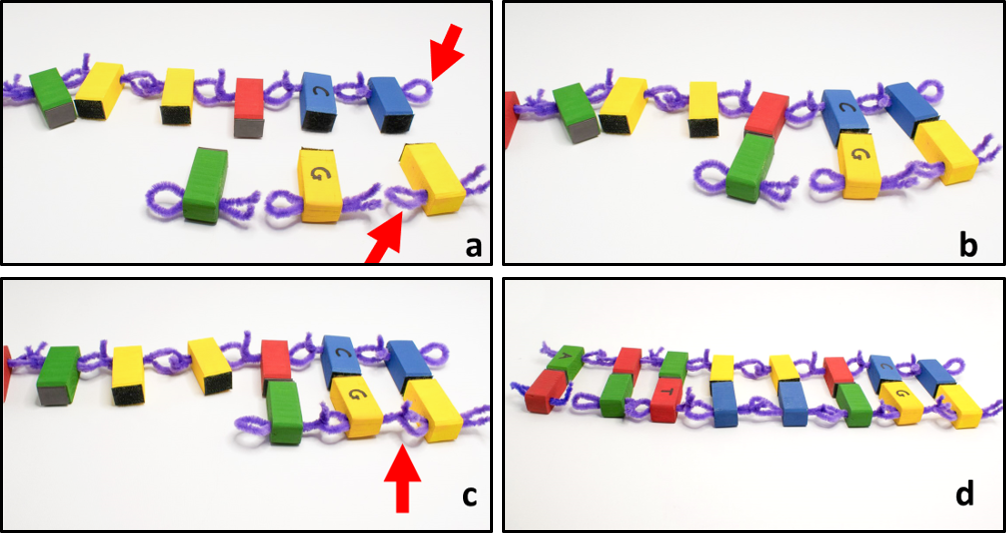
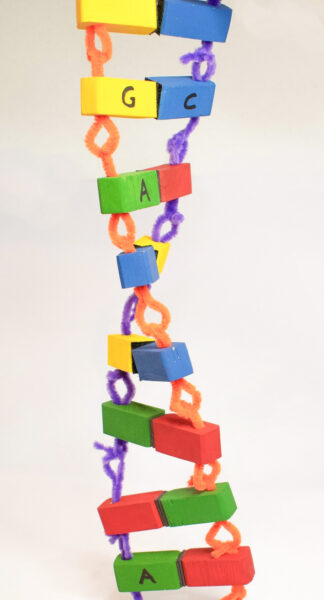
The teacher recaps the general concepts of DNA, making parallels with the model just constructed.
Then ask students the following questions. The discussion can be organized in various ways: in groups; as a class; or even in flipped classroom mode, where the students explain the activity they have just completed. You can use the question cards or hand out the Activity 1 question sheet to the students, leaving about 20 minutes, or adequate time, for each group to discuss the best answers.
For older students, or at the discretion of the teacher, questions may be more specific:
From this comparison, some of the main properties of the DNA molecule should emerge, as they result from the construction and manipulation of the model. For example, students should be able to infer that the paired strands are antiparallel, that the nucleobases only pair well with their complementary bases, and that the two pairs (A–T and C–G) bind with different strengths. Example answers can be found on the Activity 1 answer sheet.
In this case, the activity starts with the following question: what happens to DNA when a cell has to divide into two daughter cells? By following the instructions, the sequence of events that leads to the duplication of DNA in the cell is reconstructed.
The practical part of this activity will take 20–40 minutes, depending on the manual skills of the students; for the discussion, allow at least 20 minutes. The discussion can be extended at the discretion of the teacher.
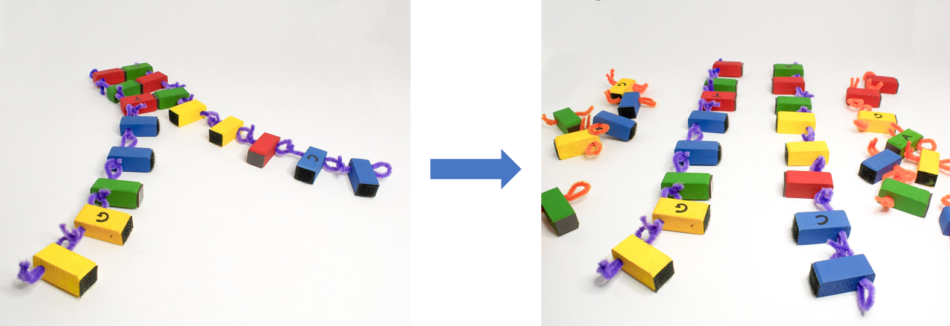
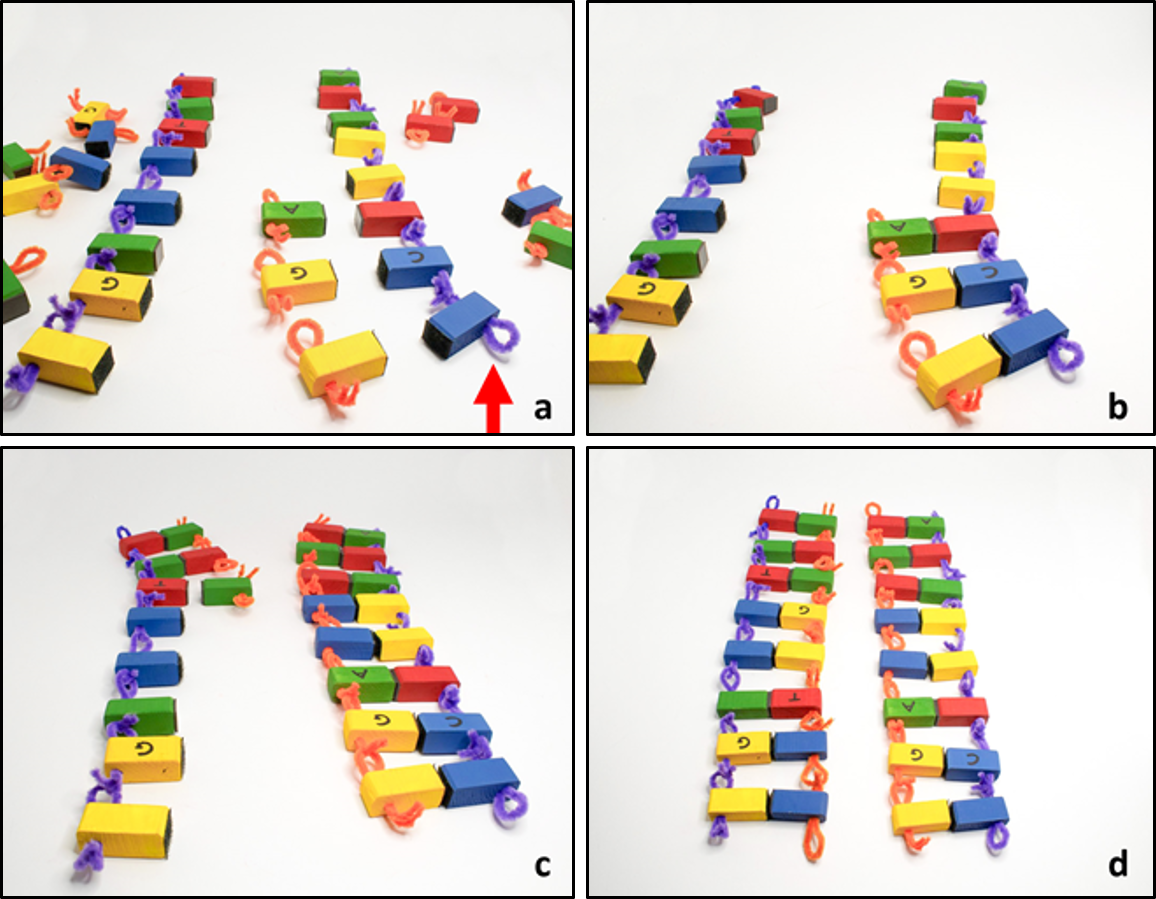
As in the previous activity, the teacher takes the concept of DNA duplication and poses a set of questions (you can use the Activity 2 question sheet):
Example answers can be found on the Activity 2 answer sheet or the question cards. These questions should help the students reflect on the process, starting from the manual experience and trying to describe what they discovered.
What are models and what are their advantages and disadvantages? Students can then discuss this model and its accuracy.
What properties of DNA does this model highlight? Are there some properties of DNA that this model doesn’t reflect well? For example, the size difference between purine and pyrimidine bases; the relative sizes of the nucleobase, ribose sugar, and phosphate group; the fact that the model shows the nucleobase sitting between the sugar and the phosphate group (rather than attached only to the sugar); or the angle of attachment of the nucleobase to the sugar (which has implications for the double-helix structure: it creates the major and minor grooves).
These activities give students a chance to explore some of the key properties of DNA in a hands-on way. They also provide an opportunity to reflect on scientific models and how they are used, which is relevant across curriculum topics.
Permanent, not paper-based, DNA models are often expensive and can be limited in how many students can make use of them at any one time.
With the simple building blocks proposed here, models can be built by several groups of students at the same time and either kept or taken apart for future use by more students.
Students of any age mostly enjoy making models and these activities could lead to greater understanding of the complex DNA molecule as well as the opportunity to question the ways in which the model works well and the ways in which it is not a good model.
If the activity is used, as suggested, with 11-14 years olds, then once built, their models could be kept for a short while and used by older students to critique. The younger students might like that they have created a teaching aid for older students and the older students would benefit from revising their knowledge of DNA structure as well as practising their ability to consider the advantages and disadvantages of a model in science.
So, if you can find obliging parents or guardians or adult volunteers to make the simple blocks with a hole in, do give them the instructions provided and look forward to a new resource for your classroom that can have multiple uses.
Sue Howarth, Science Education Lecturer, UK.
Play the part: students take on the roles of different components of a synapse to act out synaptic transmission and learn about neurobiology.
We all know that DNA → RNA → protein. But did you know that some genes don't encode proteins but rather RNAs with important cellular functions?
Discover simple adaptations to apparatus and experiments that make practical chemistry more accessible to students with vision impairment.