Supporting materials
Microscale electrolysis apparatus (PDF)
Download
Download this article as a PDF

Enhance your students’ knowledge of electrolysis using quick, safe, and easy microscale chemistry techniques.
Electrolysis is a process that is fundamental for extracting relatively reactive metals, such as aluminium, lithium, and magnesium. Chlorine and sodium hydroxide, used in fighting viruses and bacteria, are made by the chloralkali process, which involves the electrolysis of aqueous sodium chloride.
When teaching conductivity and electrolysis, microscale techniques are very rewarding due to the speed at which students can work, and they allow the teacher to challenge the misconceptions in understanding that arise.
The conductivity meter is a simple device that allows students to investigate the conductivity of a range of solid materials (such as copper and glass) and compounds in different states (such as solid sodium chloride and sodium chloride solution). This device, which is a variation of the CLEAPSS conductivity indicator GL16609(1), was originally developed by Matthias Ducci at the Pädagogische Hochschule Karlsruhe . A class set of these devices can be made by the teacher or technician, although students can also make these as part of the classroom activity or in science clubs. They can made in under 30 minutes.
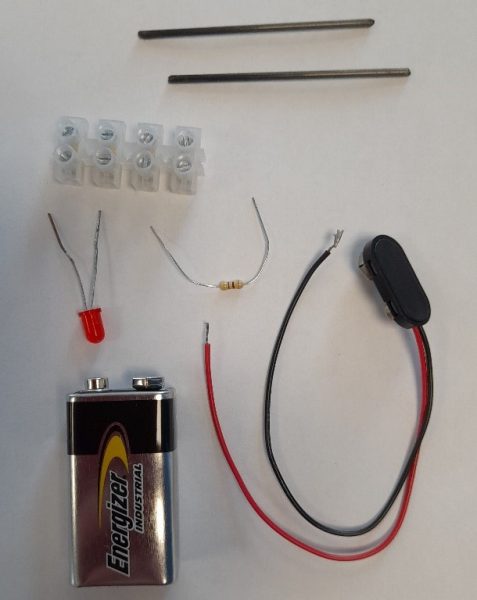
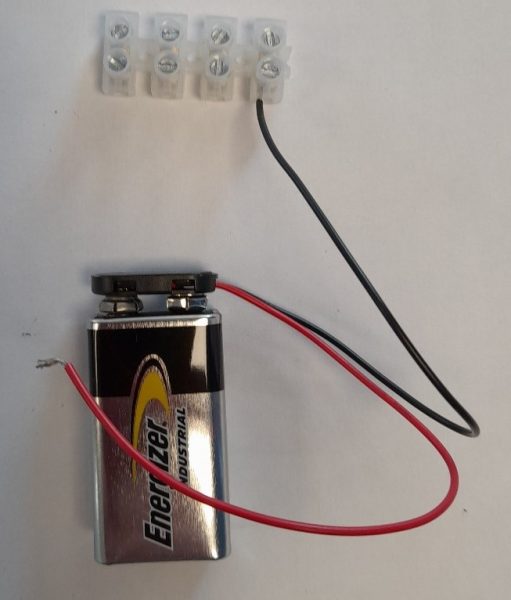
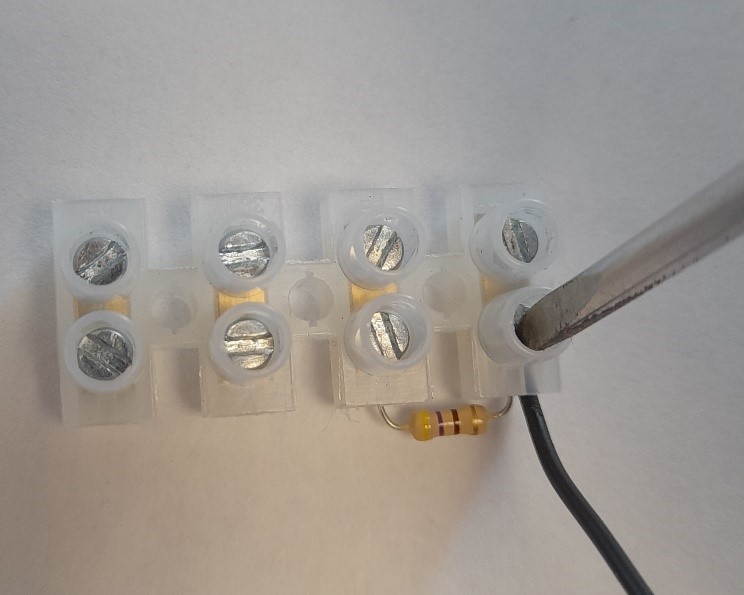
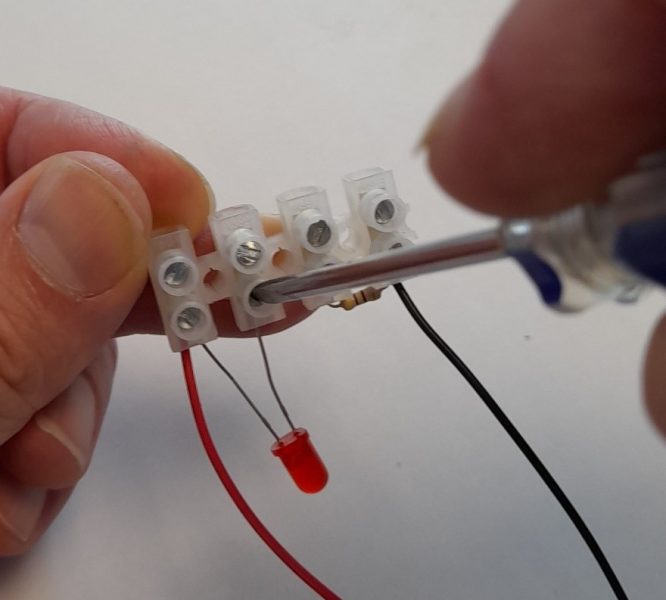
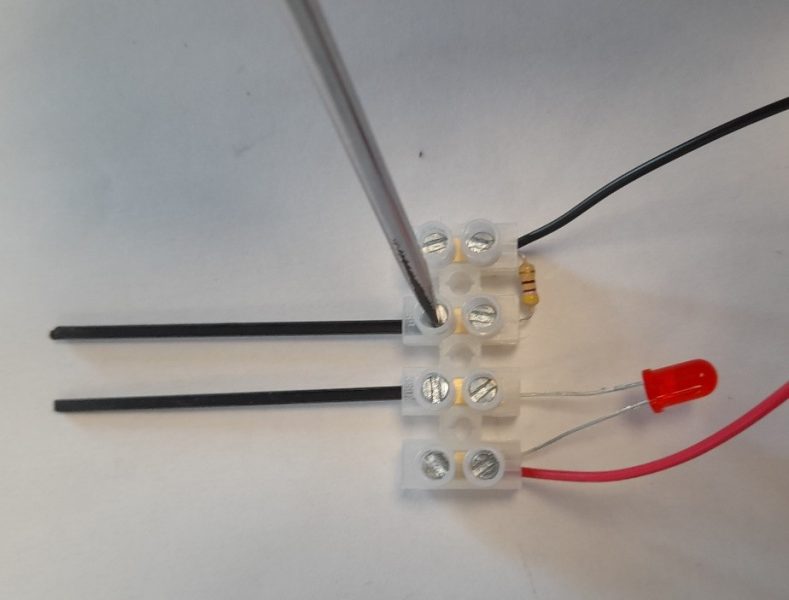
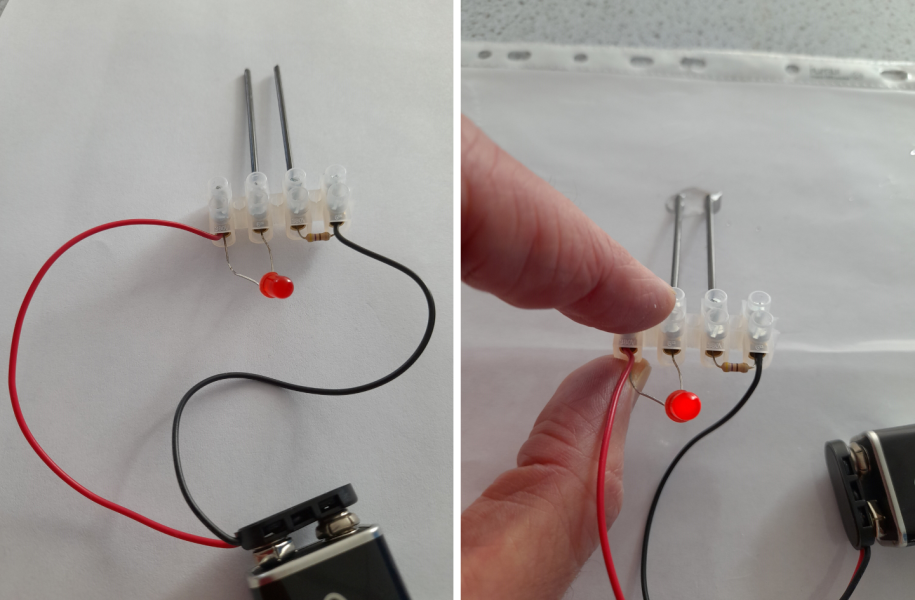
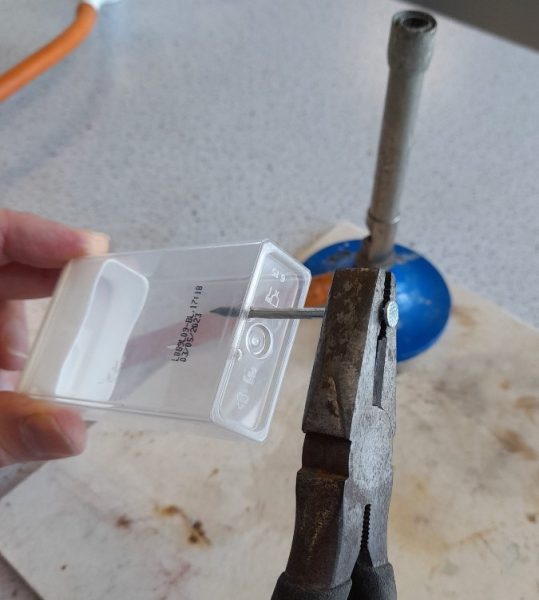
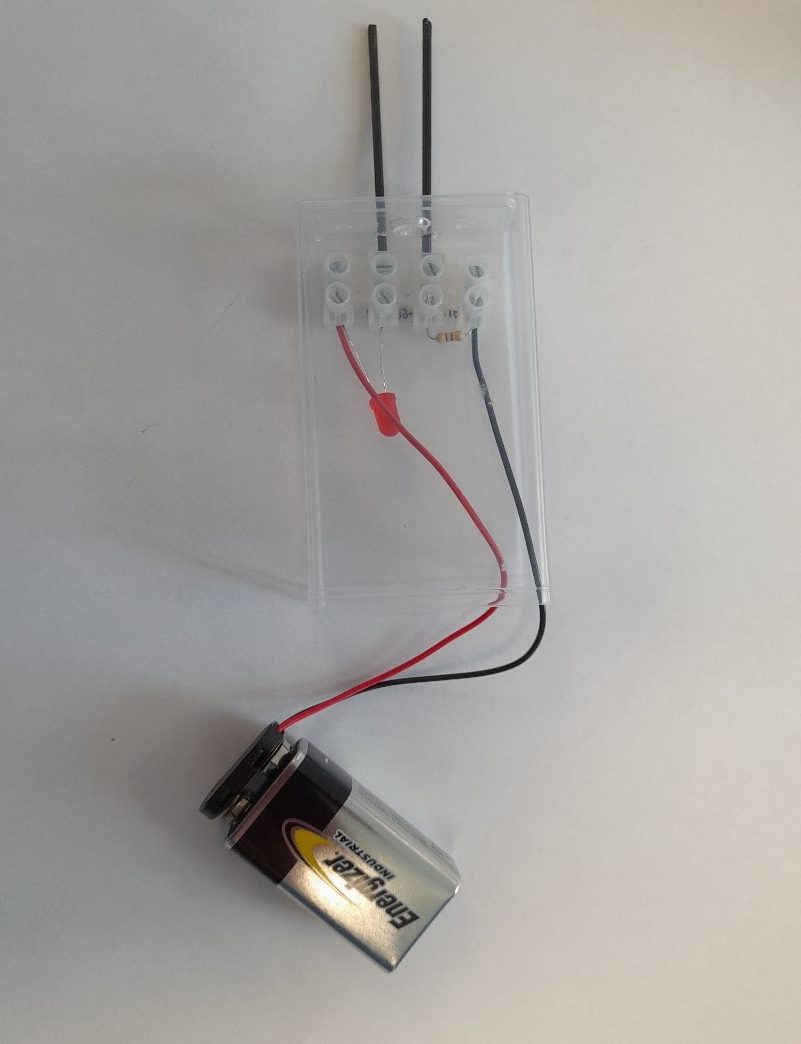
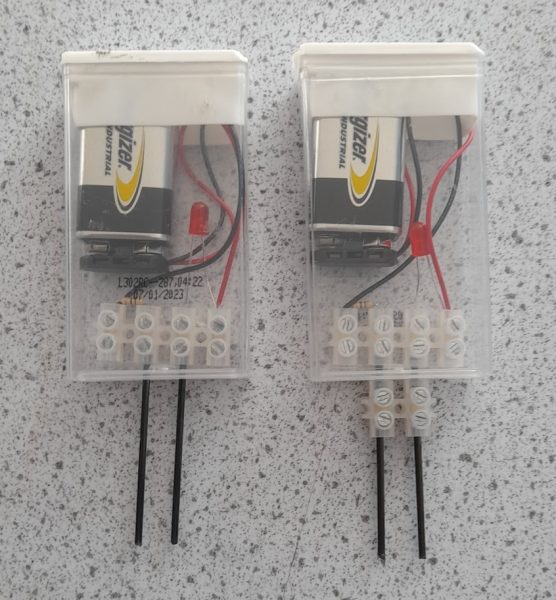
The full assembly process can observed be in this video:
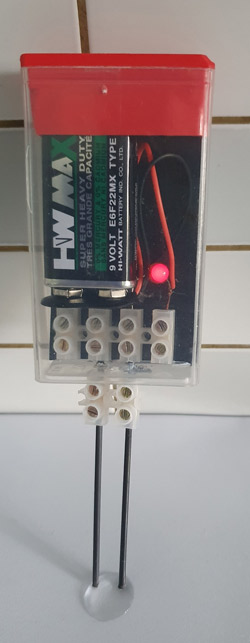
If you put black card/paper behind the LED, you can see the light better.
The carbon fibre rods (2 mm in diameter) are easily (and often less expensive than graphite rods) available from online suppliers. The carbon fibre rods are used for frames in kites and model aircraft, as they are extremely strong and ‘snippers’ are required to cut them.
Metals and alloys, such as copper, iron (paper clips), zinc wire, aluminium wire, and nichrome wire, can also be used as electrodes; however, the products are often different. For instance, copper sulfate solution with copper electrodes results in copper at the positive electrode dissolving, and copper being deposited at the negative electrode. If carbon electrodes are used, carbon dioxide is produced at the positive electrode. At the negative electrode, copper is deposited and hydrogen gas begins to appear, as the concentration of copper ions decreases.
The conductivity of solutions allows discussions with students on topics such as the presence of ions in solution, the production of useful chemicals, and electroplating. This activity teaches students that, for solutions to conduct, ions must be present. It illustrates important concepts relating to atomic structure, ion formation, and ionic and covalent bonding.
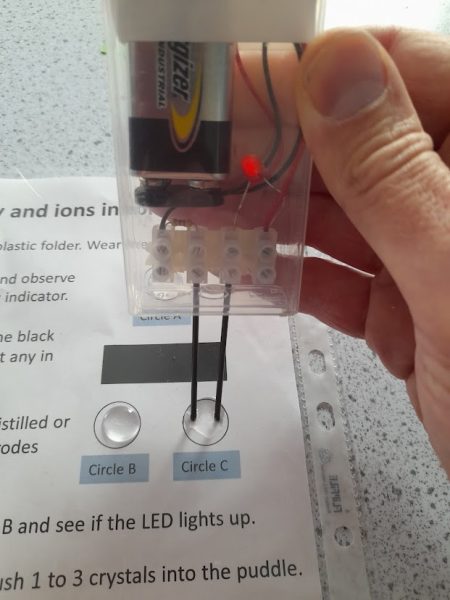
Discuss the following questions with your students:
When sodium chloride crystals dissolve in the water drop, the ions are free to move, diffusing through the liquid. As the ions encounter the electrodes, the circuit is complete, as shown by the LED lighting up. Therefore, the conductivity meter is detecting the presence of ions in solution. Tap water will contain a small amount of ions that will cause an LED to light up, unlike distilled water. White sugar is composed of sucrose, a covalent molecular compound, and will not produce ions when dissolved in water, giving little signal on the LED. Soft brown sugar (molasses) contains impurities that will form ions in water, giving a brighter signal on the LED. In some cases, brown sugar may show no signal, which may suggest that the sugar has a food dye added.
Although this piece of apparatus is commonly known as a conductivity meter, it can also be described as an ion detector. Any solution that contains ions will conduct electricity; therefore, it is not a good idea to swim in the sea during a thunderstorm or use a hairdryer in the bath!
Place some potassium manganate(VII) crystals at the edge of a puddle of distilled water.
Caution: potassium manganate is a harmful oxidizer.
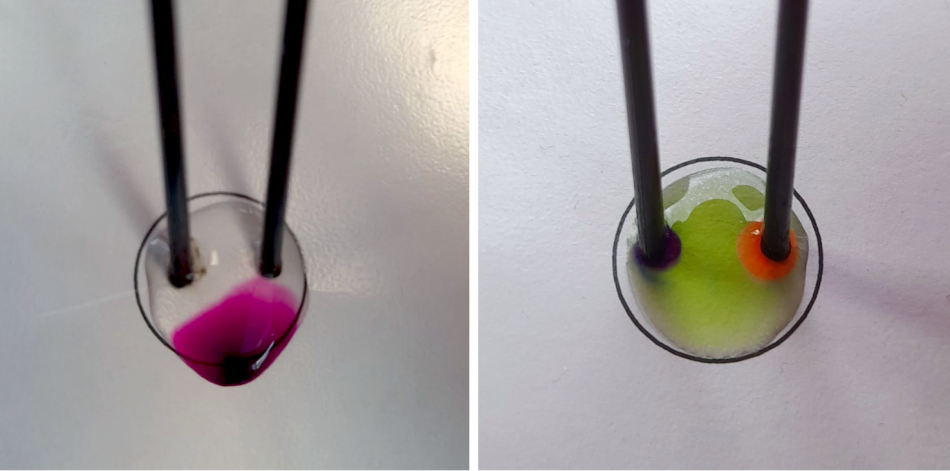
As the purple colour diffuses, insert the electrodes into the drop and observe. The purple colour moves towards the positive electrode due to the negative charge of manganate(VII) ions (MnO4−). This can also be done with copper sulfate crystals in a drop of 2 M ammonia; copper metal appears at the positive electrode. Other salts can also be tried.
Alternatively, add universal indicator to a puddle of water and insert the electrodes. Keep them still for a minute and remove carefully. There will be an orangey red acidic area around the positive electrode and a blueish–purple alkaline area around the negative electrode. This is caused by electrolysis on the electrode surface.
Safety becomes an issue when copper chloride salts are electrolyzed to chlorine. In the UK, the electrolysis of copper(II) chloride was promoted by exam specification because the solution conveniently produces copper and chlorine at the electrodes. The toxic nature of chlorine sent students to hospital with breathing difficulties. The use of a Petri dish in the apparatus can limit the volume of chlorine produced to 6 cm3 of gas, which is enough to be identified by bleaching and oxidising reactions. Full instructions for construction of the microscale electrolysis apparatus are given in the supplemental material.
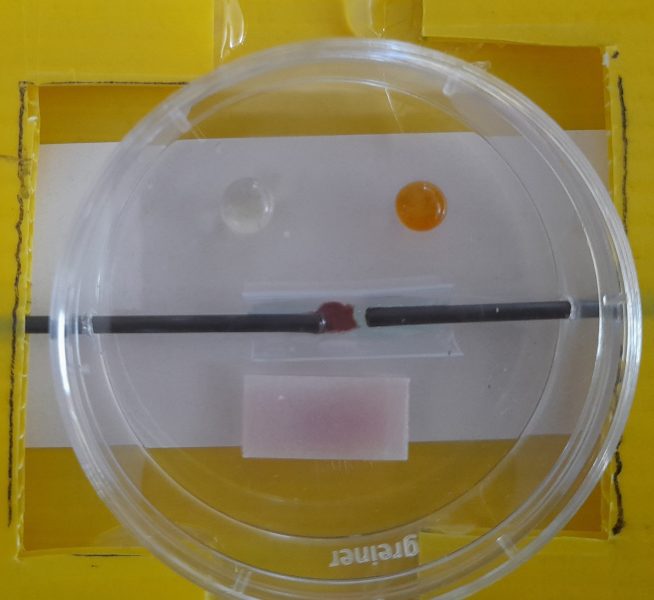
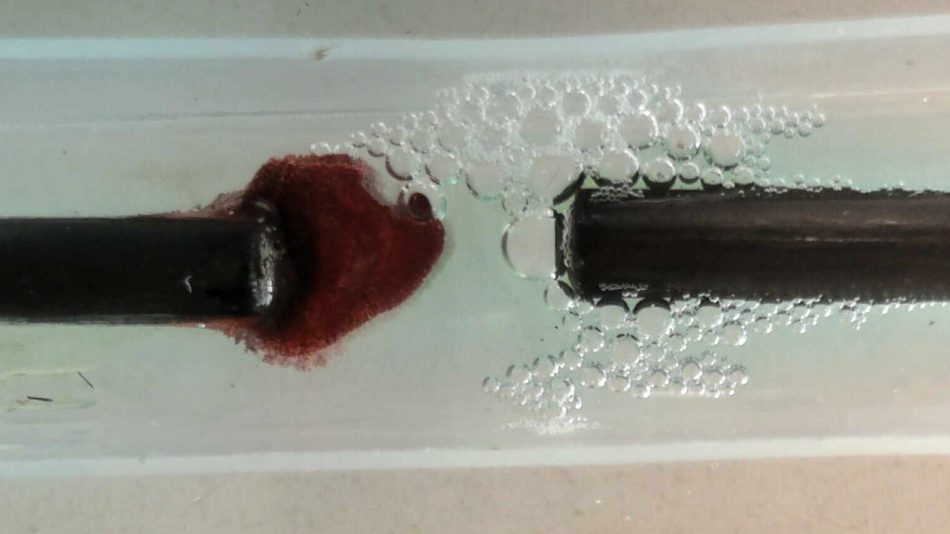
If copper(II) chloride is electrolyzed, brown copper is observed to form at the negative electrode, and chlorine can be seen as bubbles at the positive electrode, and faintly smelled.
Electrolysis can be a tricky concept that is not as straightforward as textbooks would have you believe, and simplification can often mask what is going on. These are points to consider when performing these activities with students:
1. It is not only the ionic salt that can take part in redox reactions at the electrodes; the solvent may react too.
2. Unlike inert platinum electrodes, the carbon electrodes themselves can enter into the reactions, particularly at the positive electrode.
3. There are often competing reactions occurring so that a mixture of products form at each electrode.
4. The products often depend on the concentration of the salt in the solvent.
[1] Andre C (2016) Chemie? Aber sicher! Experimente kennen und können! Akademie für Lehrerfortbildung und Personalführung (ALP), Dillingen. https://www.deutsche-digitale-bibliothek.de/item/IWYNTP6YBCLOMKKRJBVUFEALZ2DRJMQO
[2] Worley B, Paterson D (2021) Understanding chemistry through microscale practical work p 70. Association for Science Education. ISBN: 9780863574788
At Wellington College, our students have used microscale chemistry as part of our Individual Investigations for the IB course and this is another example that lends itself to creating new areas to investigate by making the Microscale Conductivity Meter. I am not surprised to see Bob Worley as one of the authors, from my perspective he is the Godfather of microscale chemistry and he has had a major impact on the accessibility of experiments within a range of schools. The content within this article allows teachers and students to be creative, to challenge their understanding of ions/bonding whilst also ironing out any misconceptions that exist within the electrolysis/bonding topics. There are endless discussions that can be drawn from these experiments which could include anything from ‘what is electrolysis?’ to the chemistry behind manganese. I am excited to put these experiments to the test next academic year and appreciate the level of detail the authors have provided to make it possible.
Caroline Evans, Head of Chemistry, Wellington College, UK
Microscale electrolysis apparatus (PDF)
Download this article as a PDF