Supporting materials
Pictures of the metal objects to use for the activity (PDF file)
Download
Download this article as a PDF

Evolutionary relationships can be tricky to explain. By using simple, everyday objects, your students can work them out for themselves.
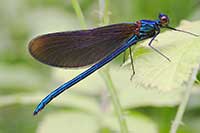
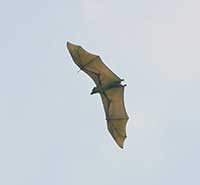
Birds, bats and insects all have wings; horses, millipedes and crocodiles all have legs. Many unrelated species can be grouped by physical similarities – that is one of the problems with studying morphological phenotype to determine evolutionary relationships. Convergent evolution can result in apparently similar structures.
Although the end product may be the same (e.g. the presence of wings), the starting points can be very different. Some organisms that may appear similar and hence related are actually widely separated from each other in the evolutionary tree.
At a molecular level, DNA and protein studies can be used to produce a family tree by looking at the differences between homologous sequences: sequences that are thought to have evolved from a common ancestor. Kozlowski (2010) describes an excellent activity to demonstrate this in a classroom, but there is a sense of being removed from the study – the data required is simply downloaded and used. This article provides a complementary, more hand-on introduction to evolutionary studies, in which the students gather all the necessary data themselves before considering the underlying principles.
In this classroom activity, your students can use a wide range of objects to create an artificial phylogeny based on morphology. The family tree that they produce will be artificial in the sense that the objects used have not actually evolved from each other.
However, the problems faced and the questions posed are similar to those addressed by palaeontologists using specimens of fossils, or by entomologists using specimens of dead insects in museum cabinets.
The activity, which takes approximately 30 minutes, is suitable for a wide range of students, from the age of about 15 up to postgraduate level. It allows students to:
There are four guiding principles used to produce an evolutionary tree based on morphology:
One version of this activity uses metal objects such as nails, screws, staples, paperclips and drawing pins. The greater the number of objects used, the longer the activity will take.
As a guide, it will take the students around 15 minutes to sort out the evolutionary relationships and 10-15 minutes for feedback and discussion. The time required could be shortened by using fewer objects or using printouts instead of real objects – although it is more fun to handle real objects.
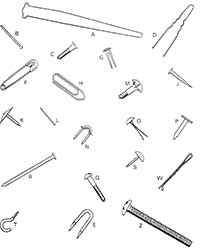
For each group, you will need one example each of some or all of the following metal objects (figure 1). Alternatively, you can use printouts of the objects (you can download the instructions for this activity from the Science in School website).
Note, however, that it is not essential that the objects are exactly the size stated.
Some lines of evolution seem very obvious whereas other specimens will be quite difficult to place. Some may fit in several positions.
All the evolutionary series considered so far basically have a straight shaft and a single axis (exceptions are G and O where the shaft is double; T, which has a curved head, is another highly divergent type). We could say that all these forms are members of a single order – Orthos (from the Greek for ‘straight’) or some similar name. The rest of the objects are bent in various ways – Sinuos (from the Latin for ‘curve’) or some similar name. Of the curved objects, the simplest form is probably E so this is likely to be nearest to the common ancestor.
Within each ‘order’, there are several divergent lines. Series showing increases in size are common in the Orthos group; they also show variety in the development of the head and of the shaft, both independently and together. The Sinuos group shows variety in the bending of the two shafts; they generally lack heads – which may make it more probable that G and O are Orthos and not Sinuos.
Your students may have thought out quite a different series of evolutionary lines but as long as they can justify them using the four general principles, then each series is just as credible. If the objects were extant organisms, then there would be other possible lines of argument – such as studies of their molecular characteristics or of their embryology – which might support some hypotheses while discounting others and so indicate more precisely the probable evolutionary series.
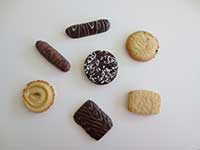
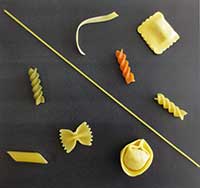
This type of activity can also be carried out with a range of other objects, for example biscuits or dried pasta. These materials can introduce another variable – that of colour. Do the colour differences represent camouflage, for example, or sexual dimorphism?
For a simple, 20-minute activity, a small group of objects can be used to represent the problems sometimes faced by palaeontologists. New specimens can be introduced as if they were recently discovered fossils. How can these new finds be accommodated in the tree?
Once your students have completed their trees, it is useful for them to assess each other’s work. For example, they could ask:
Have any groups of students produced identical trees? Can each group justify their reasons for choosing particular evolutionary pathways? This could lead to a discussion of why it is very difficult to generate an undisputed ‘correct’ tree. The students can then start to appreciate the depth and range of expertise that is required by an evolutionary biologist.
Next, tell your students that the pasta shapes (or biscuits) are made from a range of primary ingredients (wheat, rye and corn) and that if they were to look at the chemical composition of each shape, they would get a very different set of trees. The students normally make the link to DNA. For 15- to 16-year olds, it is sufficient to say that some species have similar DNA even though they look different. For older students (16+), convergent and divergent evolution can be discussed in more detail.
An extension activity for older students could be a discussion of the difficulties associated with extracting uncontaminated DNA from ancient samples (see, for example, Hayes, 2011).
A further extension activity could be to introduce the molecular phylogeny activity described in Kozlowski (2010).
The activity using metal objects was originally developed by the Open University’s Science Course Foundation Course Team for the S100 Course, Unit 21 ‘Unity and diversity’, Study Guide. This version has been adapted from Barker (1984).
Evolution is a tricky concept to understand. This article describes an unusual but simple classroom activity, using cheap and easily available materials to teach some of the most basic principles of evolution. More specifically, through the use of evolutionary trees, students can investigate the phenomena of divergence, convergence and parallel evolution. It’s also fun!
Michalis Hadjimarcou, Cyprus
Pictures of the metal objects to use for the activity (PDF file)
Download this article as a PDF