Supporting materials
Instructions for building a rocket launcher (Word document)
Instructions for building a rocket launcher (PDF file)
Download
Download this article as a PDF

Ever wanted to launch a rocket? Jan-Erik Rønningen, Frida Vestnes, Rohan Sheth and Maria Råken from the European Space Camp explain how.
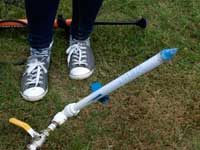
Space science is a fascinating field of study, whether at school or, in our case, at the one-week European Space Camp in Norway (see box). One hands-on aspect that can be easily introduced in the classroom is rocketry.
Paper rockets are small and relatively simple to construct, and can achieve flight distances of 50 metres or more, enabling students to compete in terms of either height or distance, depending on the space available. Students can also be creative, designing visually appealing rockets or using different types of material. Making a paper rocket is the perfect way to have fun and learn plenty of physics at the same time. Here, we describe a simple rocket that we built and launched during the 2011 European Space Camp.
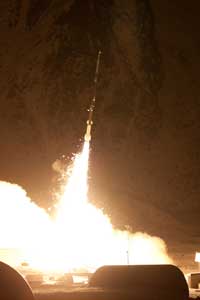
Building paper rockets enables students to tie together many different concepts in physics – in particular, the equations of motion linking velocity, acceleration, distance and time, as well as the principles of aerodynamics. It also provides an exciting introduction to what it is like to be a scientist: designing a rocket from theoretical principles, carrying out an experiment by launching rockets, and finally analysing the results, drawing conclusions and identifying points for improvement for the future.
The aim when building the rocket is to minimise drag (air resistance). Drag is mostly dependent on the velocity, but also on the frontal surface area of the rocket and its overall shape – important considerations when designing a rocket.
Rocket body:
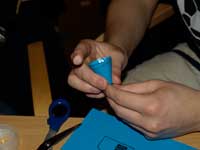
Nosecone:
Fins:
The stability of a rocket depends on where the centre of gravity and the centre of pressure are in relation to each other. For a stable rocket, the centre of gravity should be in front of the centre of pressure at all times. Simply put, the centre of pressure is where the sum of all drag forces acts.
If the centre of pressure is in front of the centre of gravity, a turning moment will occur, causing the rocket to flip over in mid-flight. This is why ballast is usually applied to the nosecone.
If the relative distance between the centre of gravity and centre of pressure is too large, either because too much mass has been applied to the front of the rocket or because the fins are oversized, the rocket will be more sensitive to wind.
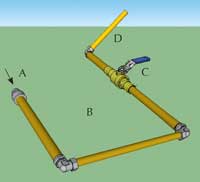
To launch the rocket, you will need a launcher, which for safety reasons should be built by the teacher. There are many types of launcher, but all are essentially a stable tube with the same three constituents.
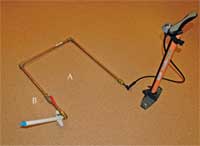
We would recommend building a robust launcher out of metal piping, with an adjustable launch tube. This allows reproducible launches, with different angles of elevation. At the European Space Camp, we used a launching system in which air was pumped into a copper pipe system using a low-cost air compressor, a robust and stable system that can be used over and over again. For downloadable instructions, see beloww1. A robust launcher can also be built out of PVC, using materials readily available from hardware shops, as described on the NASA websitew2.
When launching your rocket, note that higher air pressure does not necessary lead to better flight performances. This is because aerodynamic drag on the rocket increases with velocity: the rocket’s fins may be distorted, increasing drag and reducing performance.
Before deciding on the angle at which to launch their rocket, the students should think about how the angle of elevation affects the total distance travelled and the rocket’s apogee (its highest point above the ground).
Safety is important when launching rockets. Students should wear safety glasses and stand behind the launcher at all times to avoid being hit by the paper rockets. When using a compressor for the launcher, be sure not to exceed the pressure limit, which could cause parts of the launcher to fall apart or even rupture. The exact limit will depend on the materials you use: the copper launcher we built at the European Space Campw1 could withstand more than 8.3 bar (120 psi) of pressure; the NASA PVC launcherw2 is limited to 2.0 bar (30 psi).
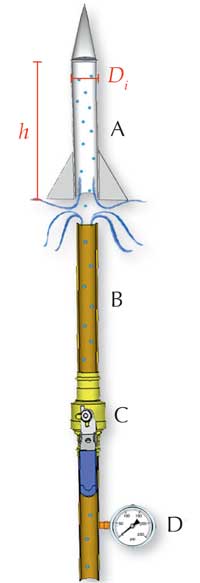
After the launch, the students can analyse the rocket’s trajectory to calculate the maximum height (apogee) attained by the rocket and also its initial velocity. To perform the trajectory analysis, some measurements need to be taken before the launch (see Figure 2):


The rocket’s initial velocity (ν0) can now be expressed in terms of known variables, by inserting the expressions for the time t0 (Equation 6) and the acceleration a (Equation 4) into the equation for the initial velocity (Equation 1):

We assume that the rocket has a parabolic flight path, and this allows us to calculate the equation for the trajectory of the rocket.
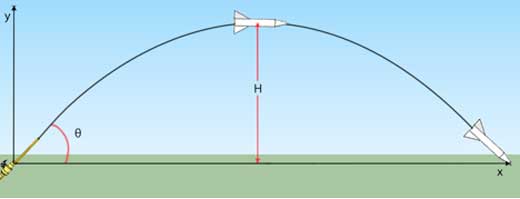

where g is the gravitational constant.


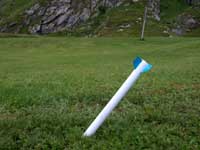
Each rocket will probably be able to be launched only once, as the nosecones are usually damaged on landing. However, if the rockets are still intact, the students can carry out repeat experiments and perhaps vary the launch angle.
On the basis of their results, the students could discuss the following questions:
The European Space Camp focuses on topics important in the space industry, motivating and inspiring young students by showing them how theoretical ideas can be put into practice.
During the one-week camp at the Andøya Rocket Range in Norway, the northernmost permanent launch facility in the world, 24 students aged 17-20 are treated as real rocket scientists, using professional equipment and solving advanced problems in international teams.
Each team addresses a different aspect of rocketry such as system design, experimental instrumentation, payload assembly or telemetry, all working towards the launch of a ‘sounding rocket’ to carry instruments. Participants also receive lectures from some of Europe’s best scientists, on topics ranging from rocket physics to the Northern Lights. Some of the lectures are supplemented by fascinating hands-on activities, such as building the paper rocket described in this article.
Students interested in applying to participate in the 2012 camp (24 June – 2 July 2012) should visit the websitew3 or email contact@spacecamp.no.
Building and launching rockets is definitely a unique experience that students can enjoy with their peers. It is one way of merging old and contemporary science, as it applies standard equations and theories to advanced techniques used for space exploration.
The activity described in the article would definitely create excitement among school students, most of whom would try their best to build the best possible rocket. Before attempting to build their rocket, they should explore and discuss how the shape, dimensions and materials used will affect the range, apogee and time of travel of the rocket. After the activity, a new dimension of discussion, re-modelling and evaluation can be explored, with students discussing their individual results with the whole class and seeing which methods and models worked better and why. Furthermore, they can try to improve their model and re-test their hypotheses.
Some topics, not all of them scientific, can be discussed with the class, before or after the activity, including:
This activity involves a wide range of physics topics ideal for ages 13-16, and also involves physics concepts, equations and mathematics suitable for students aged 16+. The teachers can adapt the calculations involved according to the level of their class. The topics involved are gravitation and escape velocity; stability and centre of gravity; projectile motion; air resistance in relation to mass and shape of rocket; conservation of momentum and energy during launching; and material properties.
Catherine Cutajar, Malta