Microwave experiments at school Teach article
Halina Stanley introduces a number of spectacular classroom experiments using microwaves.
As reported in this issue of Science in School (Stanley, 2009), Israeli scientists have been using microwaves to drill holes into glass and ceramics, and to produce plasma balls. Microwave ovens are a useful resource for teachers as well as scientists. Here is a collection of fun microwave experiments that are suitable for the classroom.
Plasma balls

/ iStockphoto
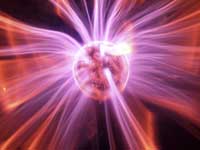
Using a microwave oven, you can create balls of plasmaw1 at school from nanoparticles of soot. Dr Chris Schrempp, who teaches at a Californian high school, has been doing this in class for some time. He says, “This is a great demonstration that is always a sure hit with students of any level. Although the owner of the participating microwave, if present, will be absolutely sure that the appliance will be a total loss after the demonstration, it should remain surprisingly undamaged.”
Materials
- A small heatproof glass bowl
- A short wooden splint or toothpick (3-5 cm long)
- A cork
- 50 ml laboratory beakers (or other similarly sized microwavable objects)
Procedure
- Remove the turntable from the microwave and cover or remove the light.
- Stick the wooden splint or toothpick into the cork.
- Support a small heatproof glass bowl upside-down in the centre of the microwave using a circle of beakers. The bowl should be raised high enough that the toothpick stuck in the cork can be placed beneath it.
- Pre-program the microwave for 30 seconds at full power and turn off the lights in the room.
- Light the splint and put it into the microwave under the glass bowl.
- Close the door and turn the microwave on.
The plasma usually forms in about 10 seconds. Schrempp says, “It will make a horrific noise, sounding as though the microwave is frying from he inside out.” If a plasma ball does not form in this time, stop the microwave, relight the splint and start again.
Safety note:
The microwave should only be allowed to run for about 20-30 seconds, otherwise the glassware might overheat and break. Be sure not to let the toothpick burn right down and set fire to the cork.
The inverted glass bowl serves to contain the plasma so that it can be viewed through the window easily. The demo can be performed without the bowl, but the fireball will then rise to the top of the microwave, so you have to bend down and look up into the window to see it.
The only negative effect of the demonstration is a smoky smell in the microwave. Schrempp says he has never had any real damage to the oven, just some sooty marks, but suggests that an older oven be used just in case.
Schrempp’s demonstration of this and lots of other dramatic experiments can be seen on the Exploscience websitew2.
Plasma balls can also be created using grapes, as described in Schrempp’s e-book Bangs, Flashes, and Explosions – An Illustrated Guide of Chemistry Demonstrationsw3:
- Cut a grape almost completely in half along its length, retaining a small piece of the skin on one side to keep the two halves connected.
- Place the grape on a dish, cut side up, and put it into the microwave.
- When the oven is turned on, plasma will be emitted from the section of skin connecting the two halves.
A video of the grape plasma can also be found onlinew4.

Soap sculpture
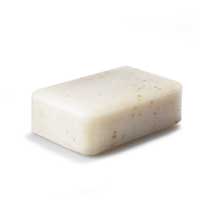
When microwaved on full power for about a minute, a bar of soap grows into a strange volcanic lava, or something that looks like horrible fungus. The deformation is caused by tiny pockets of water in the soap vaporising, or by air in the soap expanding as it heats up.
The soap sculpture may leave the microwave oven (and the classroom) smelling quite strongly, so try to find non-perfumed soap and avoid doing this in a microwave that is used to prepare food.
This demonstration has the added benefit that the teacher can leave the microwaved soap lying around the science preparation lab at school to worry colleagues, or the students can take it home to perturb members of their family.
This and other experiments can be found on the physics.org websitew5.
Eggy explosions
If demonstrations are good, explosions are unforgettable. My children will never let me forget the night my son’s boiled egg had a rather runny white and I said, “a few seconds in the microwave will just finish it off nicely”! A hen’s egg, even with the top cut off, will explode dramatically when heated in a microwave. You can try it in a lesson, but only if you’re prepared to clean the inside of the microwave afterwards!
A US TV programme, Brainiac Science Abuse, has taken this experiment to the logical limit by microwaving an ostrich egg. This is probably not an experiment that you will want (or be able) to do yourself, but there are many versions of it on YouTubew6. I strongly suspect that the experiment was rigged in some way (they call it science abuse), but you could use the video to wake up any class.

/ iStockphoto
Light bulbs
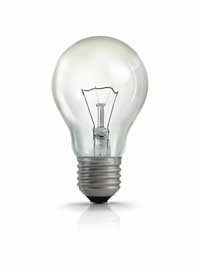
Another classic demonstration is to put a light bulb in a microwave oven. An incandescent light bulb (whether or not it is still functional) will light up when irradiated with microwaves, provided the glass is intact. Depending on the type of bulb, you can get different colours. Remember that the bulb will heat up very quickly; 10 seconds is probably long enough before allowing it to cool down again.
Fluorescent tubes will also light up, and the effect can be used to test for microwave leakage around the doors of microwave ovens. Switch on the microwave and hold a fluorescent tube against the edges of the oven door. If the microwave leaks, it will make the bulb glow. (Switch off the lights in the room so that you can see the glow.) This works much better if the oven is empty, but if you’re testing an older (pre-1980s) oven, you might want to include a glass of water. Note that this method only shows the larger leaks.
This and other facts, myths and experiments about or with microwaves are collected on William Beaty’s websitew7.
Measure the speed of light with bread and margarine
The ‘naked scientists’ Chris Smith and Dave Ansell describe a very nice demonstration using standing waves to calculate the speed of light microwaves in their book Crisp Packet Fireworks and on their websitew8, where you will also find further microwave and other experiments.
Having been taught all about the really difficult historical experiments to measure the speed of light, students think it is great to use this easy method. The only drawback of this demonstration is a rather strong smell of toast. This experiment can also be used to reinforce the notion that all waves in the electromagnetic spectrum travel at the speed of light.
Materials
- A plate (and possibly a bowl)
- Four pieces of toast
- Margarine
- A buttering knife
- A ruler
Procedure
- Remove the turntable from the microwave.
- Arrange four pieces of toast in a square shape on a plate.
- Cover them completely with margarine, making sure to include the joints where the pieces meet.
- You need to ensure the plate won’t turn when you switch on the microwave. If there is a central pillar supporting the turntable, you may cover it with a bowl turned upside down and balance the plate on top of it.
- Switch on the microwave at full power for 15 – 20 seconds until the margarine just begins to melt. Powerful microwaves may need less time, so check every 5 seconds. Be very careful not to microwave for too long.
- You should see a series of parallel melted patches or lines separated by unmelted patches. Take out the plate.
- Measure the distance in centimetres between two of these patches with a ruler. Multiply by two and note down the value: this is the wavelength of the microwaves produced by your oven – it should be around 12–12.5 cm.
- Now you need to find out the frequency of the microwaves. You should be able to find it on a sticker, usually at the back or door lip of the microwave. If you can’t find the specific value of your microwave, use 2450 MHz (2.45 GHz) as a standard value.
- Multiply the wavelength (about 12 cm) by the frequency. If you are using MHz, you’ll need to multiply the result by one million, with GHz by one billion.
- The result will be the speed of light in centimetres per second. Divide it by 100 to convert it to metres per second. Your answer should be about 300 million metres per second.
Light, including microwaves, is a wave consisting of a series of peaks and troughs. The wavelength is the distance from one peak or trough to the next. The frequency is the number of waves per second. To know how fast a wave is travelling, you need both values.
A microwave oven produces waves on one side of the oven, which are reflected on the opposite side and return to where they started. The reflected waves will encounter the original waves, cancelling each other out in some places, while adding up in others: the waves bouncing about in the oven interfere with each other, creating a standing wave with positions of high amplitude (antinodes) where there will be strong heating, and positions where the amplitude is close to zero (nodes) where there will be little heating. The distance between two hot spots is half a wavelength – the distance from one antinode to the next. In these hot spots, the margarine will melt first.
References
- Stanley H (2009) Plasma balls: creating the 4th state of matter with microwaves. Science in School 12: 24-29. www.scienceinschool.org/2009/issue12/fireballs
- Smith C, Ansell D (2008) Crisp Packet Fireworks. London, UK: New Holland Publishers
Web References
- w1 – To learn more about plasma, see:
- The Internet Plasma Physics Education Experience website: http://ippex.pppl.gov/fusion/fusion3.htm
- The glossary on the Southwest Research Institute website: http://pluto.space.swri.edu/image/glossary/plasma.html
- The Fusion Energy Division of the Oak Ridge National Laboratory: www.ornl.gov/sci/fed/Theory/tt/ttmcp/plasma.htm
- The FusEdWeb (fusion energy education) website: http://fusedweb.llnl.gov/cpep/Chart_Pages/5.Plasma4StateMatter.html
- w2 – The Exploscience website has many videos of dramatic experiments: www.exploscience.com/ChemTV_Page_5.html
- w3 – Chris Schrempp’s e-book, Bangs, Flashes, and Explosions – An Illustrated Guide of Chemistry Demonstrations, a manual with over 170 chemistry demonstrations and activities, can be ordered here: http://exploscience.com/Book.html
- w4 – The grape plasma can also be seen on the Naked Scientists website (www.thenakedscientists.com) or here: http://tinyurl.com/mklx73
- w5 – The physics.org website has many fun experiments and games: www.physics.org/interact-wide-template.asp
- w6 – For a dramatic demonstration of microwaving an ostrich egg, see: http://www.youtube.com/watch?v=Wgy1Yhgk_BY
- w7 – William Beaty’s ‘Unwise microwave oven experiments: high voltage in the kitchen’ website contains facts, myths and experiments about or with microwaves: http://amasci.com/weird/microwave/voltage3.html
- w8 – You can find the margarine experiment, and much more, on the Naked Scientists website (www.thenakedscientists.com) or here: http://tinyurl.com/lhdk7r
Resources
- The UK’s Institute of Physics describes a number of experiments involving microwaves on its website: www.iop.org/activity/education/Projects
- Mobile phones transmit and receive using microwave radiation – either 900 MHz or 1800 MHz – similar to the frequency of the radiation in a microwave oven (2450 MHz). The UK’s Science Enhancement Programme has some very useful documents on radiation in the environment, including background information and student activities. See: www.sep.org.uk/teacher/view_resource.asp?resource_id=20


