Supporting materials
Activity 1 Calculation details
Activity 2 Calculation details
Download
Download this article as a PDF


Learn how to do quantitative chemistry using microscale techniques with bottle tops and inexpensive spirit burners that are relatively easy and quick to set up.
Quantitative chemistry using gravimetric analysis gives students the opportunity to experience chemical reactions, observe chemical changes, and use measurements of masses to determine the formula of a compound. This can be done using a combustion reaction, which results in a gain of mass (such as the reaction of magnesium with oxygen), or removing the water from a hydrated salt by heating, which results in a loss of mass.[1] These microscale practical activities are relatively simple and quick to do and can help students focus on the chemistry and reduce the load on working memory. Despite the small masses involved, the data generated from microscale experiments shows equivalent or better results than those obtained with traditional equipment, although a comparison of techniques is a useful exercise in error analysis. The advent of inexpensive, robust digital balances, measuring accurately to 0.01 g, has also allowed these methods to be more accessible and affordable than before.
The determination of the formula of magnesium oxide by combustion of magnesium can yield variable results. Porcelain crucibles can be costly and can break during the experiment, and magnesium can escape when the lid is lifted. This product loss can reduce the accuracy of the result.
The microscale method uses an inexpensive alternative to expensive crucibles. The natural design of bottle tops allows a good flow of air with minimal loss of product.
This activity will take about 30 minutes and suitable for students aged 14–18.
This activity can also be used with younger students who have not yet been taught mole calculations as way of introducing conservation of mass. Ask them to predict whether the mass of magnesium will get lighter, stay the same, or get heavier when heated, and test their prediction. Some will think the magnesium will get lighter, as they assume it will be ‘burnt away’ like carbon when it reacts with oxygen to form carbon dioxide. They are often surprised that oxygen atoms have mass, which can be measured on a balance after a combustion reaction with a metal.
A full explanation of the calculations can be found in the supporting material.
Sample result and calculation:
M1 = mass of bottle tops plus nichrome wire
M2 = mass of magnesium plus nichrome wire and magnesium
M3 = mass of the bottle top plus nichrome wire and magnesium oxide
Mass of magnesium ribbon used (M2 − M1 = 4.11 − 3.87)
Moles of magnesium = mass of Mg/gram formula mass of Mg = 0.24 ⁄ 24.5
Mass of oxygen used = M3 − M2 = 4.26 − 4.11
Moles of oxygen = mass of O/gram formula mass of O = 0.15 ⁄ 16
Ratio of magnesium to oxygen = moles Mg/moles O = 0.0098 ⁄ 0.0094
= 3.87 g
= 4.11 g
= 4.26 g
= 0.24 g
= 0.0098
= 0.15
= 0.0094
= 1.04
The value should be close to one, giving a molar ratio of approximately one magnesium to one oxygen, which suggests the formula of magnesium oxide is indeed MgO.
Gravimetric analysis to determine the moles of water present in a hydrated complex usually requires preweighing of a sample and heating to constant mass over a Bunsen burner using a crucible and a desiccator to prevent water from being reabsorbed from the air.
This method is quicker and uses a bottle top instead of a crucible, as described in Activity 1, along with spirit burners.
Spirit burners burn cooler than Bunsen flames, which is advantageous for some experiments. A cheaper alternative to buying them from laboratory suppliers is to construct a homemade version made from small-scale jam jars.
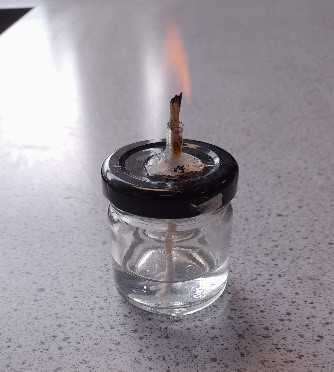
A full guide on how to make a spirit burner is available in the supporting material. The assembly process can be observed in this video: https://www.youtube.com/watch?v=ndlycDnCM8c
The spirit burners can be used for other microscale practical applications, such as flame tests and determining the melting points of covalent molecular and ionic substances,[2] as well as for the cracking of hydrocarbons.[3]
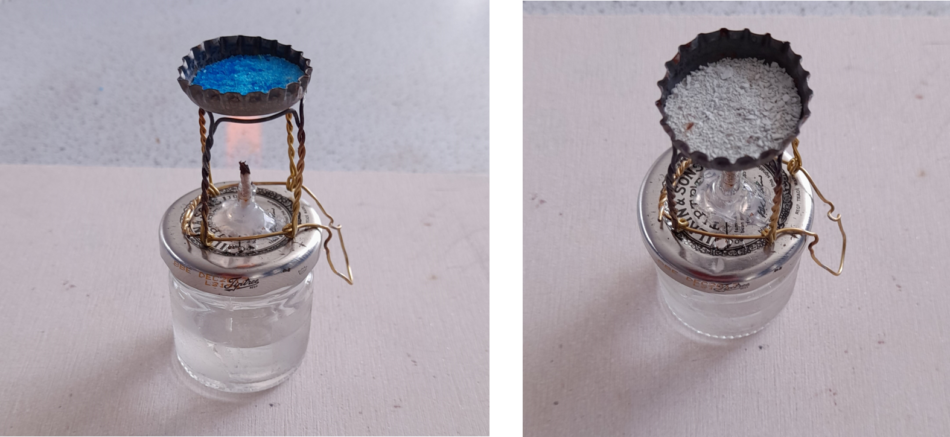
In this experiment, the use of a spirit burner limits the extent to which copper sulfate will decompose to release toxic sulfur dioxide:
CuSO4·5H2O(s) (pale-blue solid) ⇌ CuSO4(s) (white solid) + 5H2O(s)
Copper(II) sulfate pentahydrate (CuSO4·5H2O) loses four of its water molecules at about 100 °C. The final water molecule is lost at 150 °C. With a Bunsen flame, a temperature of over 650 °C is reached, which causes the hydrated copper sulfate to decompose; the solid darkens and toxic sulfur dioxide and trioxide gases are released. As well as being hazardous, the decomposition affects the accuracy of the results. Using a cooler flame produced by a spirit burner prevents this decomposition.
This activity will take about 30 minutes and suitable for students aged 14–18.
Wear eye protection.
A full explanation of the calculations can be found in the supporting material.
Sample result and calculation:
Mass of hydrated copper(II) sulfate used =
Mass of anhydrous copper(II) sulfate after heating =
Mass of water removed by heating = 1.20 − 0.78 =
Number of moles of copper sulfate (CuSO4) left after water was removed = 0.78 ⁄ 159.6 =
Number of moles of water removed by heating = 0.42 ⁄ 18 =
1.20 g
0.78 g
0.42 g
0.0049
0.023
Ratio of moles of water to copper sulfate = 0.023 ⁄ 0.0049 = 4.9, which is 5 when rounded to nearest whole number.
The students can be shown the label of a bottle of hydrated copper sulfate and compare their result with the label to verify their result. The value should be close to five, giving a molar ratio of approximately five moles of water to one mole of copper(II) sulfate, which suggests the formula of the hydrated copper(II) sulfate is CuSO4·5H2O.
Adrian and Bob have now reached the end of this series of articles on microscale chemistry. What started out as an antidote to the safety concerns of dealing with chemicals in schools, (storage, use, disposal) by education managers and the UK Health and Safety executive, in around 1993, has now attracted more enthusiasts because of the educational and economic benefits the techniques bring. Now we can add the promotion of sustainability, as directed by the United Nations, using the principles of green chemistry,[4] as formulated in 1998 by Paul Anastas and John C. Warner. At least 6 of the 12 principles of green chemistry can apply to school-taught chemistry.[5]
This last principle is what CLEAPSS and SSERC in the UK have been doing since 1963.
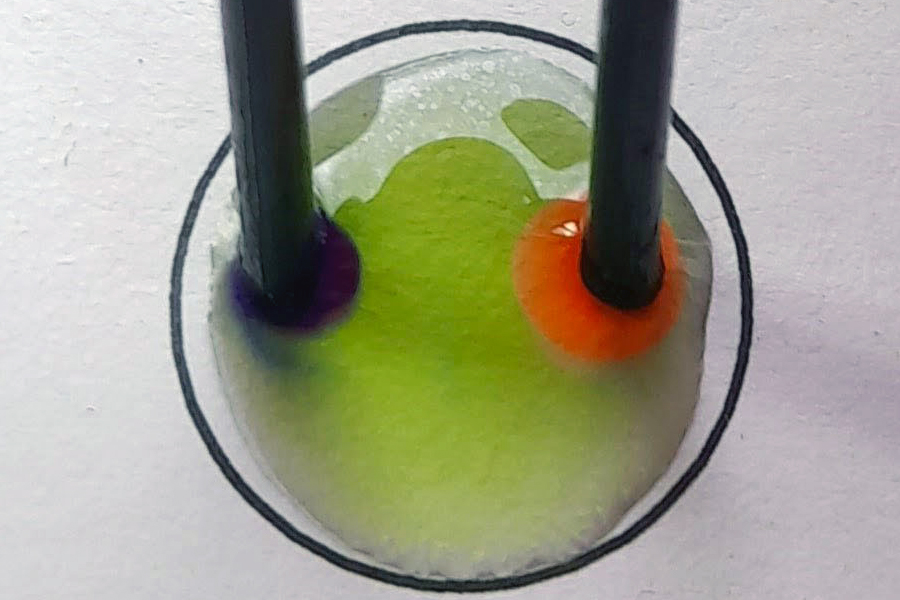
We are often accused of removing the ‘wow’ moments that school chemistry brings. With the microchemistry approach, there are still explosions (dynamite soap bubbles), and there are more wow moments, such as the beauty of an array of colours in droplet art.[6] There are completely new demonstrations. Bob recently carried out a demonstration showing the electrical conductivity of molten sodium chloride, an observation that is quoted in many school texts as evidence of ionic bonding, but never easily demonstrated until now, by using microscale techniques[7] and the bottle-top crucible described in this article.
We would like to thank and acknowledge Howard Tolliday at Dornoch Academy, UK, for his advice and assistance in developing the equipment and his help in collecting the images and video accompanying this article.
[1] Worley B, Paterson D (2021) Understanding Chemistry through Microscale Practical Work pp 38-41. Association for Science Education. ISBN: 978-0863574788
[2] The Science on Stage webinar on microscale chemistry: https://youtu.be/LM97yXJlotQ?si=e_IGnqLuTiJdPV84
[3] The Royal Society of Chemistry resource to teach the cracking of long-chain hydrocarbons: https://edu.rsc.org/exhibition-chemistry/cracking/4010515.article
[4] The 12 principles of green chemistry: https://www.compoundchem.com/2015/09/24/green-chemistry/
[5] Green chemistry principles applicable in school chemistry: https://microchemuk.weebly.com/green-chemistry.html
[6] An article on chemical droplet art: https://uwaterloo.ca/chem13-news-magazine/september-2019/feature/indicator-droplet-art
[7] A video on the electrolysis of molten sodium chloride: https://www.youtube.com/watch?v=wKgDJYY6Vkk&t=60s
Microscale chemistry (and science in general!) is an incredibly important field. The work done by Bob and Adrian is second to none, and will allow teacher (and learners) from all areas to get “stuck in” with micro. From a budget and safety stand point, it makes all the sense in the world to approach thing on a microscale, especially in the current financial climate.
John Cochrane, Chemistry Teacher. Greenfaulds High School, Scotland.
Play your cards right: Everyone enjoys playing games, so use chemical card games to get students to learn through play without them realising.


Discover simple adaptations to apparatus and experiments that make practical chemistry more accessible to students with vision impairment.

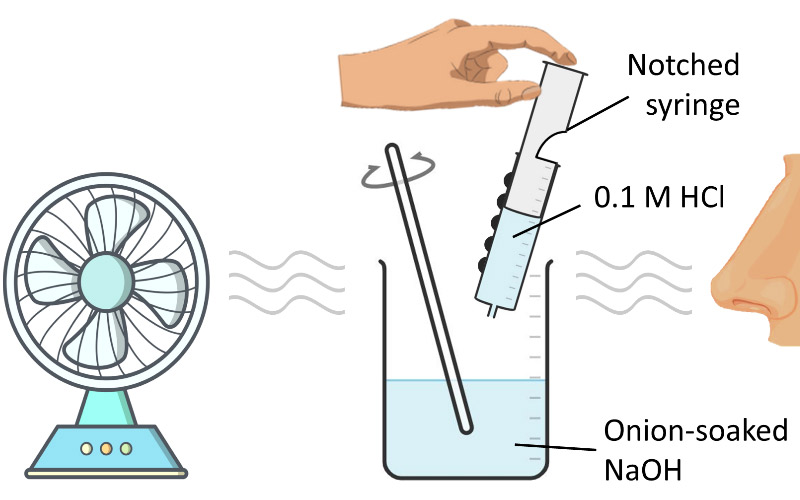
Enhance your students’ knowledge of electrolysis using quick, safe, and easy microscale chemistry…
