Supporting materials
Download
Download this article as a PDF

Dropping out: learn about the chemistry of precipitation and introduce your students to chemical reactions that form colourful new compounds using microscale chemistry methods that are cheap, quick, and easy to do.
Seeing precipitates suddenly appear is magical to students (and many think it is magic).[1] Two salt solutions are mixed and suddenly a solid appears. Sometimes the solid is a different colour to the solutions. If 1 M copper sulfate solution is mixed with sodium hydroxide solution, a blue solid appears. The solid is copper hydroxide, which is insoluble in water. If lead or silver nitrate solution is used, then a yellow solid suddenly appears.
Traditional methods using test tubes waste a lot of resources. There is an awful lot of material thrown down the sink or saved in waste bottles. A previous article on pH indicators showed how procedures can be carried out on a plastic folder. The instructions are printed on a worksheet, below the plastic surface, so there is no immediate distraction. These activities are suitable for students aged 11–18.
When students perform precipitation reactions, they can often fail to appreciate where the solids are coming from, since they never see the original salts being dissolved. Getting students to make the solutions adds a lot of time to lessons. This microscale experiment is a quick and simple way to introduce the concept of solubility.
Safety note: The solutions are of low hazard. Eye protection should be worn, and hands should be washed with soap and water after the experiment in case of contact with copper(II) chloride, which can cause skin irritation.
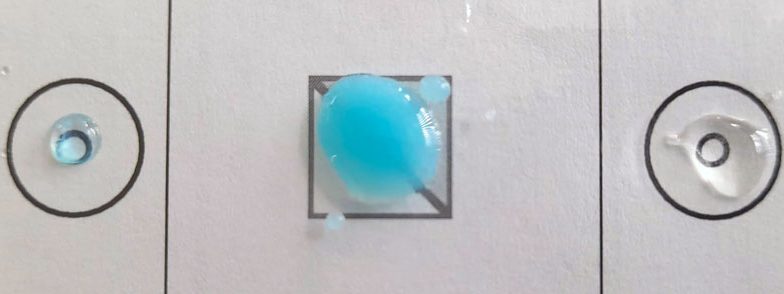
The results allow students and teachers to discuss where the chemicals are coming from, and they provide more belief in the chemical equation:
CuCl2 + Na2CO3 → CuCO3 + 2NaCl
The reaction works because sodium carbonate and copper chloride are soluble in water, but copper carbonate is not very soluble, and this is the reason why a precipitate forms. It is really a saturated solution of copper carbonate in water.
Every student knows sodium chloride is soluble in water. So, now students can complete a table of results and observations.
| Salts soluble in water | Salts insoluble in water |
|---|---|
| Copper chloride Sodium carbonate Sodium chloride | Copper carbonate |
Try reactions between the following salts:
There will be no precipitate with the second one, which implies that sodium nitrate and potassium chloride are also soluble in water. The fifth reaction is a ‘green’ reaction with chemicals available from the local shop. Using test tubes would generate a large amount of cleaning at the end. Now with the use of a plastic sheet, the procedure is rapid, giving the teacher time to generate student feedback on their observations, with very little waste generated.
Metal ions can be identified in solids or in 0.1 M solutions using precipitation techniques. The technique of adding reagents to a plastic surface, with instructions underneath, is also ideally suited to the study of transition metals.
Safety note: The solutions are of low hazard. Eye protection should be worn, and hands should be washed with soap and water after the experiment in case of contact, as solutions of transition-metal ions can cause skin irritation.

The activity can be extended to study the chemistry of transition metals (Worksheet 2), which can give a variety of pleasing colours that can be observed when they form a metal hydroxide upon the addition of 0.4 M sodium hydroxide solution to a 0.1 M solution of the transition-metal ion.

The addition of 2 M ammonia solution can also show a wide range of colourful precipitates (Worksheet 3).

Negative ions can also be identified using microscale techniques by the addition of silver nitrate.
The solutions are of low hazard. Eye protection should be worn, and hands should be washed with soap and water after the experiment in case of contact, as solutions of silver nitrate can stain skin.

The results illustrate one of the strengths of this technique. Only three of the six salts show positive responses to the addition of silver nitrate solution. The responses of the other negative ions are negative, since the silver nitrate test is unique to halides. On addition of 2 M ammonia, silver chloride dissolves, silver bromide partly dissolves, and silver iodide is unaffected.
To identify carbonate ions in a salt solution, add two drops of pH indicator, which should indicate an alkaline pH. Add two drops of 0.4 M hydrochloric acid to the sample. Bubbles of carbon dioxide will be released. A template for this is shown in the middle row of Worksheet 4.
To identify sulfate ions in a salt solution, add two drops of 0.4 M hydrochloric acid to a metal sulfate solution (0.1 M), followed by two drops of 0.1 M barium chloride. A white precipitate of barium sulfate will form. A template for this is shown in the bottom row of Worksheet 4.
“We did precipitates last year” is a not unknown comment from some students. It is important for teachers to have something new that not only substantiates what has been taught before, but also presents new information, aiding further understanding of these reactions. This activity combines dissolving, diffusion, and precipitation. It needs to be done after the ionic nature of salts has been introduced.
Safety note: The solids are mostly of low hazard. The compounds of some metals, such as lead, cobalt, and nickel, may be banned from use in some countries. Readers should always follow local rules. However, one of the advantages of the microscale approach is that so little of the substance is used, there is not enough to cause a health issue, and waste can be collected and stored for disposal. Eye protection should be worn, and hands should be washed with soap and water after the experiment in case of contact.
– Dampen the ends of two splints in water and touch each to one of the solids to pick up small amounts. Insert the two solids, one either side of the puddle.
Use the flat end of a splint to push a grain into each side of the puddle
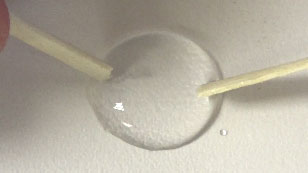
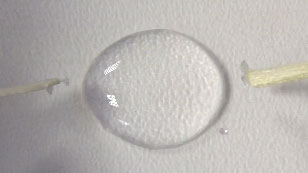
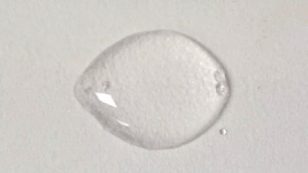
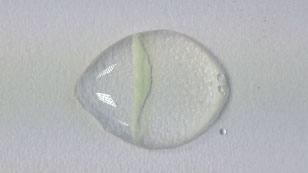
a. Copper(II) sulfate and sodium hydrogen carbonate
b. Iron(II) sulfate and sodium hydrogen carbonate
c. Lead nitrate and potassium iodide
d. Iron(II) sulfate and potassium hexacyanoferrate(III) – the product, iron(II) hexacyanoferrate(III), is the pigment Prussian blue

Discuss the following questions with your students:
If we use the reaction involving silver nitrate and potassium iodide as an example, we can see that both compounds are soluble in water. These are ionic compounds with an ionic lattice structure. As the ions are released from the ionic lattice during dissolving, the ions diffuse and migrate towards each other until a precipitate is formed near the middle. The precipitate formed is silver iodide. The other soluble product is potassium nitrate.
A visualizer or USB microscope is ideal for a highly visual classroom demonstration.
[1] Worley B et al. (2019) Visualizing dissolution, ion mobility, and precipitation through a low-cost, rapid-reaction activity introducing microscale precipitation chemistry. Journal of Chemical Education 96: 951–954. doi: 10.1021/acs.jchemed.8b00563
One of the ideas of sustainable chemistry is to limit the amount of chemicals used. Another one is to reduce chemical waste. Doing experiments with just a few drops on a plastic surface is a nice idea, and nevertheless can lead to interesting observations and insights.
Ingo Eilks, Prof in chemistry education, University of Bremen, Germany
Download this article as a PDF