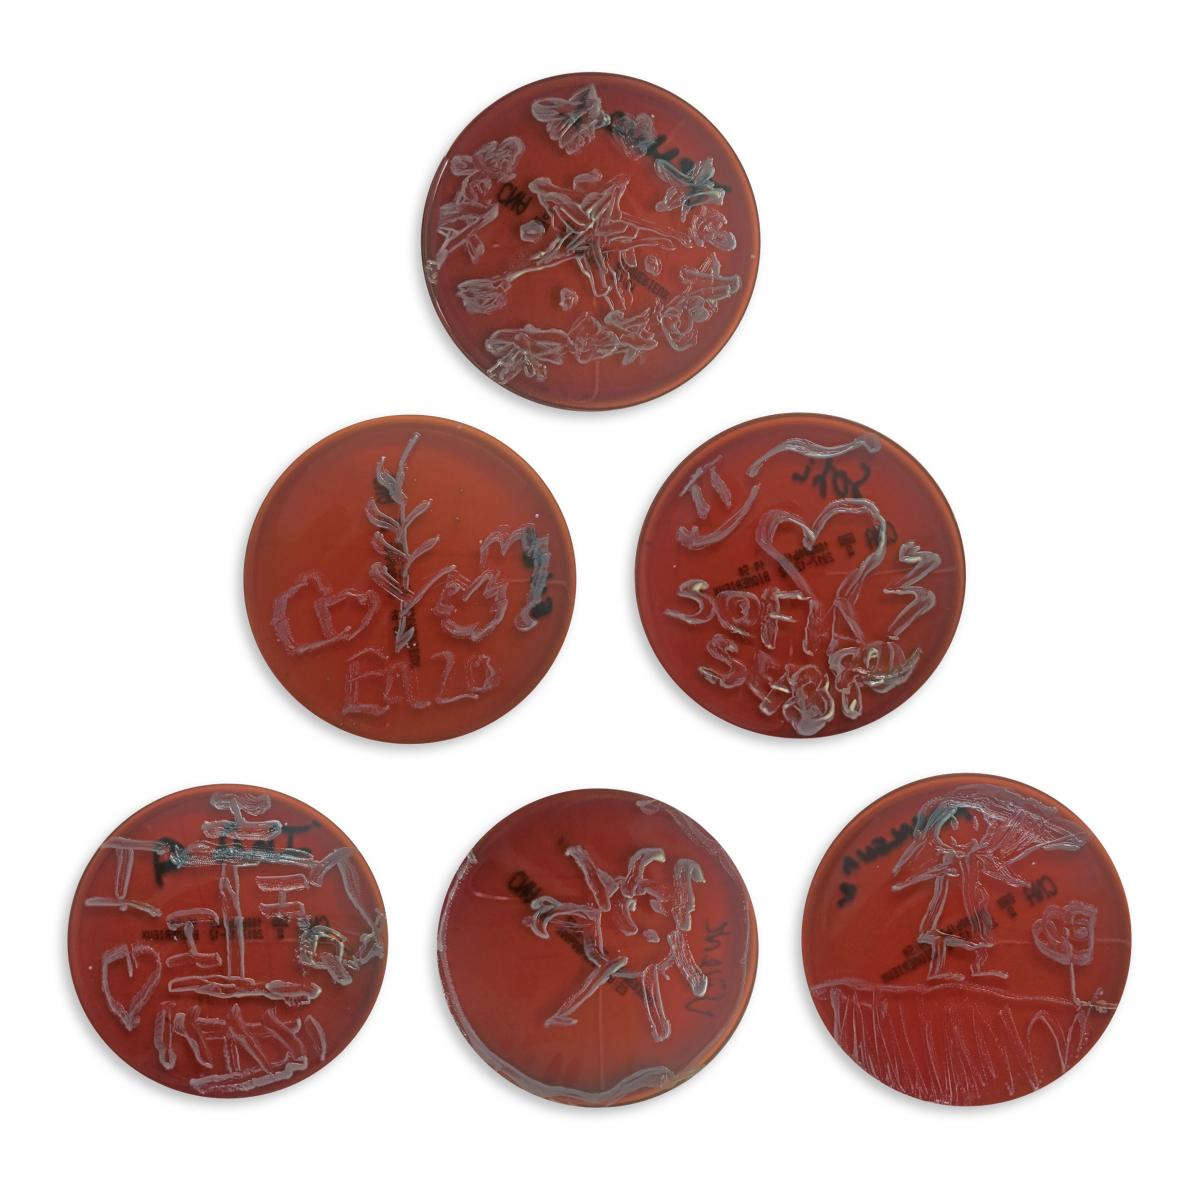
Painting in a petri dish Teach article
Create a living piece of ‘agar art’ to discover the invisible world of microbes living on our hands.
On hearing the word ‘bacteria’, many pupils might squirm in their seats. But while bacteria are often perceived as bad, linked in our minds to infection or disease, the majority are in fact harmless to humans, and many are even beneficial.
Along with other microorganisms (such as viruses and yeastsw1), bacteria are too small to see with the naked eye. They are, however, all around us. One way to reveal these hidden microorganisms is to grow them in an agar-filled petri dish (also known as an agar plate), which is a popular activity in schools.
In recent years, this simple idea has been transformed into an art form: across the world, people are now using bacteria to create beautiful works of ‘agar art’w2. Using a wire inoculating loop, different species of microorganisms in various colours are carefully painted onto an agar plate. The plate is incubated to encourage the bacteria to grow, in the hope that it will develop into a microbial masterpiece.
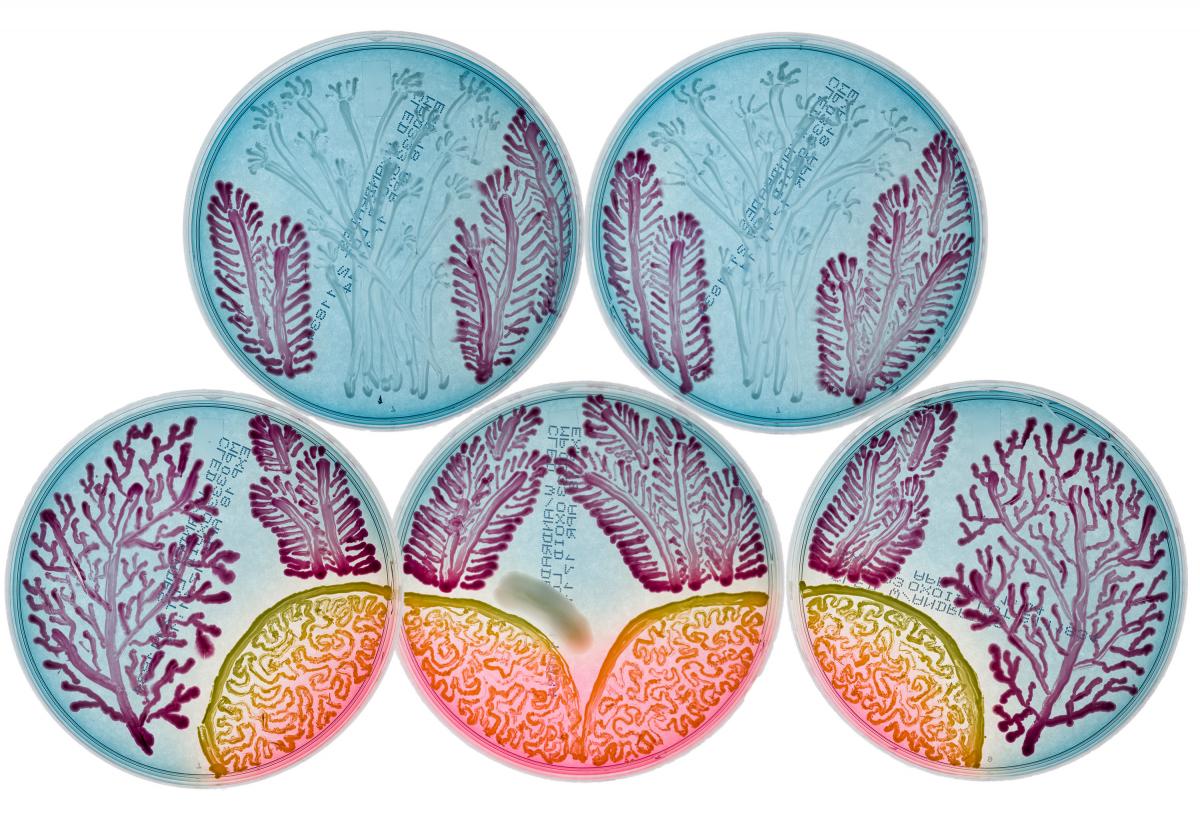
Andrew Simor/Linh Ngo/American Society for Microbiology
Producing agar art at school (albeit using a simplified approach) is a playful way to introduce your pupils to the world of microorganisms. The hands-on activities outlined in this article are suitable for pupils aged 9–11 and are a valuable way to learn about bacteria.
We also provide a simple introductory activity to learn about hand hygiene. Although it is essential to highlight to your class that not all bacteria are harmful, you must also emphasise the importance of thorough hand-washing to control the spread of infectious diseases.
If you choose to carry out the following activities sequentially, keep in mind that you must allow at least two days between each activity for incubation time.
Safety note
For the following procedures, pupils are advised to wear lab coats. Pupils should not eat or drink in the classroom/laboratory or put their fingers or any other matter in their mouths. Once the agar plates have been incubated, pupils should not remove the lids of the plates.
To follow usual guidelines, all contaminated waste (e.g. disposable inoculating loops and agar plates) should be discarded in an appropriate container and collected by a laboratory waste disposal service. If this is not possible, contaminated equipment could be treated with disinfectant (e.g. bleach) and disposed of in your regular waste.
Activity 1: Bacterial handprints
Washing our hands is the most important means of preventing the spread of infection. In this simple activity, pupils discover the importance of good hand hygiene by comparing two agar plates of their handprints – one before washing, and one after. The activity takes approximately 1 hour, and pupils should work individually.
Materials
Each pupil will need access to the following:
- Two premade agar platesw3 (standard size of 100 mm in diameter)
- Permanent marker pen
- Hand soap (or antibacterial soap), water and paper towels
Procedure
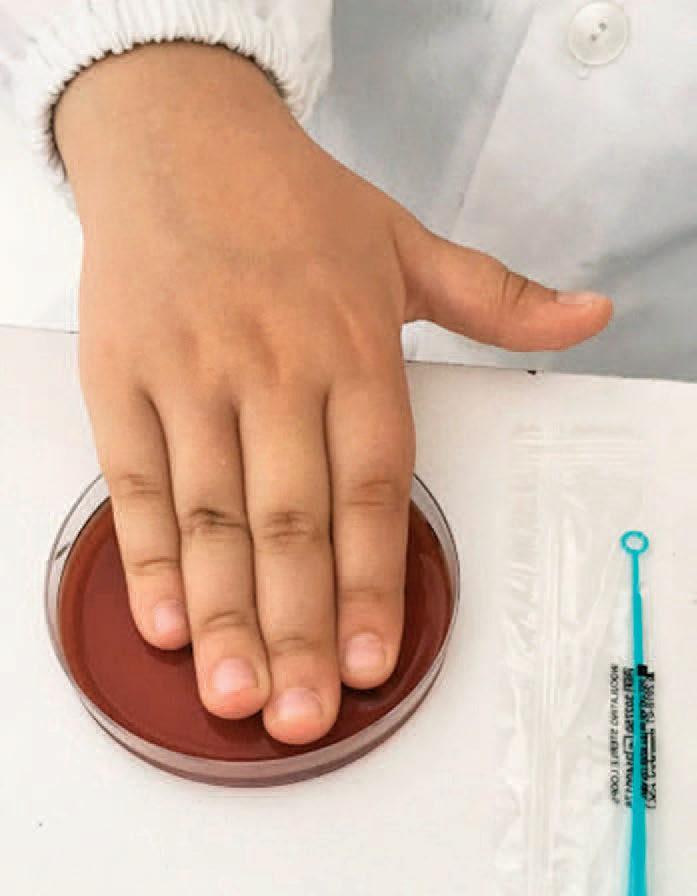
fingers onto the agar plate to
transfer bacteria to the agar.
Ana Margarida Madureira
Instruct your pupils as follows, demonstrating the procedure if required:
- Using a marker pen, label the two plates ‘before’ and ‘after’ on the underside of each plate, along with your name. When turning a plate upside down, keep the lid pressed down to avoid it falling off.
- Place the agar plates on the table (the correct way up) and remove the lid of the plate marked ‘before’.
- Press your fingers firmly onto the agar (figure 1) and then remove them.
- Replace the lid and clean your hands using soap and water. Dry them well using paper towels.
- Repeat the process for the agar plate marked ‘after’, pressing your fingers firmly onto the agar.
- Replace the lid and wash your hands after touching the agar.
- Leave both plates in a safe area of the classroom to incubate at room temperature (e.g. 20ºC) for 48–72 hours, or until you can see some bacterial colonies.
Observation and discussion
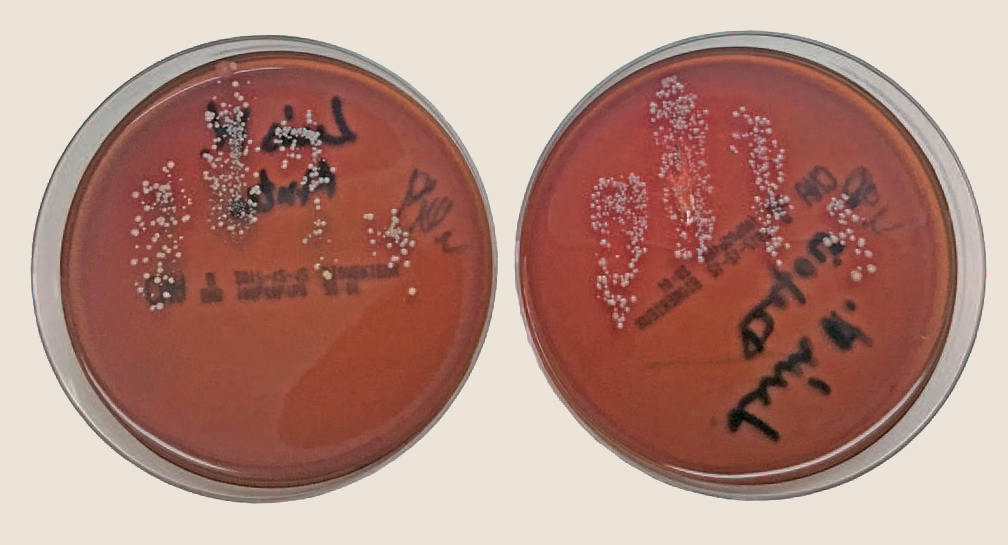
When the agar plates are ready, ask your pupils to compare their ‘before’ and ‘after’ handprints (figures 2 and 3). The following questions and tasks can encourage them to analyse the results:
- What do you observe on your agar plates? What are the dots? Are there different types of dots (e.g. different colours and shapes)?
- Is there a difference in bacterial growth between the ‘before’ and ‘after’ handprints? What does this show?
- Count the dots on each plate to estimate the number of bacterial colonies. If there are too many dots to count, make an estimate for the whole agar plate based on one section. Record this in a joint classroom table (see table 1).
- Compare your agar plates to those of other pupils in your class. Why do some plates have more growth than others?
- What does this tell you about your hand hygiene, or the hygiene of your peers? What would you suggest to your peers based on these results?
From previous experience, pupils are often surprised by the number of colonies on the plates – and by the variety of colours and shapes of the different bacterial colonies. The activity can also act as a lesson for pupils with poor hand-washing techniques, who see no change (or even an increase in bacteria) between their ‘before’ and ‘after’ plates.
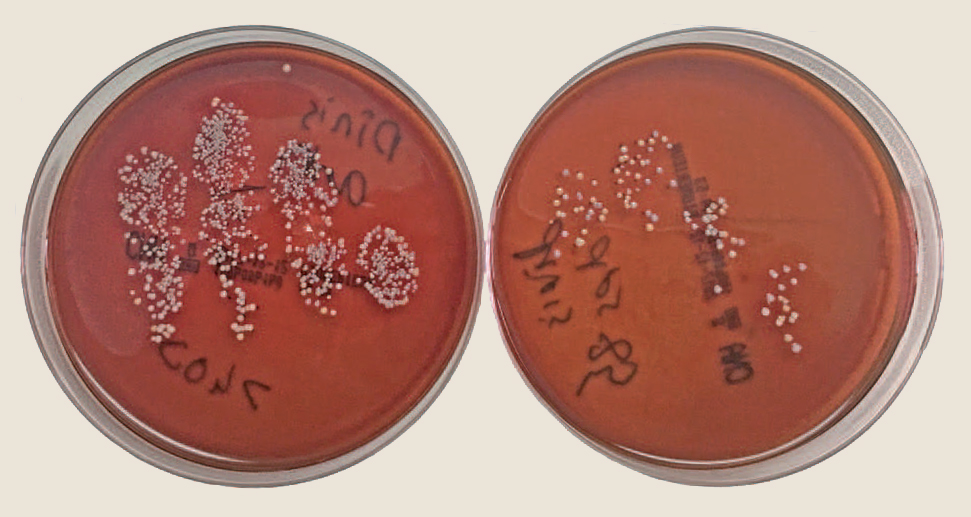
Ana Margarida Madureira
Ana Margarida Madureira
| Pupil | Before | After | Percentage change |
|---|---|---|---|
| 1 | 144 | 140 | -3% |
| 2 | 424 | 208 | -51% |
| 3 | 36 | 18 | -50% |
| 4 | 110 | 60 | -45% |
| 5 | 138 | 118 | -14% |
| 6 | 86 | 98 | +14% |
| 7 | 55 | 27 | -51% |
| 8 | 449 | 490 | +9% |
| 9 | 148 | 96 | -35% |
| 10 | 600 | 85 | -86% |
| 11 | 125 | 69 | -45% |
| 12 | 600 | 289 | -52% |
| 13 | 68 | 41 | -40% |
| 14 | 600 | 245 | -59% |
| 15 | 309 | 261 | -16% |
| 16 | 67 | 18 | -73% |
| 17 | 132 | 108 | -18% |
| 18 | 107 | 120 | +12% |
| 19 | 82 | 32 | -61% |
| 20 | 348 | 234 | -33% |
| 21 | 54 | 6 | -89% |
| 22 | 92 | 46 | -50% |
| 23 | 125 | 127 | +2% |
Activity 2: Microbial ‘paint’
Before creating agar art in the final activity, pupils need to grow their chosen bacteria to use as the ‘paint’ on their blank agar ‘canvas’. Inoculating an agar plate to grow the bacteria takes approximately 15 minutes, after which the plate must be incubated.
Materials
Each pupil requires:
- One premade agar plate
- Disposable inoculating loop
- Agar plate labelled ‘before’, from activity 1 (or alternatively, a purchased culture of Staphylococcus epidermidis)
Procedure
Instruct your pupils as follows, demonstrating the procedure if required:
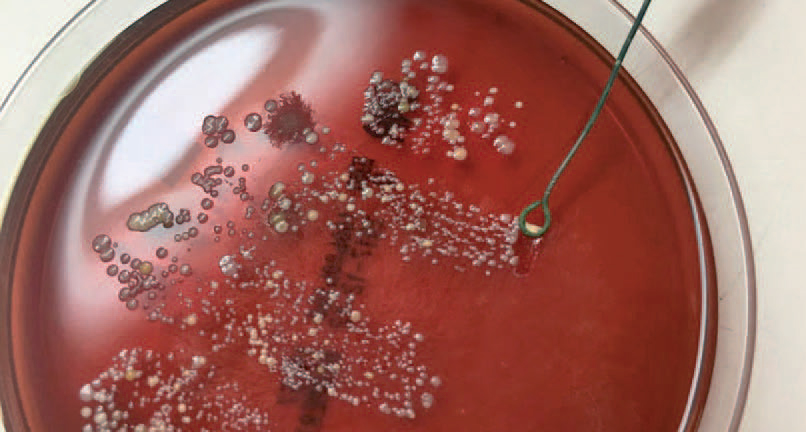
- Locate the bacterium S. epidermidis on the agar plate labelled ‘before’. S. epidermidis is part of the normal human skin flora and is typically white in colour, forming round colonies with a diameter of 1–2 mm. Alternatively, you can use a purchased culture instead.
- Transfer S. epidermidis to the end of the inoculating loop (see figure 4).
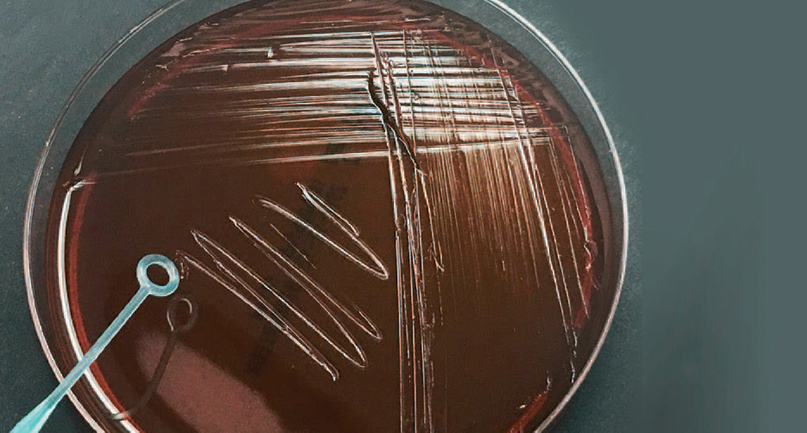
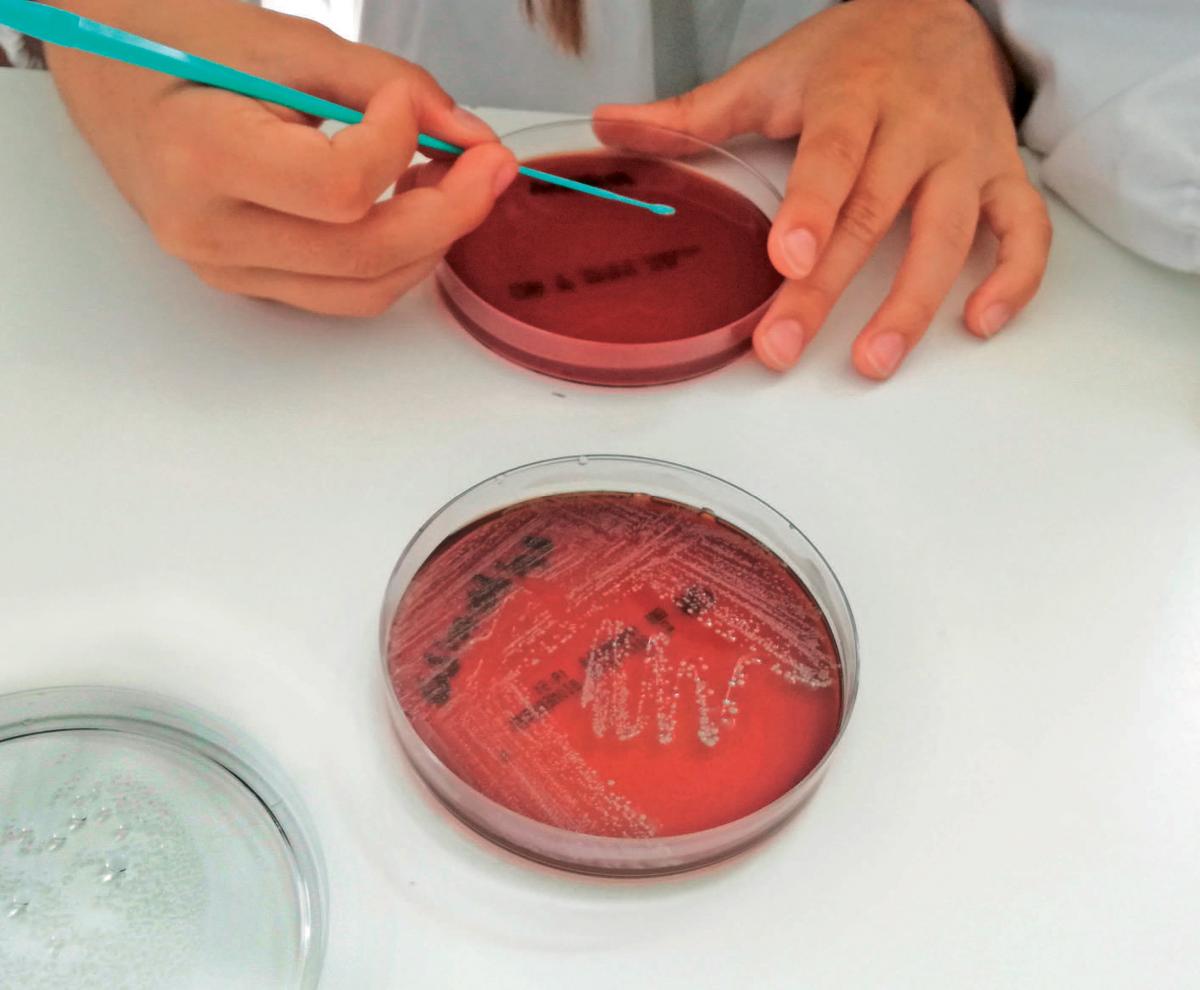
- Take a new agar plate and, using the loop, spread the bacteria in streaks across the surface of the agar (see figure 5 for the final streaking pattern). Start by drawing lines in the first quadrant of the agar, holding the loop as you would a pen. Do not dig into the agar – only touch the surface.
- Turn the plate 90º and create streaks across the second quadrant.
- Turn the plate 90º again and draw a zigzag in between the other streaked quadrants.
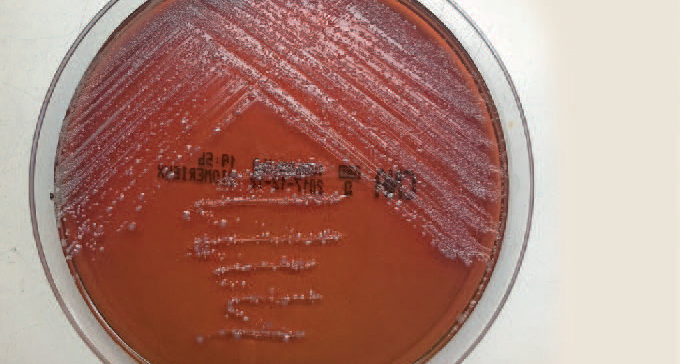
- Place the lid onto the plate and incubate it at room temperature for 48–72 hours or until the plate is sufficiently covered by S. epidermidis colonies (figure 6).
If desired, repeat the procedure above for any other bacteria (perhaps of different colours or colony formations) that are present on the ‘before’ plate, or using purchased cultures. Inoculate each bacteria on a new agar plate using a new loop.
Ana Margarida Madureira
Ana Margarida Madureira
Ana Margarida Madureira
Activity 3: A living masterpiece
Once the incubation period is over, your pupils are ready to start getting creative. We suggest allocating around 30 minutes for pupils to produce their microbial works of art.
Materials
Each pupil requires:
- One premade agar plate
- Disposable inoculating loop (one for each type of bacteria used)
- Agar plate with S. epidermidis (and/or other cultures)
Procedure
Instruct your pupils as follows, demonstrating the procedure if required:
- Transfer S. epidermidis from the agar plate onto the end of the inoculating loop.
- Using the loop as a pen, draw on the surface of the new agar plate (figure 7). You can draw various shapes, write your name, or even sketch a whole scene.
- When required, collect more bacteria on the loop. This is usually every time you have finished drawing a line. If you are using more than one type of bacteria to create different colours or colony shapes in your drawing, use a new inoculating loop for each culture.
- Once finished, place the lid onto the plate and incubate at room temperature for 48–72 hours to allow the artwork to develop.
Your pupils will be amazed to see their invisible drawings come to life. And in the process, we hope they discover a new appreciation for the bacterial diversity that surrounds us.
Ana Margarida Madureira
Web References
- w1 – Read more about the different types of microorganisms in a resource from The School Run.
- w2 – Visit the website for the American Society for Microbiology to see beautiful examples of agar art from their annual contests.
- w3 – For our experiments, we used petri dishes with a solid culture medium of Columbia ANC agar with 5% sheep blood.
Review
This article provides a great opportunity for interdisciplinary teaching by introducing a playful way of approaching both biology and art. The activity could be used by one teacher teaching both science and art, or through a collaboration between a science teacher and an art teacher.
It is ideal for discussing how bacteria occur and can be cultured, and how they are linked to everyday life. The article could also foster interesting discussions on how science and non-science subjects can work in tandem. I will definitely use it in my classroom.
Dr Christiana Nicolaou, science teacher, Archangelos Elementary School, Cyprus


