Be a magnet for a day Teach article
What happens inside magnets? This fun activity for primary school pupils helps them find out – by turning themselves into a magnet.
Generations of children have discovered that magnets are great fun to play with. The way in which the unseen power of magnetism pulls them together or pushes them apart is so intriguing – an active force that seems to come from nowhere. Magnets are useful too – they can hold things together but it’s easy to break them apart again: the engine and carriages of a toy train, magnetic alphabet letters, fridge magnets, cabinet latches, and so on – not to mention magnets inside appliances and electronic devices.

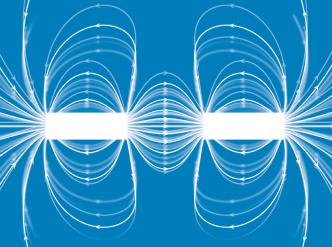
source: Wikimedia Commons
But what do pupils learn about magnets just by playing with them? When they experiment with bar magnets, what ideas do they form about the nature of magnets – such as their magnetic poles and internal structure?
On one level, the rules of how magnets behave are simple to discover and understand: opposite poles – north or south – attract each other, while similar poles push against each other, or repel. But there is a common misconception about bar magnets: that you can separate the north and south poles of a magnet by breaking it in half in the middle. In fact, this would just create two new magnets, each with its own north and south poles – as you can demonstrate by doing this experiment.
Of course, the design of bar magnets – with an N for north at one end and an S for south at the other – encourages this misconception because it suggests that the poles are located just at each end of the magnet. So teachers often find that it is hard to explain why the poles could not be separated in this way. While there are some simulations and videos that can help to make this clear (see the resources section at the end of this article), we believe that the best way to explain the phenomenon is by engaging pupils in an activity that shows the internal structure of magnets.
We have carried out this activity with children aged 10–12, but it could also be worthwhile with slightly younger children. The activities plus discussion typically take less than an hour.
First, we show what a non-magnetised material looks like, and then we magnetise it. After magnetisation, we discuss the internal structure of the magnet. Finally, we ‘break’ the magnet and talk about what has happened.
What’s inside a magnet?
This activity helps children to understand that magnets have internal structure – rather than just a north pole at one end and a south pole at the other.
So what does science tell us about the inside of magnets? Magnetism comes from the structure of the atoms within a material – which is why some materials (such as iron and steel) are magnetic, but most are not. Each atom of a magnetic material is a magnetic dipole, like a tiny magnet, which lines up with the direction of a magnetic field – just as the needle of a compass aligns itself to Earth’s magnetic field.
If a piece of iron has not been magnetised, the magnetic dipoles inside it point in random directions. Across the whole material, they will cancel each other out and it will not act as a magnet. But placing the iron in a strong magnetic field encourages the magnetic dipoles to line up in the same direction, making the material into a magnet: now it has a north and a south pole, and it can attract other objects made from magnetic materials. This is due to its internal structure, in which the dipoles are aligned – as we act out in the activity.
Materials
- At least 10 pupils
- Red / blue vests, one for each pupil
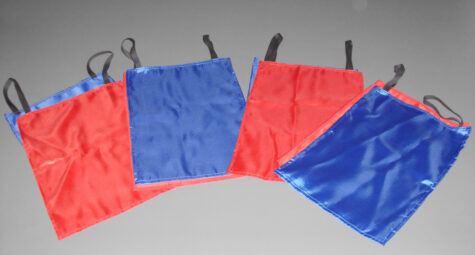
The vests are red on one side (the front) and blue on the other side (the back). You can make these using 30 cm x 30 cm squares of red and blue cloth, joining them by sewing on tape for the shoulder straps (figure 1). Alternatively, use squares of red and blue paper pinned onto the pupils’ normal shirts.

Image courtesy of Katarína Krišková
Procedure
Each pupil represents a small part of a magnet, like a magnetic dipole. This dipole cannot be divided into halves – just as a person cannot be divided into two parts.
Activity 1: Before magnetising
Each pupil should put on a vest, making sure that the red side is facing the front and the blue side is facing the back.
At the start of the activity, the pupils line up so that they form two or three parallel rows. Ask them to face random directions. This means we should not see any dominant colour (red or blue) from any direction (figure 2).
In this situation, the pupils represent a non-magnetised material, such as a piece of steel before it has been made into a magnet. Like the pupils, the magnetic dipoles face random directions, so the material does not act as a magnet.

Image courtesy of Katarína Krišková
Activity 2: Magnetising the material

internal structure of a
magnet: after ‘magnetisation’,
all the pupils face the same
way – like the dipoles in a
magnet.
Image courtesy of Katarína
Krišková
When we apply a magnetic field to the non-magnetised material, it makes the magnetic dipoles line up to point in the same direction. Staying in their rows (which represent the shape of a bar magnet), the pupils are turned by an external force – the teacher – to face the same direction.
Now looking forwards, pupils can see only the blue parts of the vests – and looking behind, only the red parts (figure 3). (Remind pupils to turn only their heads to see this – not their whole body, as the effect will disappear.)
The pupils now represent a magnetised material – a bar magnet. It has two poles, one red and one blue, shown by the colour of the vests that can be seen from each end of the row. But unlike in a real magnet, we can see its internal structure: the red and blue poles are found all the way through the magnet.
Activity 3: Breaking the magnet into two pieces
Finally, we will ‘break’ the magnet into two pieces. This is done simply by dividing each row into two. For example, if you have two parallel rows of eight pupils each, break each row apart after four pupils (keeping the parallel rows together). Ask the pupils to step away from each other at the breaking point so you end up with two separate groups of pupils.
Pupils can then see what happens after breaking a bar magnet: the internal structure remains the same, but the size of the magnet changes. We do not separate the poles of the magnet – we just make two smaller magnets.
It does not matter how we break the magnet – lengthways or widthways. The pupils can explore this aspect by ‘breaking’ the magnet in different ways – for example, keeping each long row intact but moving the rows apart, rather than breaking them in the middle.
Recording the activity
It is a good idea to take some photos while the activity is underway, to get the best views of the pupil magnets in the different situations. You can use these images after the activity or in another lesson to discuss what is happening inside the magnets.
Acknowledgements
The activity was initiated by Science on Stage Slovakiaw1 and further developed during the University Without Borders summer camp for children aged 10–12 at the Pavol Jozef Safarik University in Košice, Slovakia, in July 2015. The activity also takes place within the magnetism section at the SteelPark science centre in Košice.
Web References
- w1 – Science on Stage is the network for European science, technology, engineering and mathematics (STEM) teachers, which was initially launched in 1999 by EIROforum, the publisher of Science in School. Science on Stage brings together science teachers from across Europe to exchange teaching ideas and best practice with enthusiastic colleagues from 25 countries.
Resources
- Read a simple explanation of magnets and how they work.
- Visit the website of the University of Colorado Boulder for a simulation of a magnet and the field around it, with an option to look inside the magnets.
- Watch a video explaining magnetism at the atomic level in a simple way.
- For information on magnetisation of a material in terms of magnetic domains (small areas that contain the atomic dipoles) and how these change when a material is magnetised, see:
- The National High Magnetic Field Laboratory website.
- The Nondestruction Testing Resource Center website.
- For two videos about magnetism that are conceptually more advanced than the activity in this article and that may be more suitable for teachers or secondary-school students, see:
Institutions
Science on StageReview
The activity described in this article includes a good way to illustrate magnetism and to encourage students to move. For older students, the activity could lead into a discussion about where we encounter magnetism in everyday life, for example in Earth’s magnetic field or in medical uses.
Erland Andersen, Denmark


