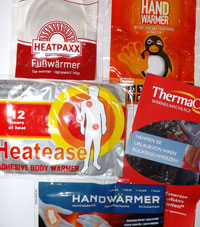
Handwarmer science Teach article
Help your students explore an exothermic reaction using the real-world example of a self-heating patch.

Self-heating patches that can be worn on the skin for hours are becoming increasingly popular as a method of pain relief, and the same technology can also keep your hands warm on cold days. But how do these patches heat up? This activity allows your students to investigate this in a lesson.
Introducing the activity
Start by introducing your students to a hypothetical scenario in which they work for a scientific magazine. A letter to the editor arrives and it is your students’ job to answer it.
I often suffer painful shoulders and neck because of my job, so I’m thinking of trying self-heating patches that I can wear during the day to reduce the pain. I am curious as to how they work exactly and if they are reusable.
The information on the packaging claims that they are simply activated by air. Is this true? Are they harmless or could they cause any problems or side effects?
Would you be so kind as to help me? Thank you in advance for your help.
Susanne Musterfrau, Cologne

Borstel
The challenge
Explain to your students that their task is to examine the functionality of the self-heating patches and provide an answer to the letter writer’s question. They should:
- Write down questions that they need to answer in order to explain how the self-heating products work.
For example, they could consider the term ‘air-activated’. Could just one of the main components of air activate the self-heating patches?
- Use the materials provided to find answers to their questions, and document their process.
The experiment described below can be used to test the reaction in small volumes.
- Write a brief reply to the letter writer, in which they explain the functionality of the self-heating patches in a way that readers with some knowledge of chemistry will understand.
The experiment
Materials
Each group of students will need:
syringe.
Image courtesy of Gregor von
Borstel
- Self-heating patch or body-warmer pack
- Kitchen roll or fillable teabags
- Spatula
- Oxygen
- Nitrogen
- Two 50 ml syringes
- Stoppers for the syringes
- Three-way valve
- Length of foam pipe insulation
- Temperature sensor or thermometer
- Scissors
Procedure
-
Watching what happens to
the plunger.
Image courtesy of Gregor von
BorstelOpen the patch or pack and remove two spatulas full of the filling, wrapping it in a paper towel or putting it in the teabag.
- Remove the plunger from one of the syringes and place this wrapped material in the body of the syringe. Replace the plunger.
- Seal the tip of the syringe.
- Place a temperature sensor on the side of the syringe and wrap both the syringe and the sensor in pipe insulation.
- Observe the set-up for a few minutes. Does the temperature change?
- What happens to the plunger of the syringe?
- Unseal the syringe and depress the plunger fully.
- Fill a second syringe with nitrogen.
- Connect the two syringes using the three-way valve and depress the plunger of the second syringe to transfer the nitrogen to the first syringe.
- Observe the set-up for a few minutes. Does the temperature in the first syringe change? What happens to the plunger of the first syringe?
- Repeat steps 8–10 with oxygen instead of nitrogen.
About what happens
during the reaction.
Image courtesy of Gregor von
Borstel
You will have noticed that the material from the self-heating patch releases heat when exposed to air and even more heat when exposed to pure oxygen. As the gas is used up in the reaction, the pressure in the syringe is reduced and the plunger moves down inside the syringe. The material doesn’t react with nitrogen, so there is no heat or movement of the plunger. This is because the heat pack works by the oxidation of iron:
4Fe(s) + 3O2(g) → 2Fe2O3(s)
This is an exothermic reaction: it releases heat. If you examine the contents of the syringe at the end of the experiment, you will see that they include flecks of red (rust).
What about the carbon and salt that are also present? Rusting is a redox reaction, with the iron being oxidised to ferric ions:
4Fe → 4Fe3+ + 12e–
and the oxygen being reduced:
12e– + 3O2 → 6O2-.
The salt and the carbon are not used up but act as electrolytes, helping the electrons to flow between the elements.
Further discussion
The syringes can be used to measure exactly how much oxygen is consumed in the reaction, and you could use this information to work out the rate of reaction. Perhaps you could discuss with your students other ways to increase this rate and other exothermic reactions that could be used to make a warming pad.
References
- Howes L (2015) Science teaching in the spotlight. Science in School 33: 30-33
- Rau M (2011) The heat is on: heating food and drinks with chemical energy. Science in School 18: 46-51
Web References
- w1 – Learn more about Lebensnaher Chemieunterricht and find more of their activities. See: www.lncu.de


