The effect of heat: simple experiments with solids, liquids and gases Teach article
From a homemade thermometer to knitting needles that grow: here are some simple but fun experiments for primary-school pupils to investigate what happens to solids, liquids and gases when we heat them.
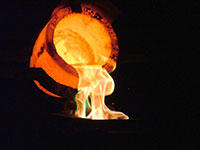
into a cast to make a gold
bar
Image courtesy of The Puzzler;
image source: Flickr
Why do elephants squirt water onto their backs? How does fog form? And why do trains make a ‘clickety clack’ noise? Your students will have answers to all of these questions once they have understood how heat affects solids, liquids and gases.
In this small collection of experiments, we begin by investigating how heat alters the properties of the three states of matter. We then examine how heat can convert gases, liquids and solids from one to another. After each experiment, in the manner of true scientists, we question our results and think about how we could improve our experimental design.
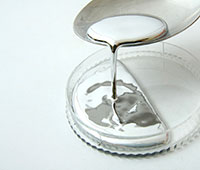
iStockphoto
Each of the five experiments relies on simple materials and is suitable for pupils aged 7-11 (although note that the reviewer suggested the article is suitable for pupils aged 10-13). When used together, they could occupy your class for a whole day, but they could also be split up and used in separate lessons. Before starting, ask your students to think about what solids, liquids and gases actually are, in terms of their appearance and propertiesw1.
Changing properties
1) Make your own thermometer: gases expand when heated
This experiment introduces the idea that heat makes gases expand. Students will make their own thermometer based on this principle.
Safety note
Teachers should perform the step involving scissors. See also the general Science in School safety note.
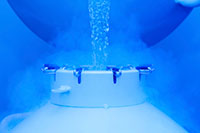
To familiarise students with
the differences between
solids, liquids and gases, use
examples of materials that
exist in an unexpected state
of matter, such as mercury or
liquid nitrogen. This helps to
challenge misconceptions
suchas ‘all metals are solids’.
Also point out that air is not
the only gas (another
common misconception), and
that it is in fact a mixture of
gases
Image courtesy of dem10 /
iStockphoto
Materials
Per group of pupils:
- A rigid plastic bottle with a lid
- Play dough or modelling clay, e.g. Plasticine®
- A transparent plastic drinking straw
- A pair of scissors
- Food colouring (optional)
- Tap water
Procedure

Image courtesy of Andrew
Brown
- Use a pair of scissors to make a hole in the top of the bottle lid, big enough for the drinking straw to fit through.
- Fill the bottle halfway with cold water.
- Add a few drops of food colouring and mix.
- Screw on the bottle lid and insert the straw through it into the water, making sure that the straw does not touch the base of the bottle.
- Seal around the hole in the lid using play dough, thereby fixing the straw in place. The seal must be completely airtight.
- Place one hand on the upper part of the bottle. What happens to the liquid in the straw, and why?
What happens?
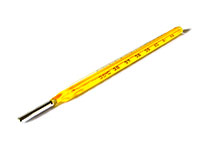
thermometer. The liquid in a
bulb thermometer expands
when heated, causing it to
rise up the narrow glass
tube. The thermometer in
experiment 1 relies on the
expansion of gas, not liquid
Image courtesy of Andres
Rueda; image source: Flickr
The heat from your hand warms the air inside the bottle. The air expands and pushes on the water, causing it to rise up the straw.
Questions for your pupils
- Was it really heat that caused the liquid to rise up the straw, or could pressure from your hands be responsible?
- How can we test this experimentally?
Answers: the bottle was rigid and, assuming you didn’t squeeze, the liquid rose up the straw due to heat, not pressure. You can test this by placing your hands close to but not on the bottle and seeing if the liquid still rises up the straw.
2) Watch a knitting needle grow: solids also expand when heated
In the previous experiment, the heat from a pair of hands was sufficient to expand the gas in the bottle considerably. Solids, however, expand much less than gases for a given increase in temperature. In the following experiment, we will use a simple but sensitive device to observe the expansion of a knitting needle when heated by a candle.
Safety note
Because naked flames and sharp objects are used in this experiment, it is advisable to perform it as a demonstration. See also the general Science in School safety note.
Materials
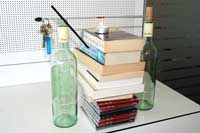
knitting needle grow.
Click on image to enlarge
Image courtesy of Andrew
Brown
- A metal knitting needle
- Two empty glass bottles (wine bottle are suitable)
- A cork to fit one of the bottles
- A set of keys or other object (e.g. modelling clay) to weigh down one end of the knitting needle
- A pile of books (or other objects to support the apparatus)
- A sewing needle with a cylindrical shaft
- A drinking straw
- A tea light (short candle)
- Matches
Procedure
- Push the cork halfway into one of the bottles.
- Push the sharp end of the knitting needle into the side of the cork, so that the knitting needle is just above the rim of the bottle.
- Lay the other end of the knitting needle across the mouth of the second bottle.
- Stick the sewing needle through the drinking straw, one third of the way along the straw’s length. The hole should be small enough that the straw does not turn loosely around the needle.
- Place the sewing needle (with straw attached) across the mouth of the second bottle, underneath the knitting needle and at right angles to it.
- Hang a weight (e.g. keys) on the free end of the knitting needle.
- Point the straw downwards.
- Place a pile of books between the two bottles.
- Place the candle on top of the pile of books. Adjust the height of the pile so that the top of the candle is approximately 3 cm from the knitting needle.
- Light the candle. What happens to the straw? What causes this?
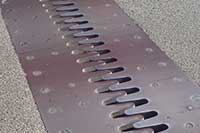
Image courtesy of Ingolfson;
image source: Wikimedia
Commons
What happens?
The heat from the candle causes the knitting needle to expand. As it expands lengthways, it moves over and rolls the sewing needle. The straw magnifies the small movements of the sewing needle.
Questions for your pupils
- We have seen that solids and gases expand when heated, but what about liquids?
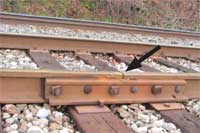
Answer: liquids are no exception – they too expand when heated. - What problems might heat-related expansion cause for bridges or railways? Answer: see the images to the right.
indicated by arrow
Image courtesy of PixOnTrax;
image source: Wikimedia
Commons

Real-world problems caused by expanding solids: rails and bridges expand in hot weather, which can cause them to buckle or break. Railway engineers leave gaps between sections of rail, which gives the sections room to expand and also gives trains their characteristic ‘clickety clack’ noise when their wheels run over the gaps. Similarly, bridges can be built in sections, connected by expandable joints; the 18 km Storebæltsbroen (Great Belt Bridge) in Denmark can expand by 4.7 m in hot weather!
Image courtesy of Kdhenrik; image source: Flickr
Changing states
So far, students have seen what happens when we heat solids and gases: they expand. You have also told your students that liquids do the same. But what happens when we heat substances even further (figure 1)? Ask your students to think about a bar of gold; it is solid at room temperature, at 100 °C, and even at 500 °C. But what happens when we raise the temperature even higher, to 1064 °C? At this temperature, something amazing happens: the solid gold becomes a liquid! Heat the liquid further still (to 2856 °C) and the liquid boils and turns into a gas.

Images courtesy of k.landerholm, atomicshark and Vélocia; image source: Flickr

gold is in a museum in Toi,
Japan. It weighs 250 kg and
at the time of writing is
worth about US$12
million
Image courtesy of PHGCOM;
image source: Wikimedia
Commons
Of course, this is a rather extreme example; most of us will never experience gold in its gaseous form. But everyone in the class will be familiar with water moving through the three states of matter: turning from solid ice to liquid water (0 °C), then to its gaseous form, water vapour (100 °C). So as well as expanding them, heat can also cause substances to change state. Different substances require different amounts of heat to do this: it takes more heat to boil gold than to boil water. But in theory at least, all substances can exist in the three states of matter.
In the following experiments, we will look at what happens when we turn liquid water to a gas – and back again.
3) Liquid to gas: evaporation on your finger
Even before a liquid boils, some of it may start to turn into gas – ask your students to think of the wisps of steam that come off a pan of water long before it boils. In this experiment, students will see that that even our fingertips generate enough heat to make small amounts of water turn from a liquid to a gas. We call this process evaporation.
Materials
- A cup of water
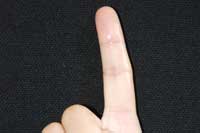
your finger
Image courtesy of Andrew
Brown
Procedure
This experiment is best done outdoors or somewhere where there is a draft, such as near an open window.
- Dip your index finger in the water, then hold it up.
- What do you see and feel?
What happens?
The water evaporates from your finger, leaving it dry. Your finger also feels cold. This is because the heat from your body is transferred to the liquid water and carried away in water vapour.
Questions for your pupils
on its back
Image courtesy of bratboy76;
image source: Flickr
- In this experiment we heated liquid water, but what happens when we heat a solid? Think about what happens when you heat butter. Answer: solids melt when heated.
- How could we improve our experiment? Answer: what if your finger felt cold not because of evaporation, but because the water was cold? To test this idea, we could use water at body temperature (37 °C). Try it – you should get the same result.
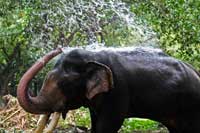
- Using what you have learned, can you explain why elephants sometimes squirt water onto their backs? Answer: elephants do this to cool themselves down, by taking advantage of the cooling power of evaporation.
4) Gas to liquid: condensation in a bag
Students have seen that heating a liquid can turn it into a gas (evaporation), but this is a reversible process: cooling a gas sufficiently turns it into a liquid, in a process called condensation. In the following experiment, students will investigate condensation.
Materials
- A transparent plastic bag
- An elastic band
- A small cloth
- Water
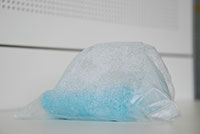
Image courtesy of Andrew
Brown
Procedure
- Run the cloth under a tap to make it wet and then squeeze it to remove the excess water.
- Place the cloth inside a plastic bag. Trap some air inside the bag and seal it.
- Leave the bag in a warm place, such as on a radiator or in direct sunlight, for one hour. What do you see?
What happens?
Water droplets form on the inside surface of the bag.
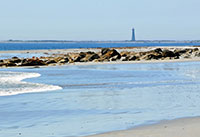
Nova Scotia, Canada, is
known as the ‘graveyard of
the Atlantic’. The island is 36
km long and is located where
warm, moist air from the Gulf
Stream is cooled by air from
the Arctic Ocean, causing
frequent heavy fogs. This
makes it is a dangerous
place for ships: at least 350
vessels have been wrecked
there
Image courtesy of archer10
(Dennis) OFF; image source:
Flickr
How? Water evaporates from the wet cloth so that the air inside the bag contains lots of water vapour. The inside surface of the bag is cool enough to change the water vapour back into liquid water.
Questions for your pupils
- In this experiment we cooled a gas (water vapour), but what happens when we cool a liquid? Think about how you make ice cubes. Answer: when cooled, liquids freeze and become solid.
- How could we modify our experiment to make the water droplets form faster? Answer: making the surface of the bag colder, for example by placing ice cubes next to it, will make condensation occur faster.
- Which causes fog: evaporation or condensation? Answer: fog forms when water vapour cools and condenses into a cloud of small water droplets near the ground (like a cloud but lower down).
Acknowledgement
The instructions on how to make a thermometer were adapted from the California Energy Commission’s Energy Quest website. See their website for this and other science projects.
Web References
- w1 – The BBC Bitesize website features concise, high-quality teaching resources for students. It includes an excellent section on the properties of solids, liquids and gases.
- w2 – To find out more about one of the authors, visit Erland Andersen’s website (in Danish).
- w3 – The small energy driving licence certificate and teacher’s handbook (both in Danish) can be downloaded from the website of the Danish Electricity Association (Dansk El-Forbund).
Resources
- Watch a video of a simple experiment showing that gases expand when heated, involving nothing more than a refrigerated drink and a coin.
- Watch a video showing solids expanding when heated and gases contracting when cooled (involves fire, liquid nitrogen and a balloon).
Review
The main strength of this article is that it presents a group of activities in an order that makes sense as a whole. Even though the activities are likely to be known by many teachers, the suggested sequence and questions will help teachers approach some rather difficult concepts, such as heat transfer, evaporation and condensation. The activities also help teachers to examine the reversibility of some of these processes. Another important advantage of this article is that it uses feasible and easy experiments, which can be carried out using standard school equipment and cheap materials.
Christiana Nicolaou, Cyprus


