Supporting materials
Download
Download this article as a PDF

Something as everyday as bread can offer a surprising spectrum of interdisciplinary teaching opportunities.
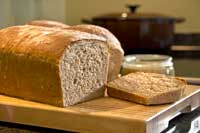
Millennia ago, humans mixed flour and water together to make bread. At some point, a bread-maker was distracted, possibly by a passing sabre-toothed tiger, and returning to the dough hours later, found it was strangely lighter and fluffier. Thus the foundations of leavened breadw1 – bread raised using yeast, a widespread, naturally occurring microbe – were laid.
In this series of activities for children aged 9-11, we look at the science of bread making and at the helpful microbes involved. Activities 1-4 can be squeezed into an hour but bread-making needs at least half a day, built around activities whilst the bread is proving.
There are many microbes in the world around us, invisible to the naked eye. Like us, they are programmed to survive and reproduce; to do so they feed off natural sugars and proteins wherever they find them and, in the process, cause them to decay. Have you ever reached for an orange and found a ring of white mould with blue-green mould in the centre, or taken cheese out of the fridge to find that a greenish-black mould got there first?
It’s easy to go ‘fishing for microbes’ almost anywhere and you can take your class on a ‘fishing trip’ by getting them to leave plates of bread, cheese or fruit exposed to the air, in a safe place, and waiting for a few days or weeks. What the students will see is the result of the microbes in the air settling on the food and feeding off sugars and proteins in it, eventually developing fruiting bodies that we call mould.
Make sure none of the children has allergies to mould, and remind them not to eat the food or to get too close to the moulds in case they breathe in the spores.
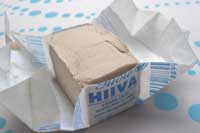
We can watch a faster example of microbes feeding, using baker’s yeast – a cluster of yeast microbes that can be seen, smelled and felt. Ask the class to mix a teaspoon of fresh or dried baker’s yeast with about 100 ml warm water and sugar and leave it somewhere warm but ventilated. After a short time, the children should be able to observe froth forming on the mixture and to detect a pungent smell. These effects are caused by the production of carbon dioxide and alcohol in a process known as fermentation.
Many children will know that yeast is used to make bread, but how is fermentation involved?
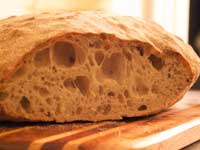
Cut open a loaf of bread or a roll and ask the children to describe what they see. Hopefully they’ll say that they see bubbles and that the bread looks like a sponge. Ask them if they can make a link between the bubbles they saw on the fermenting yeast and those in the bread.
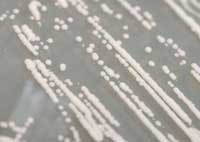
Ask the children some more questions:
Now for a little activity. Ask the children to imagine they are the yeast, blowing carbon dioxide into the air. Where does it go? Next, give them balloons and ask them to blow into them. What is the difference in terms of where the air goes? (It’s held within the balloons.) Help the children to understand the difference by putting all the inflated balloons in a box to simulate the carbon dioxide in a loaf of bread, held in place by tiny ‘balloons’ of dough.
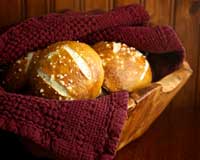
In activity 1, the children will have learned that yeast, sugar and water produce the trapped gas that makes the bread rise. They’ll also have learned that flour, when mixed with yeast and water, forms a ‘balloon’ to hold the gas bubbles in a loaf. As an introduction to the wider aspects of bread-making, you can read the story of The Little Red Hen. If you don’t have a copy, use the online Project Gutenberg versionw2. The story illustrates clearly the main aspects of the bread-making process from field to plate.
After reading the story, ask the class to illustrate and label each stage of the process and display it around the classroom. Can the students use the ideas from the book together with what they learned in activity 1 to write instructions for bread-making? There may be gaps but they can fill them in later after completing the rest of the activities.

Like many other regions, the British Isles have a history of invasion and of settlement: the Romans, Angles, Saxons, Jutes and Vikings all came to the British Isles as invaders and eventually settled. Similarly, mainland Europe has seen waves of invaders and settlers over the centuries. The newcomers brought some food with them but would soon have needed to eat local food. You can integrate the subjects of bread-making and bread consumption into history lessons using the topic of invaders and settlers. We’ll begin with a role-play.
In an area in the school hall or playground, label cones or chairs with signs listing individual food types such as berries, fruit, wheat, meat, dairy products and vegetables. Ask the children to sit down in the area as if they were settlers, look at the named foodstuffs around them, and decide which they would be likely to eat as settlers. You may need to remind them of the times of year that the different food types are available and also the time taken to grow them or process them into edible food.
Now repeat the role-play by asking the children to enter the area at different seasons of the year as invaders who won’t be there for long. Which foods can they eat and which will be unavailable to them? Can they suggest why? What would the invaders do if they decided to settle there?
The activity should teach the children that some foodstuffs such as bread or vegetables have to be cultivated and processed using tools, so are appropriate foods for a settler, whereas others such as meat or berries can be taken straight away and processed easily, and are thus suitable foods for an invader.
For this activity, ask the children to bring in different types of bread. Amongst others, you may get wholemeal, granary (with added bran and wheatgerm), oatmeal, rye, soda and flat breads. Set up an observation and taste test. Ask the children to suggest features for comparison such as what the bread looks like, its texture, the size of its holes / bubbles, its taste and whether they like or dislike it.
Before starting, make sure none of the children suffers from coeliac disease, an autoimmune disease triggered by the wheat protein gluten.
If the bread is pre-packed, you can check the bag for information on its ingredients and how it was baked. Otherwise, you can find nutritional information about different types of bread on the Internetw3. If you’ve already covered the topic of healthy eating, the children will understand the basics of the nutritional information chart on the bag. If the children haven’t covered the topic yet, a quick online investigation of the categories in a nutritional information chart will soon tell them what is healthy and what is notw4. You could then discuss healthiness by looking at the nutritional information on each bag and ranking the breads in order of healthiness, deciding what it is about each type of bread that makes it healthy or unhealthy. Which has the highest amount of fibre, for example, or the lowest salt level?
Now for making the bread! Children love this and it’s easy and almost always successful. Take it right back to the basics and get some whole wheat grains for them to ‘mill’ using a mortar and pestle. The children will see the flour appear from the crushed grains and can sieve it to get pure flour. I wouldn’t recommend making all your flour this way as it will take forever. Instead, mix your product with commercial bread flour to make up the required quantity. As a simultaneous activity, you could sow some wheat seeds and watch them grow – perhaps producing the wheat for next year’s class! This links neatly to the story of The Little Red Hen.
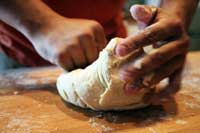
Remember those helpful microbes in the first activity? Begin with some of the yeast mixture that the children made in activity 1. As soon as it froths, mix it with the flour and salt and stir vigorously – you can download the recipe from the Science in School websitew5. You’ll need to add more warm water until the dough becomes one ball that leaves the sides of the bowl cleanly, at which point the children should begin kneading it on a clean, floured desktop. What do they notice happening to the dough as they knead it? The gluten in the flour is being released and making the dough stretchy. Once the dough is smooth, you’ll need to leave it in a warm place to prove (‘ripen’).
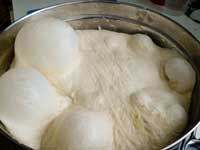
An hour later, ask the children what they observe and what they think has happened to the dough to make it rise. Carefully cut a piece off using a sharp knife and show the children the bubbles in the dough. Remind them of the balloon experiment to reinforce why the air stays in the dough. The bread dough requires a second kneading before it is left to prove again; this helps to spread the yeast and the air throughout the dough. Finally it’ll be ready for baking. Make a loaf of your own and you can use it as an example, cutting it open once baked to smell the yeast and see the bubbles.
This activity was first published on Freedom to Teach, the Collins Education blogw6.
This article proposes interesting and novel activities for primary school, combining chemistry, history and cooking – teaching about microbes within the framework of bread-making. Although the author recommends the activity for 9- to 11-year-olds, I am sure that younger secondary-school students would also love to play the game, experiment with yeast and go one step further to prepare their own bread.
Christiana Nicolaou, Cyprus
Download this article as a PDF