Once upon a time there was a pterodactyl… Teach article
Adapting the steps of the scientific method can help students write about science in a vivid and creative way.
Today, scientists need more than top-class research skills. They need to have good writing and communication skills too: after all, what good is a discovery if you can’t communicate it to others? One way to develop this skill is to adapt the long-established scientific method to encourage excellence in writing creatively about science.
Just like writing, the scientific method starts with an idea and ends with a publication. The basic idea of writing creative non-fiction is storytelling: finding a narrative way to share factually accurate scientific knowledge in a captivating and vivid manner. For example, if the class has been studying the oceans’ dead zones, students could tell the story of how a particular animal’s survival, a sea turtle for instance, is affected, and write from the animal’s point of view. This approach can help younger students to understand science and gives older students the chance to explain their scientific knowledge to others – all while nurturing the creativity that’s essential for a successful scientist.
To see how the writing process can replicate the step-by-step process that scientists use in their normal work, let’s look first at the two processes side by side, and then at the writing process in more detail.
| Scientific process | Writing process |
|---|---|
| Define the question that you want to answer. | Idea development: choose the topic that you want to write about. |
| Construct the hypothesis that you will test. | Drafting: select a specific angle or point of view that you’ll follow to write about your chosen topic. |
| Design the right experiment to test your hypothesis, and run it. | Writing: write the piece based on the draft, reviewing and adding material where needed. |
| Analyse your results, and deduce whether you need more or different experiments. | Revising: ask other people to read and comment on your text, then amend it. |
| Discuss your results with your peers and ask for input to make the results more meaningful and valuable. | Proofreading: check the text in detail. |
| Publish your results to share them with the scientific community. | Publishing: finalise your text and share it with your chosen audience. |
Material
You just need pens and paper.
Procedure
1. Idea development
The first step is for students to come up with their own ideas and begin to organise them to use as a basis for their writing. Two exercises – ‘popcorn’ and ‘power writing’ – are good ways to get started as they help students to quickly pick research topics, review previously studied topics and expand their understanding.
Popcorn: Students brainstorm as a class about a particular science topic while the teacher lists everything that ‘pops’ up, perhaps on a big sheet of paper. The teacher can help students to categorise the list by colour-coding individual comments with highlighter pens. Older students can use web-based programmes like Poppletw1 to create digital concept maps collaboratively, with or without the teacher (figure 1).
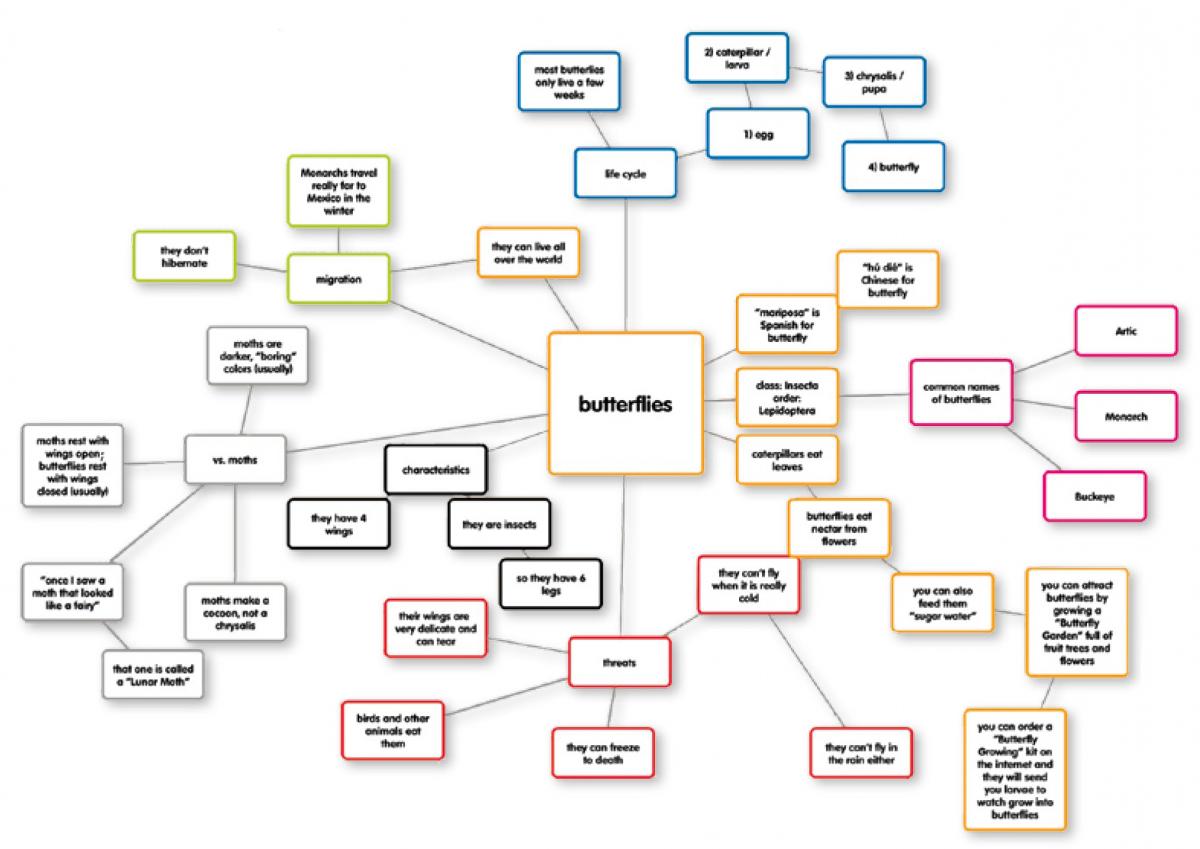
Image courtesy of Lauren Burrow
Power writing: This activity uses the class discussion points from ‘popcorn’ as prompts. It should be a sustained, uninterrupted 5-15 minutes (depending on ages and abilities) in which students rush to add as many factual details as they can to the existing writing (figure 2). Students can use illustrations, statements, phrases or even concept maps to help them further develop their own understanding. If students are hesitant, teachers should remind them that there are no wrong answers at this point: the activity is just about expressing their thoughts, feelings and ideas, and they’ll have a chance to verify these later on. Written prompts are also useful; for example, ‘Describe what the animal looks like…’, or ‘What does this topic remind you of in your life?’.
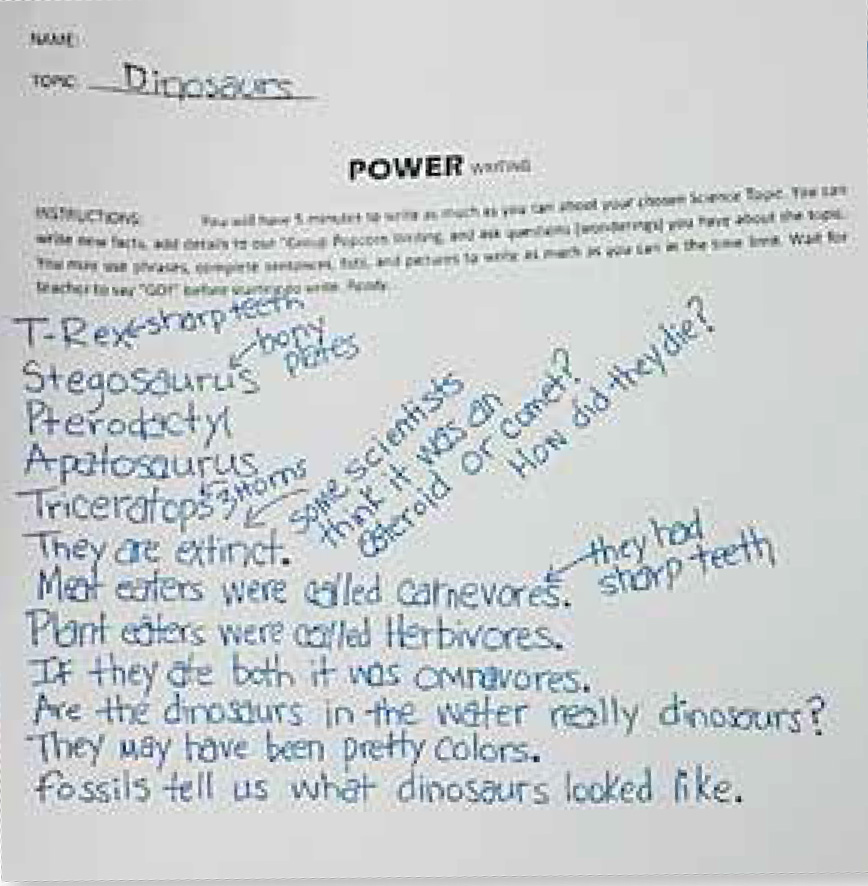
student’s ‘power writing’
response to the topic of
dinosaurs
Image courtesy of Lauren
Burrow
2. Drafting
Before they start on their writing, students should choose a point of view from which to discuss the scientific topic – in the same way as they select a hypothesis to test when doing science. For example, they could look at the water cycle from the point of view of a water droplet or a cloud. Students should not create fictitious characters or situations, but use their understanding of science to express information in a captivating way.
Students should then start drafting by creating an outline. They can do this using their own ‘power writing’ efforts, adding numbers or arrows to pull the information into a coherent order and crossing out anything that doesn’t relate to their intended science story. At this stage the students can also do another round of power writing on their chosen topic. Another method is the ‘round robin’ activity. Either way, allow time for students to say their story outlines out loud and get feedback from their teacher and other students.
Round robin: As a class, students take turns to tell the story from the viewpoint of the chosen character (e.g. a water droplet in our example of the water cycle). Each student should provide only one sentence of the story, with each sentence recorded on a strip of paper. At the end, students physically rearrange or remove the strips to produce a logically ordered story.
3. Writing
As students begin to write their stories, encourage them to use all their senses – just as they might when making observations in an experiment. This will produce a richly descriptive text, which they can then revise and edit. To promote this kind of sensory-based writing, try the ‘convince me’ exercise, to reactivate your students’ creative writing while remaining scientifically accurate.
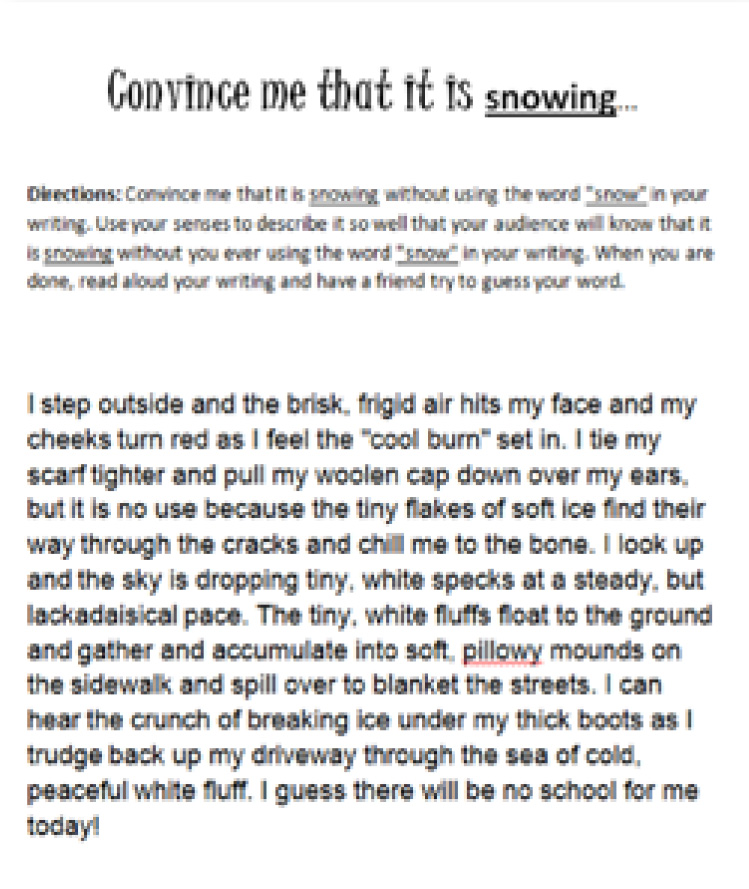
student’s ‘convince me’
response to the prompt:
“Convince me it is snowing
without using the word
snow.”
Image courtesy of Lauren
Burrow
Convince me: In pairs or as a class, students have to convince another student or the teacher that it is raining, snowing, night time, and so on, without using the topic word in their description. This can be done verbally or in writing (figure 3).
4. Revising
The revision step is often the one students dislike most, so encourage them to see this as an opportunity to pep up their writing and to make it really active and exciting. You can make the task more manageable by asking students to rewrite just small sections of their work, or of each other’s work. A good way to do this is using the ‘explode the moment’ trick developed by creative writing instructor Barry Lane (Lane, 1993).
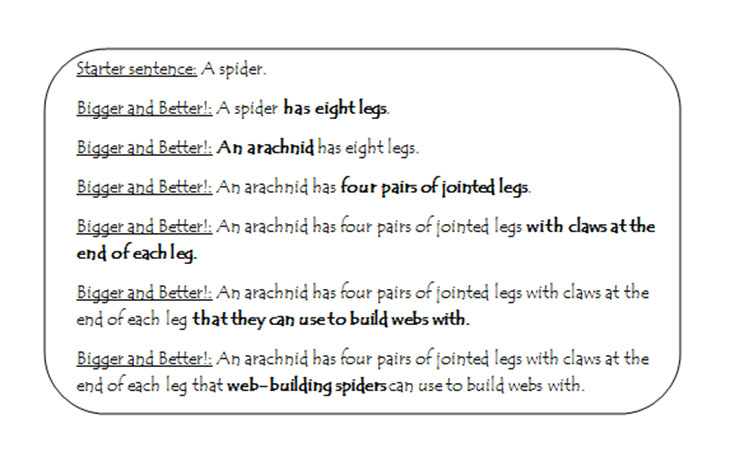
the ‘explode the moment’
exercise in which each
student takes turns making
a sentence bigger and better
by adding another detail
or clarification.
Image courtesy of Lauren
Burrow
Explode the moment: After students have written a rough draft of their stories, they identify the most important action part of their text and mark it with a firecracker symbol. Then, they ‘explode’ just that moment of the story, rewriting it and adding new details that will make it really stand out (figure 4).
Revision is not only about adding: sometimes, eliminating the writing that they have worked so hard on can be even more difficult. The fun of physically cutting out text with scissors can encourage students to get rid of repetitive or irrelevant information. You can help wordier students to master the art of succinct writing by practicing ‘six-word stories’, in which they have to summarise an idea in six or fewer words (figure 5). Teaching verbose students to be more conscious of their word choices can lead to critical writers who understand the importance of writing clearly and concisely.
5. Proofreading
Students often find proofreading discouraging, seeing it as the teacher’s chance to rip apart their ideas and highlight all of their writing errors. However, just like in science, where a hypothesis that turns out to be false is not a failure, proofreading gives students the power to identify their mistakes and to learn from them. To jumpstart the process, teachers can point out a few errors that students often make and then provide them with a simple proofreading checklist to allow them to correct the rest of their work. Explaining that the rules of grammar exist to give writers flexibility and variety of expression (Lane, 2008) may help to change students’ negative perceptions of grammar.
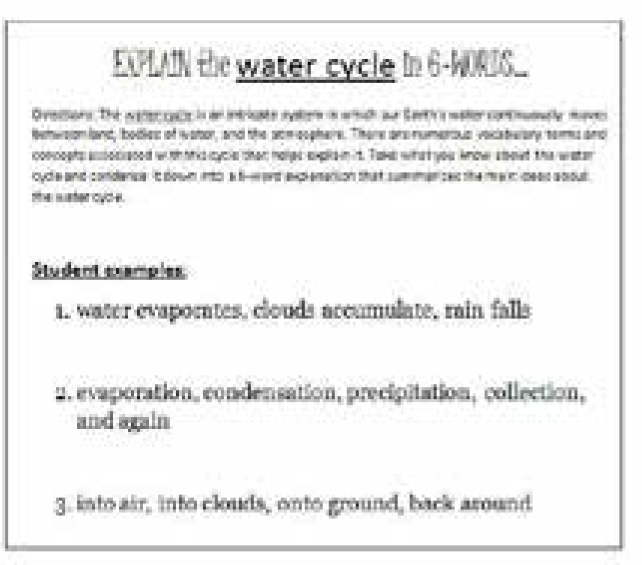
of students’ (aged 11 from
Texas, USA) six-word
explanations of the water
cycle.
Image courtesy of Lauren
Burrow
6. Publishing
The most important step of any writing process is the last one: making sure the completed work is shared with others and celebrated. Today there is a plethora of publishing outlets through which students can share their science stories with peers, family and the world – whether with traditional methods or technology-enhanced techniques. Traditional in-class storytelling can promote public-speaking skills in front of a peer audience, while publishing with easy-to-use digital storytelling software can provide experiences that really motivate students during the publication phase.
In the end, not only will the scientists-to-be in your classroom have produced a piece of writing of which they can be truly proud, but they should be well on their way to developing a flexible and creative writing style. This will be a real asset to them later on, when they need to appeal not only to other scientists but also other science VIPs: investors, decision-makers or even the media.
References
- Blasingame J, Bushman JH (2005) Teaching Writing in Middle and Secondary Schools. Upper Saddle River, NJ, USA: Pearson. ISBN: 9780130981639
- Lane B (1993) After ‘The End’: Teaching and learning creative revision. Portsmouth, NH, USA: Heinemann. ISBN: 9780435087142
- Lane B (2008) But how do you teach writing? A simple guide for all teachers. New York, NY, USA: Scholastic. ISBN: 9780545021180
Web References
- w1 – Follow the link for more information on the web- and iPad-based program Popplet.
Resources
- For more examples of, and resources on, creative non-fiction, refer to: http://creativenonfiction.org
- For a digital version of the ‘round robin’ activity in which a class of second-grade students in Sydney, Australia, interpreted the water cycle from the point of view of a water droplet, see: http://water.usgs.gov/edu/watercycle2ndgrade.html
- For a longer, more formal example of a round robin activity, in which a teacher in Wisconsin, USA, adapted a creative non-fiction story into a script for a play about how water is critical to the development of a new town, see: http://water.usgs.gov/edu/dryville.html
- For more information on ‘six-word stories’, see: www.sixwordmemoirs.com
- For a traditionally written example of a creative non-fiction piece about the water cycle, as told from the point of view of a drop of water, see: http://water.usgs.gov/edu/followadrip.html
- For more information on digital storytelling, see: http://digitalstorytelling.coe.uh.edu
- The free SAS Writing Navigator provides guidance and support for students throughout the writing process: www.sascurriculumpathways.com/portal/#/writingnavigator
Review
This article promotes interesting ways of encouraging students to communicate science more creatively. This type of writing or communication may go some way to supplementing public understanding of science, and the approach is worth trialling in all junior science classrooms.
All science teachers could benefit from trying these ideas at some stage, as they may help them make science more accessible to a wider range of students. This activity is applicable to all general science topics, although perhaps less so to those that are more mathematical.
Marie Walsh, Ireland


